The Pixel 5 is a bit of a departure from previous Pixels. Gone are the Pixel 4's Soli-based Motion Sense gestures, the Pixel 3's dual front-facing speakers, and the glass back panel of previous generations. But perhaps the most notable omission for long-time Pixel users is the lack of a squeeze gesture to trigger the Google Assistant.
Thankfully, a simple, no-root app can bring this functionality back. It uses data from the phone's various other sensors to detect when you squeeze the sides with a little pressure, then uses a few advanced Android permissions to bring up the Assistant. It's a must-have, but setup takes a little while, so I'll guide you through it below.
Step 1: Install SideSqueeze+
The app that brings back the Pixel's squeeze gesture is called SideSqueeze+. It's currently in its beta testing phase, so you may have trouble finding it in your Play Store app. If so, just tap the link below from your phone to get it installed.
- Play Store Link: SideSqueeze+ (free)
Step 2: Get Through the Initial Setup Tour
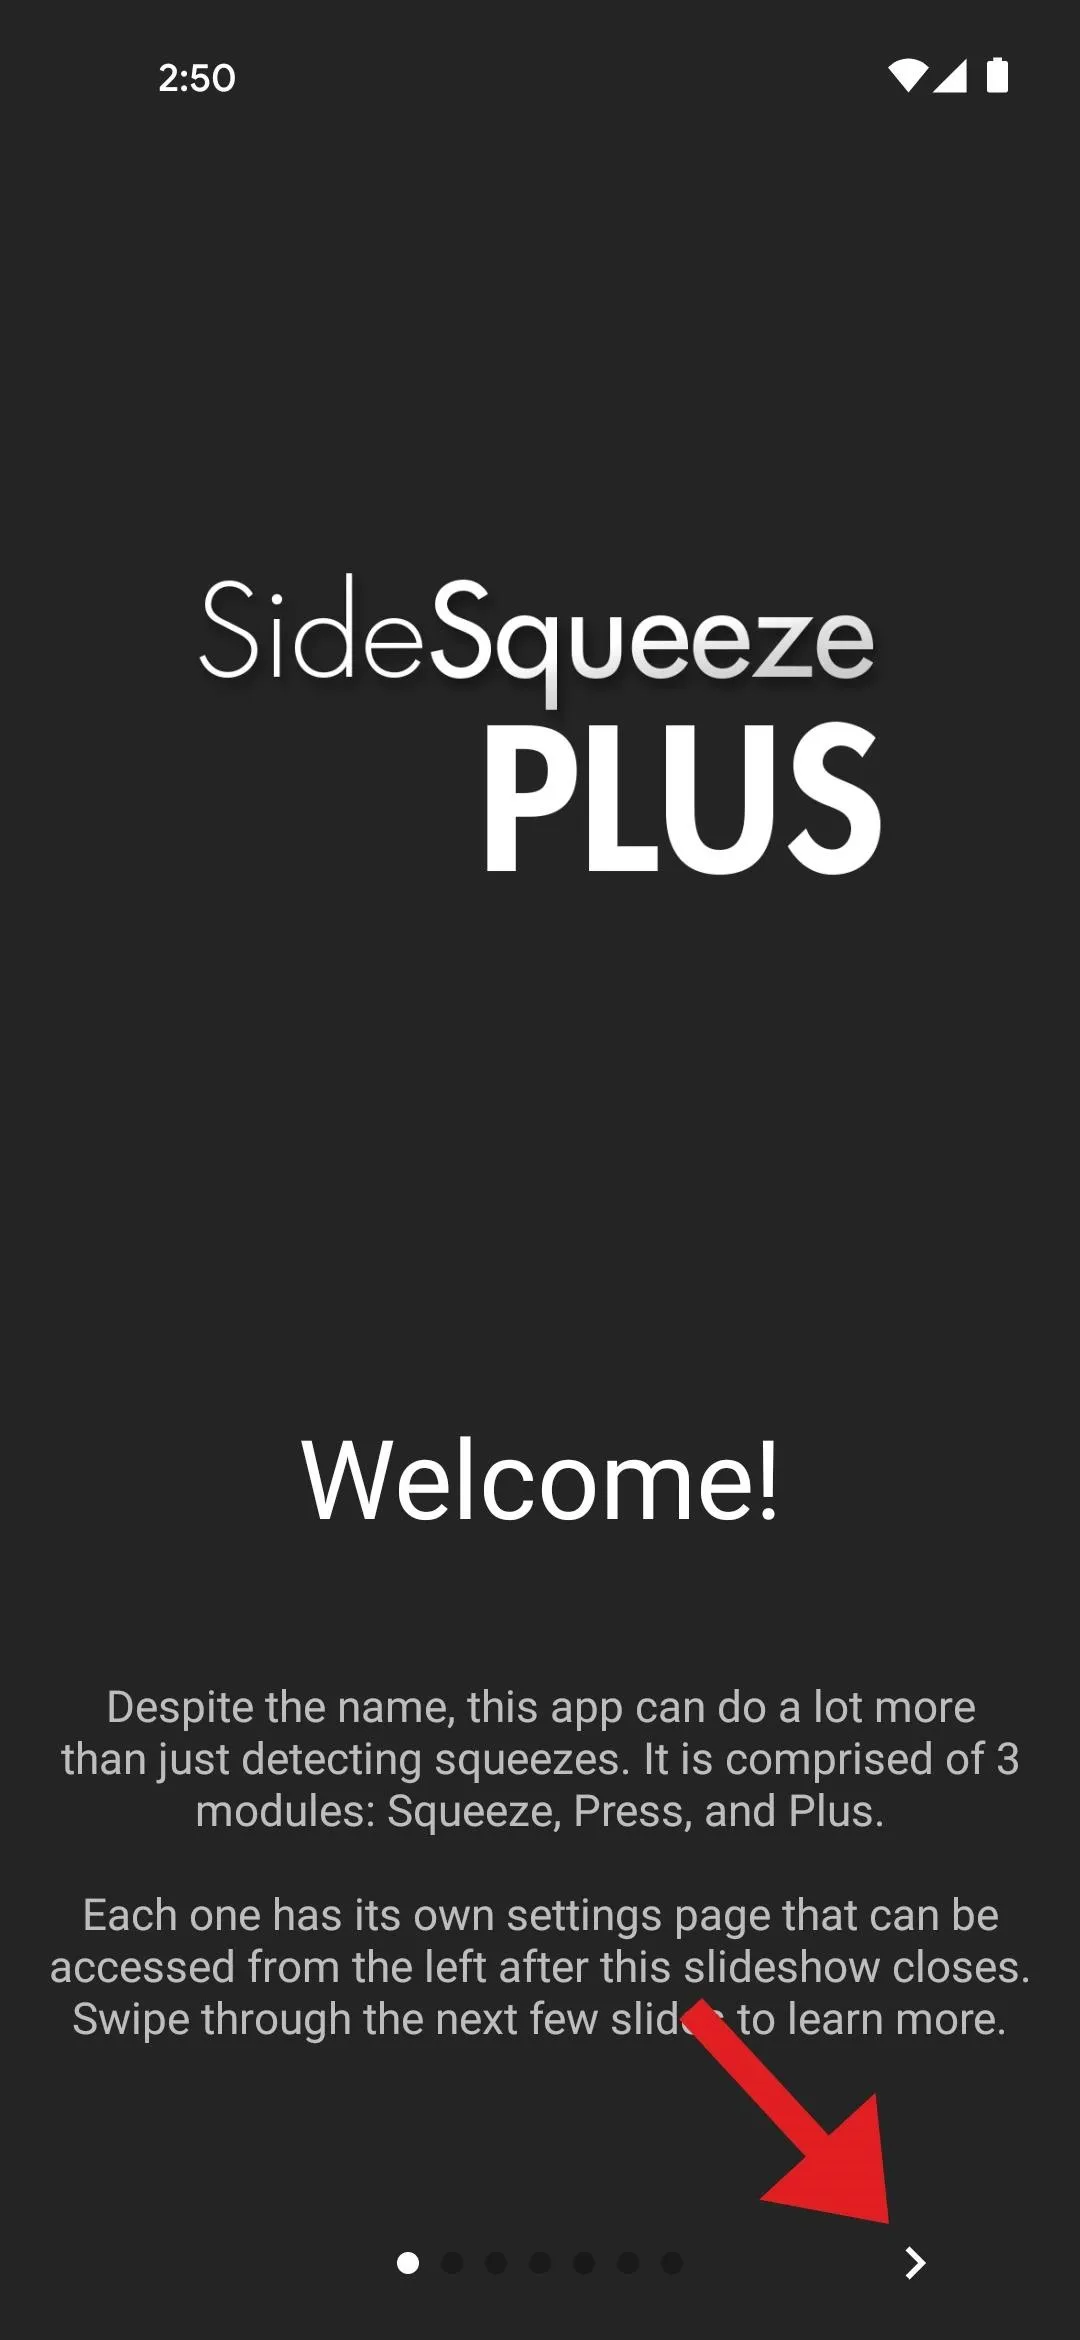
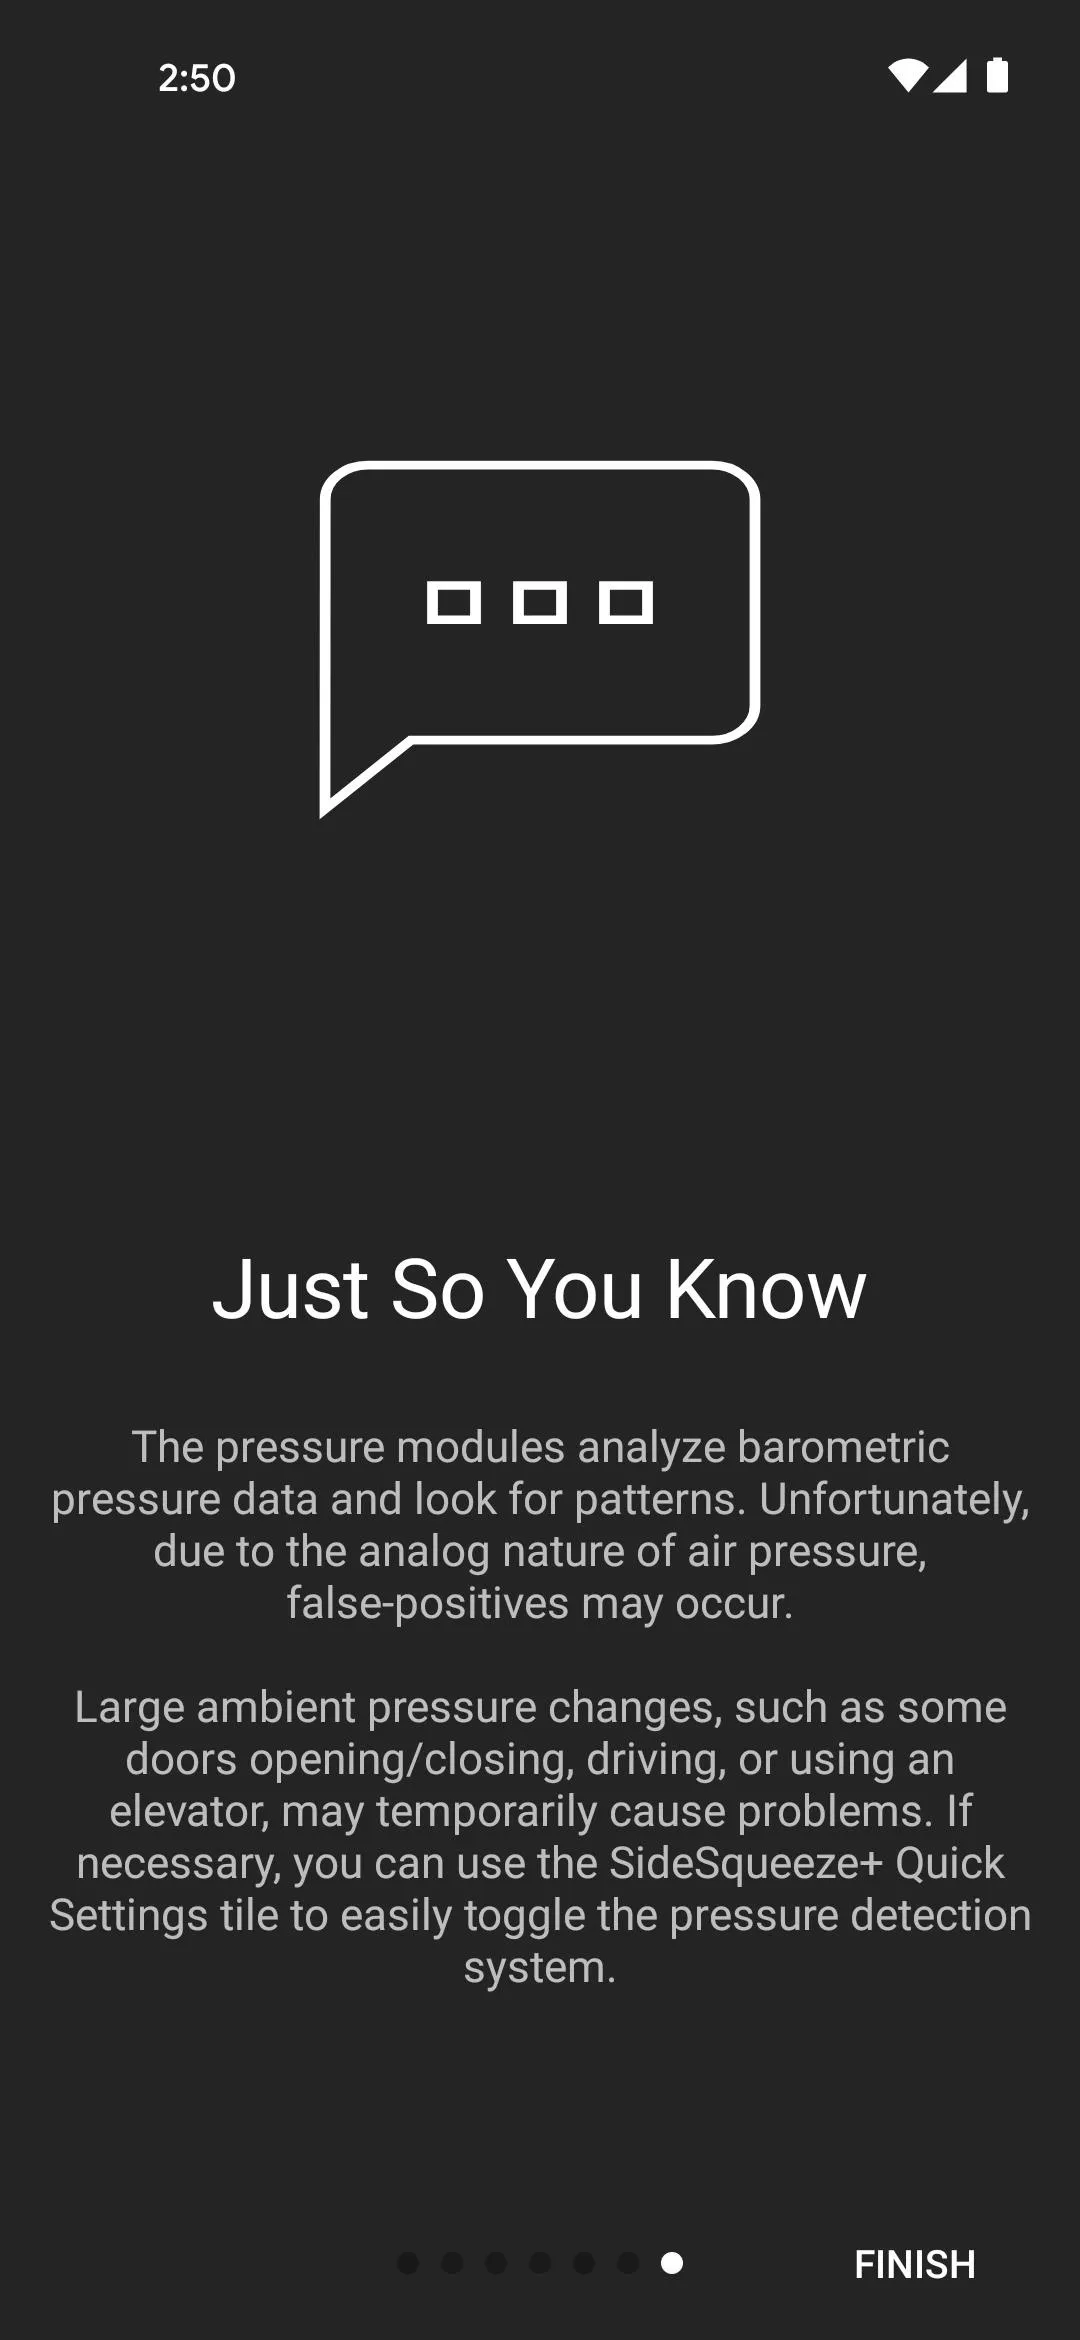
It's a little annoying, especially if you're just after the one feature, but SideSqueeze+ has a pretty lengthy first-run guide. So tap the forward arrow in the bottom-right corner several times, then hit "Finish" when it shows up.


Step 3: Enable the Accessibility Plugin
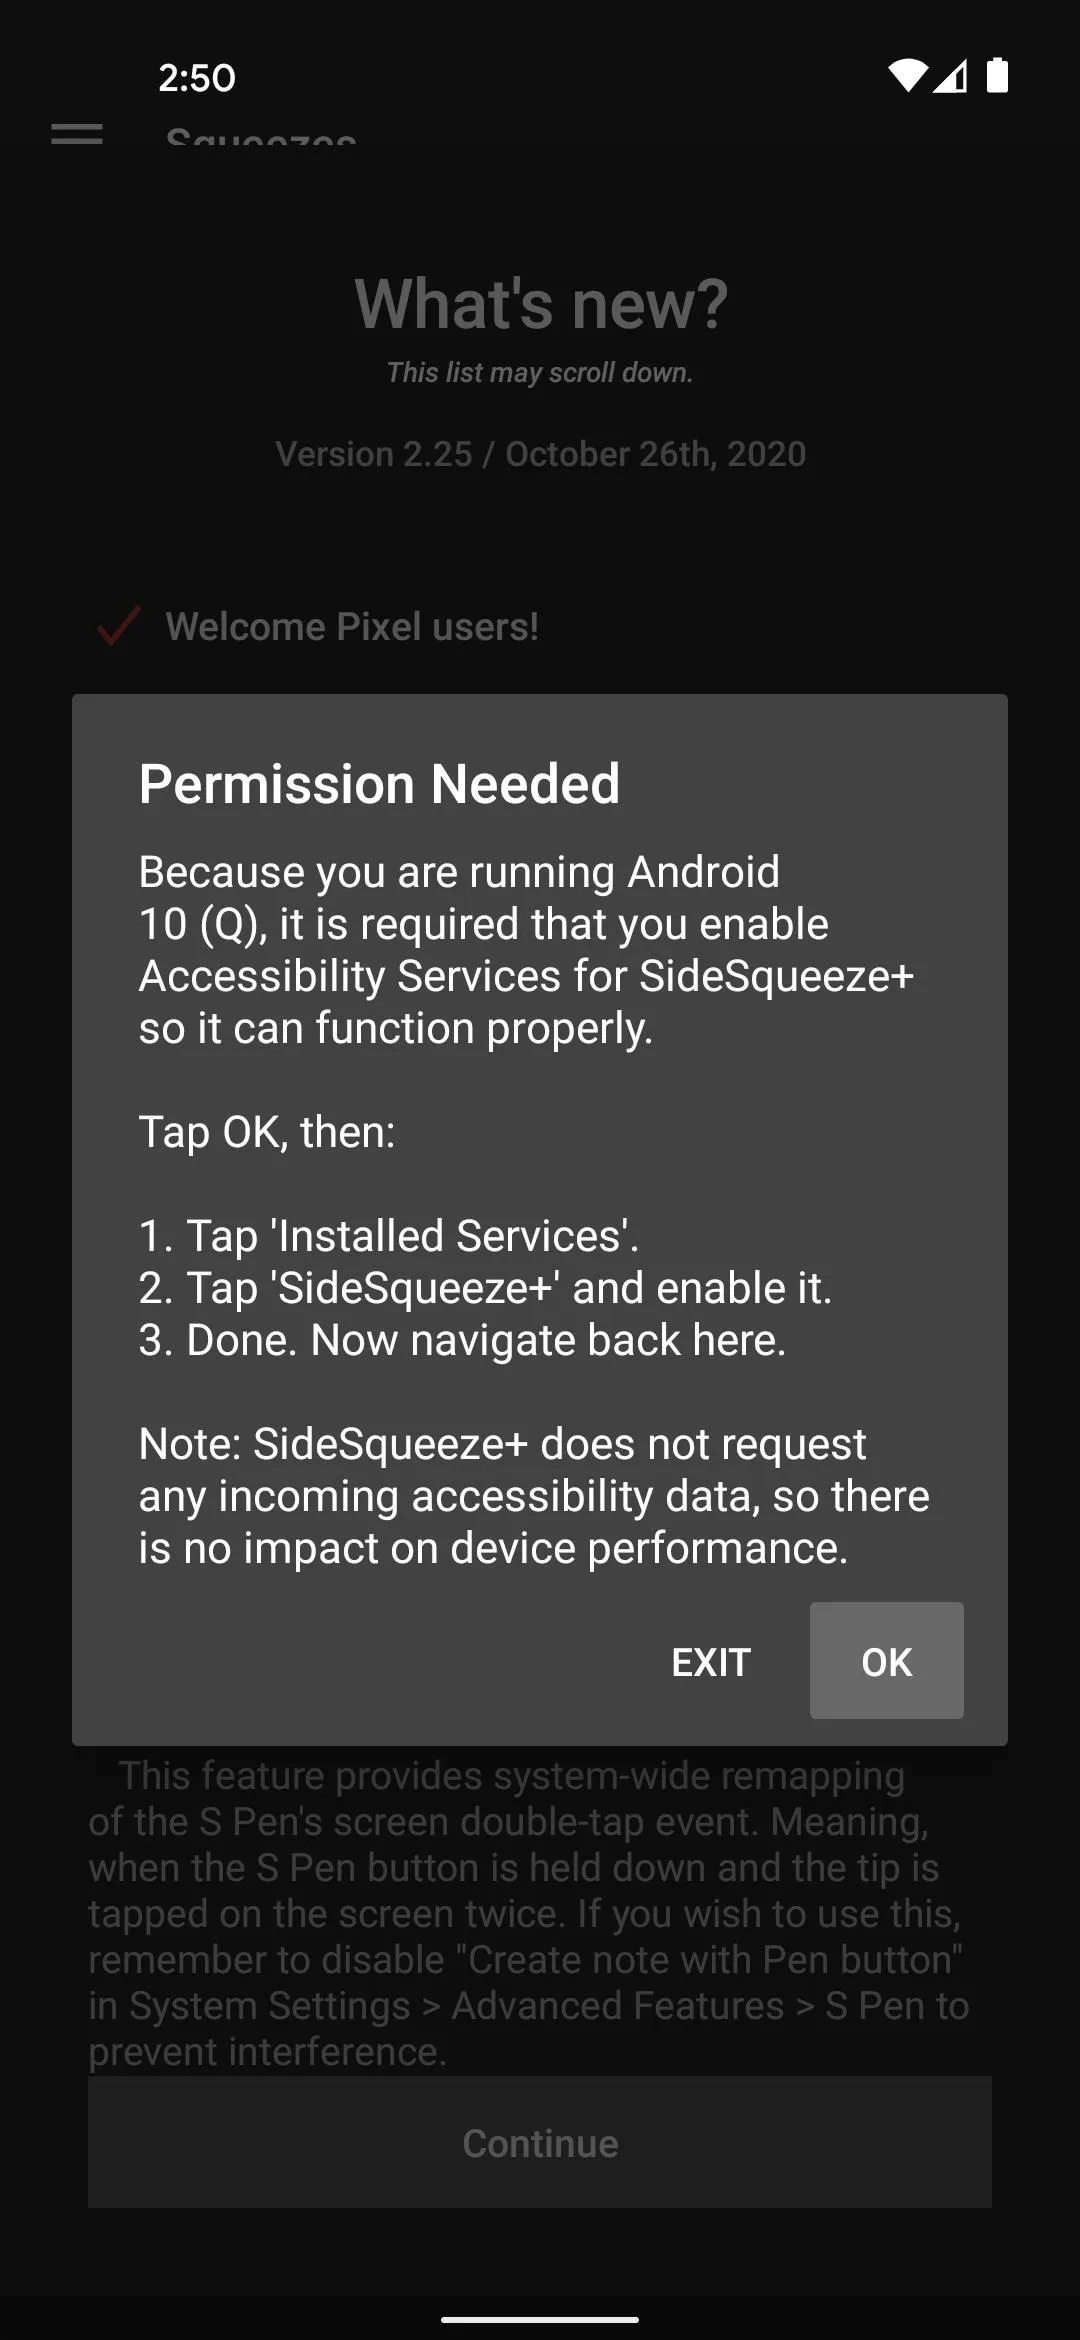
Now, you'll get a popup asking you to enable the accessibility service for SideSqueeze+. The instructions on the popup were written for Samsung devices, so ignore those and tap "OK."
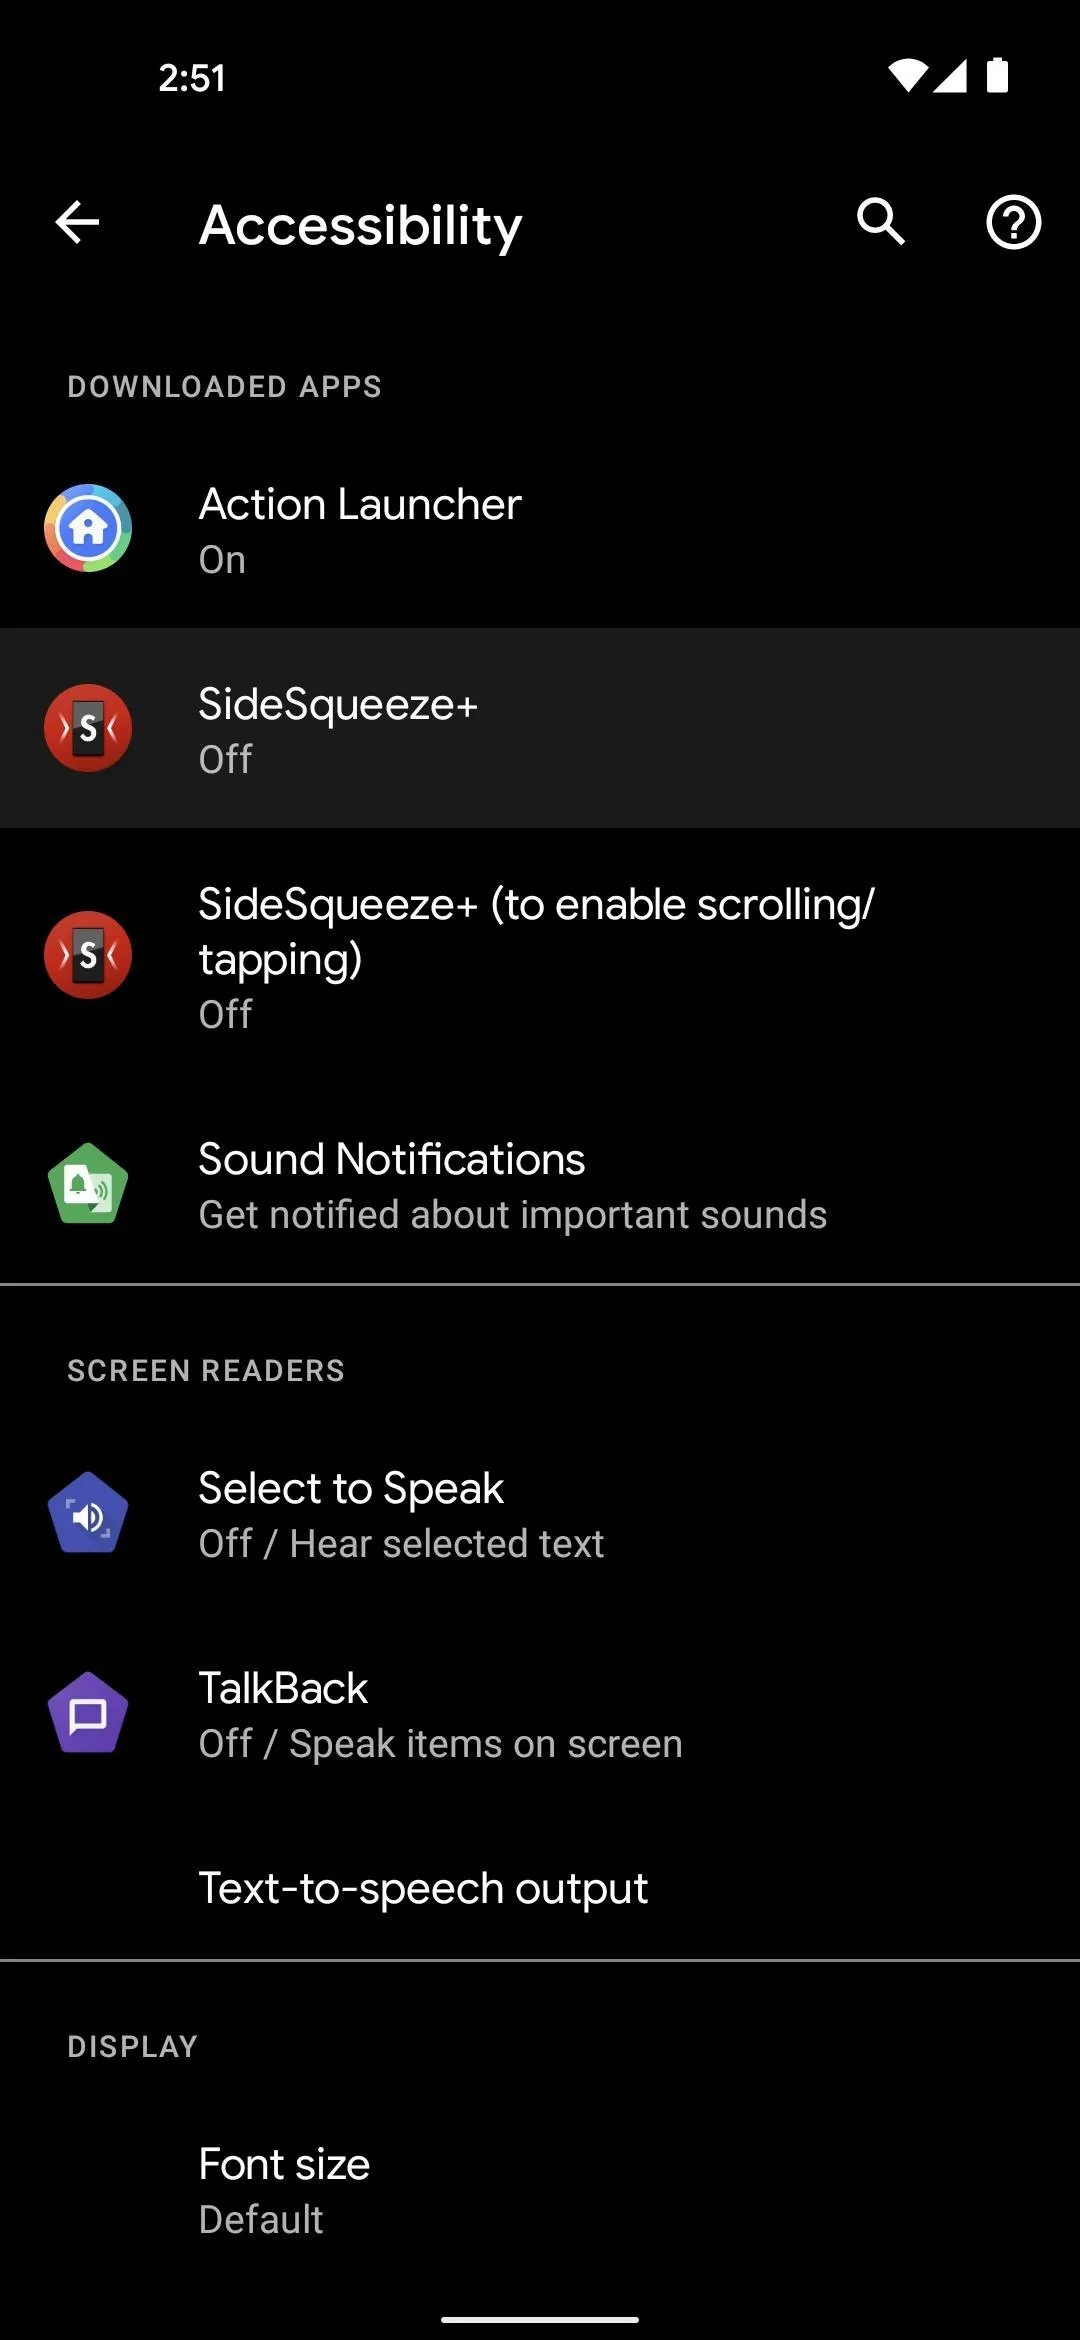
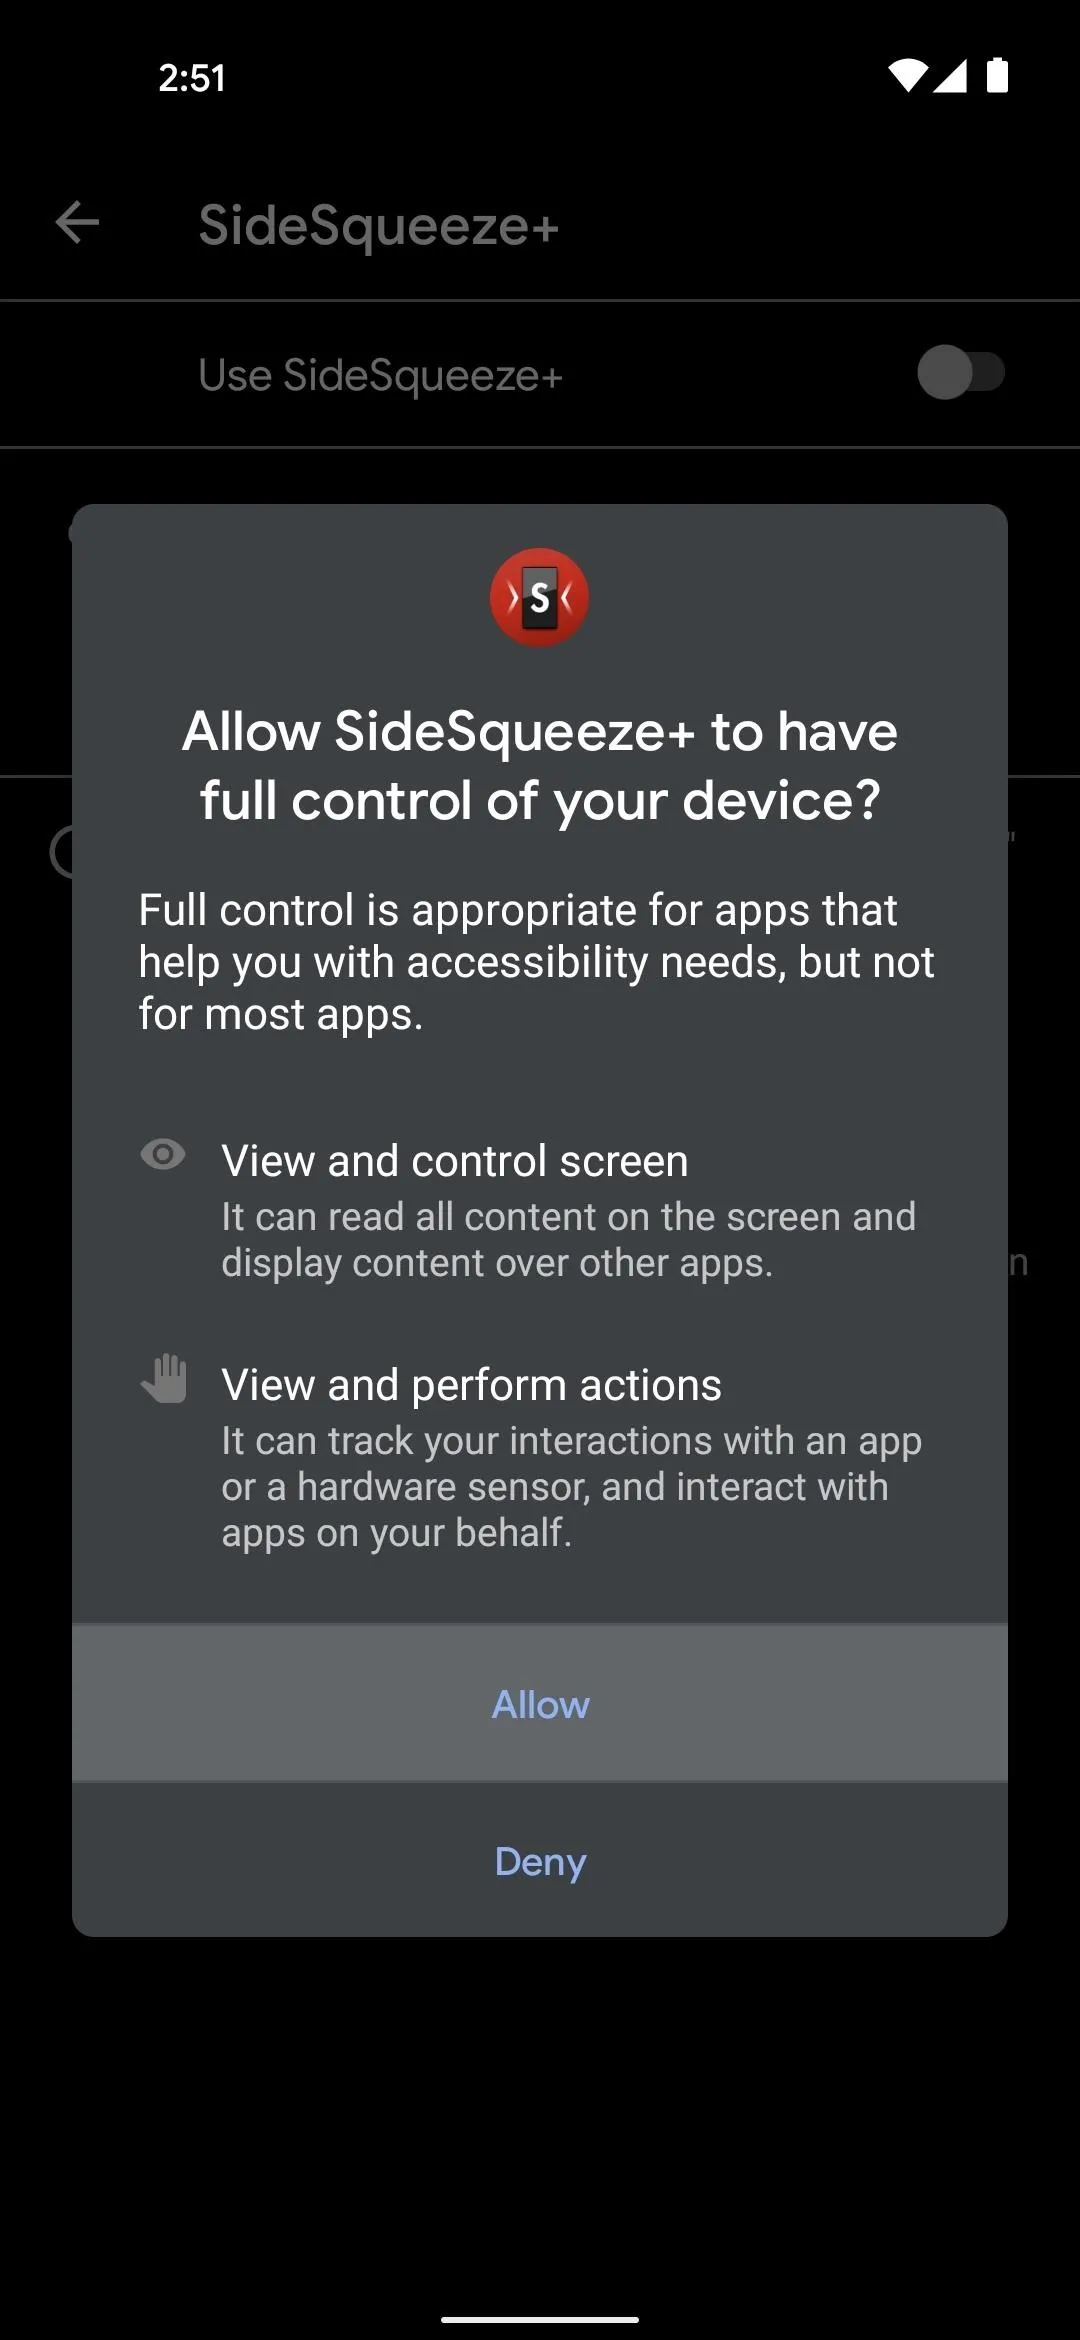
On the next screen, locate "SideSqueeze+" and tap it (not the one that says "to enable scrolling/tapping," just the first one). From there, enable the toggle next to "Use SideSqueeze+" (again, only that toggle), then press "Allow" on the popup. Now, perform the back gesture a few times to head back to the app.


Step 4: Disable Battery Optimization
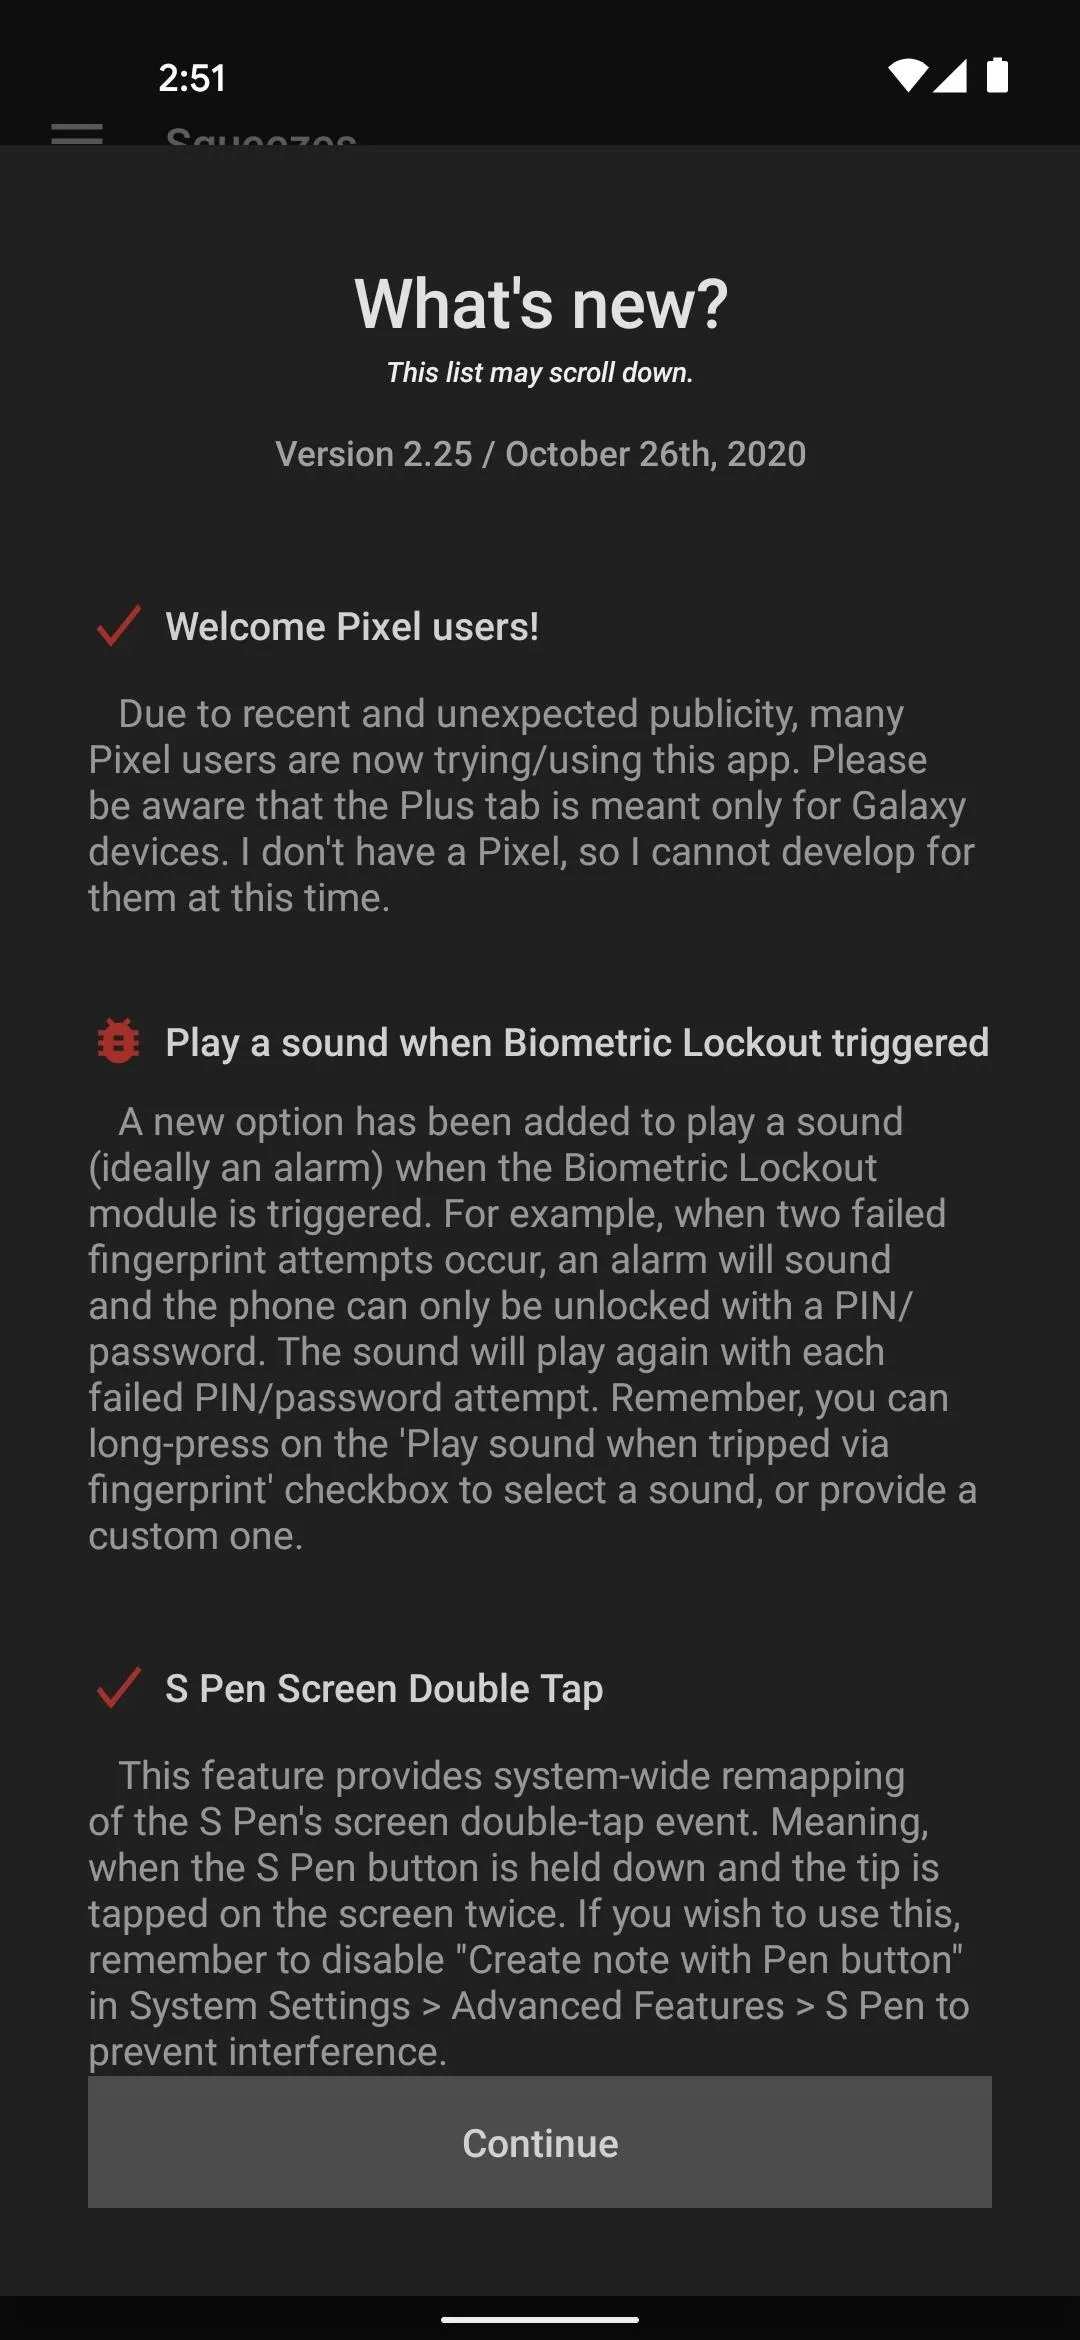
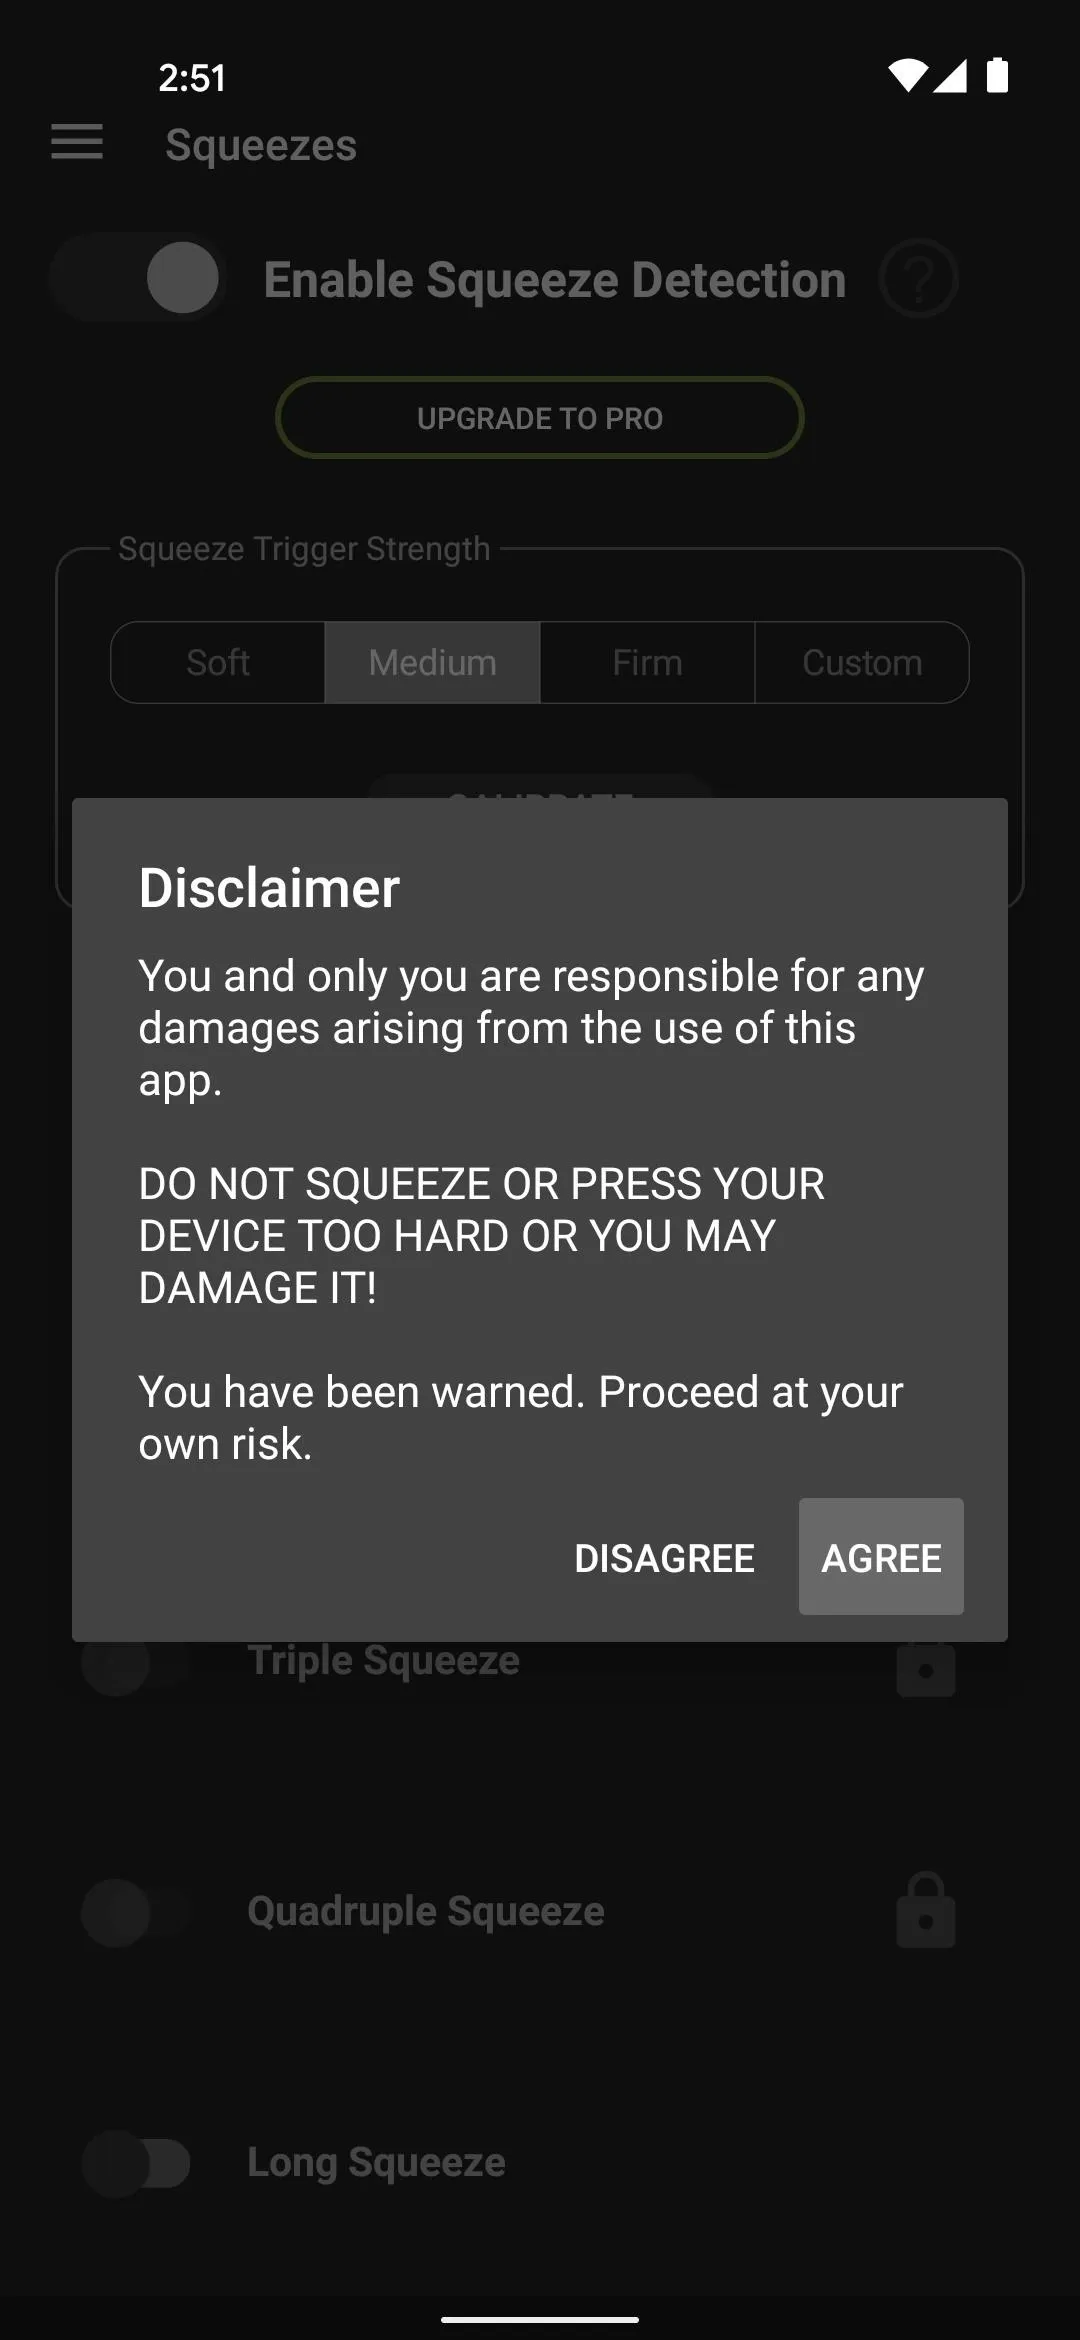
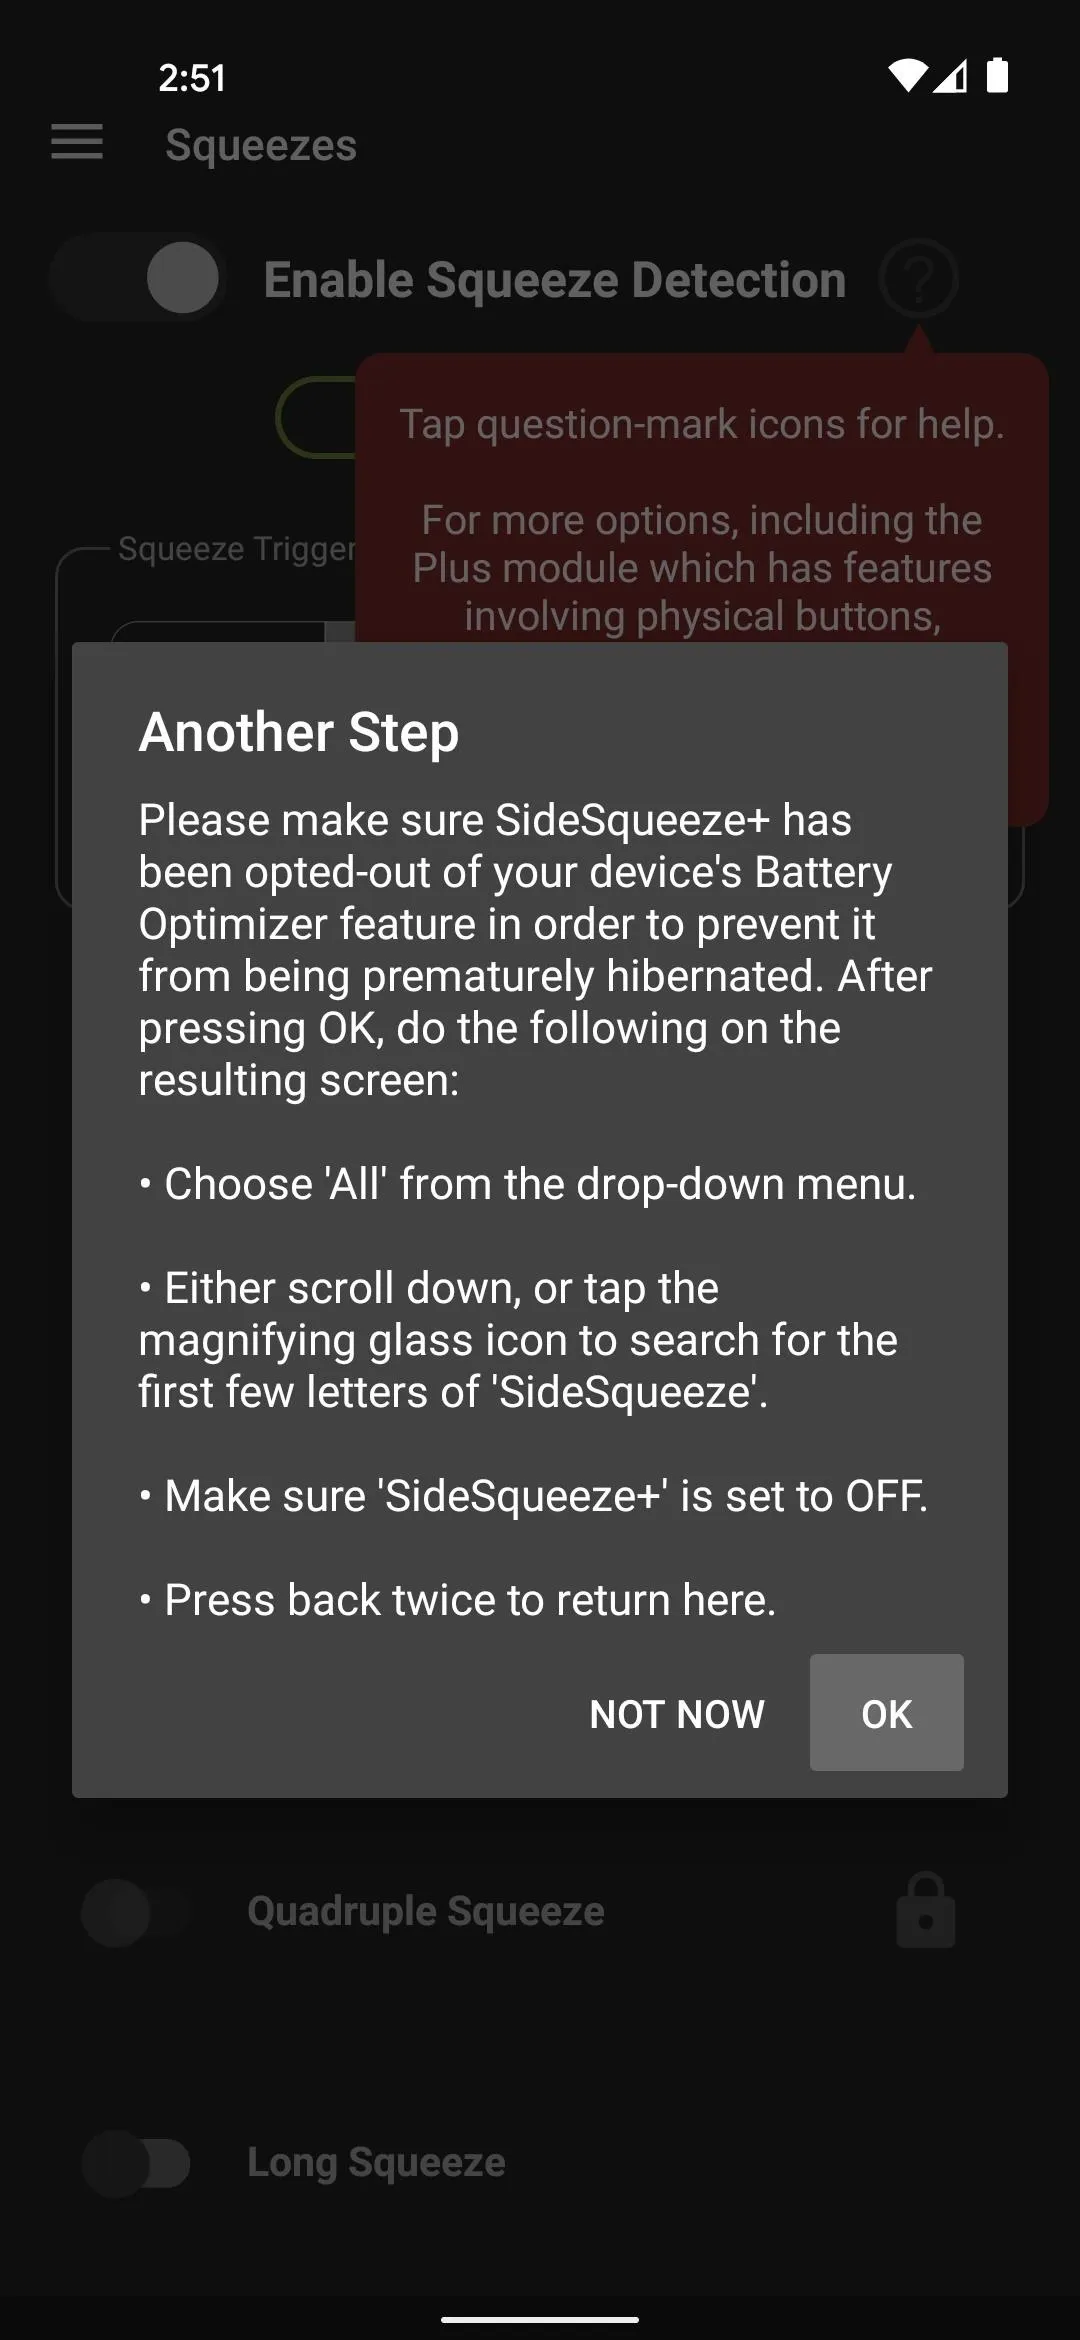
Next, you'll get a changelog and a disclaimer — tap "Continue" and "Agree" on these. Then comes a popup titled "Another Step." This is asking you to whitelist SideSqueeze+ from Android's battery optimization measures, which is very important if you want consistent results with the app. So tap "OK" here.


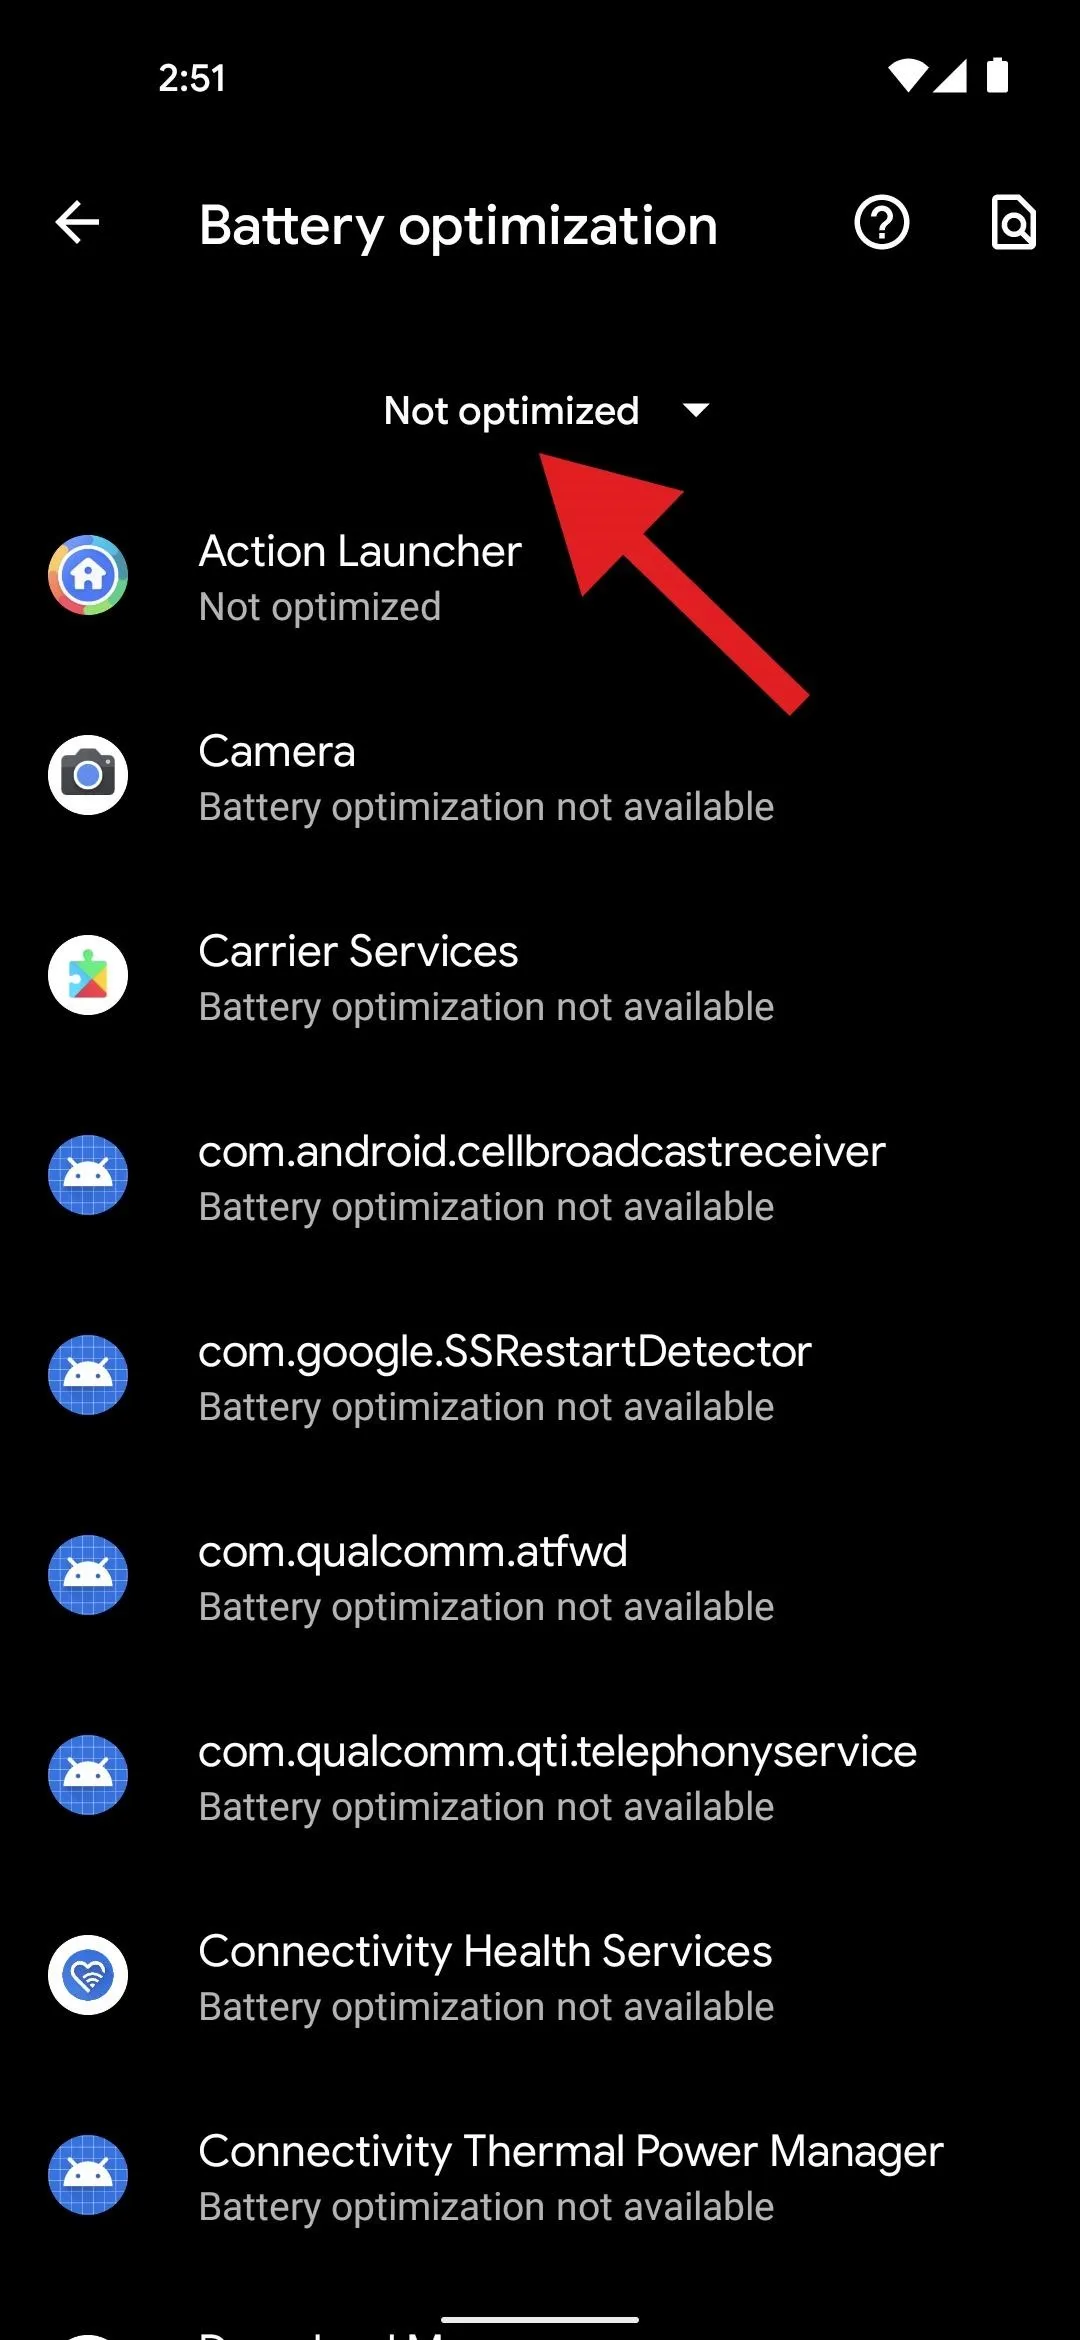
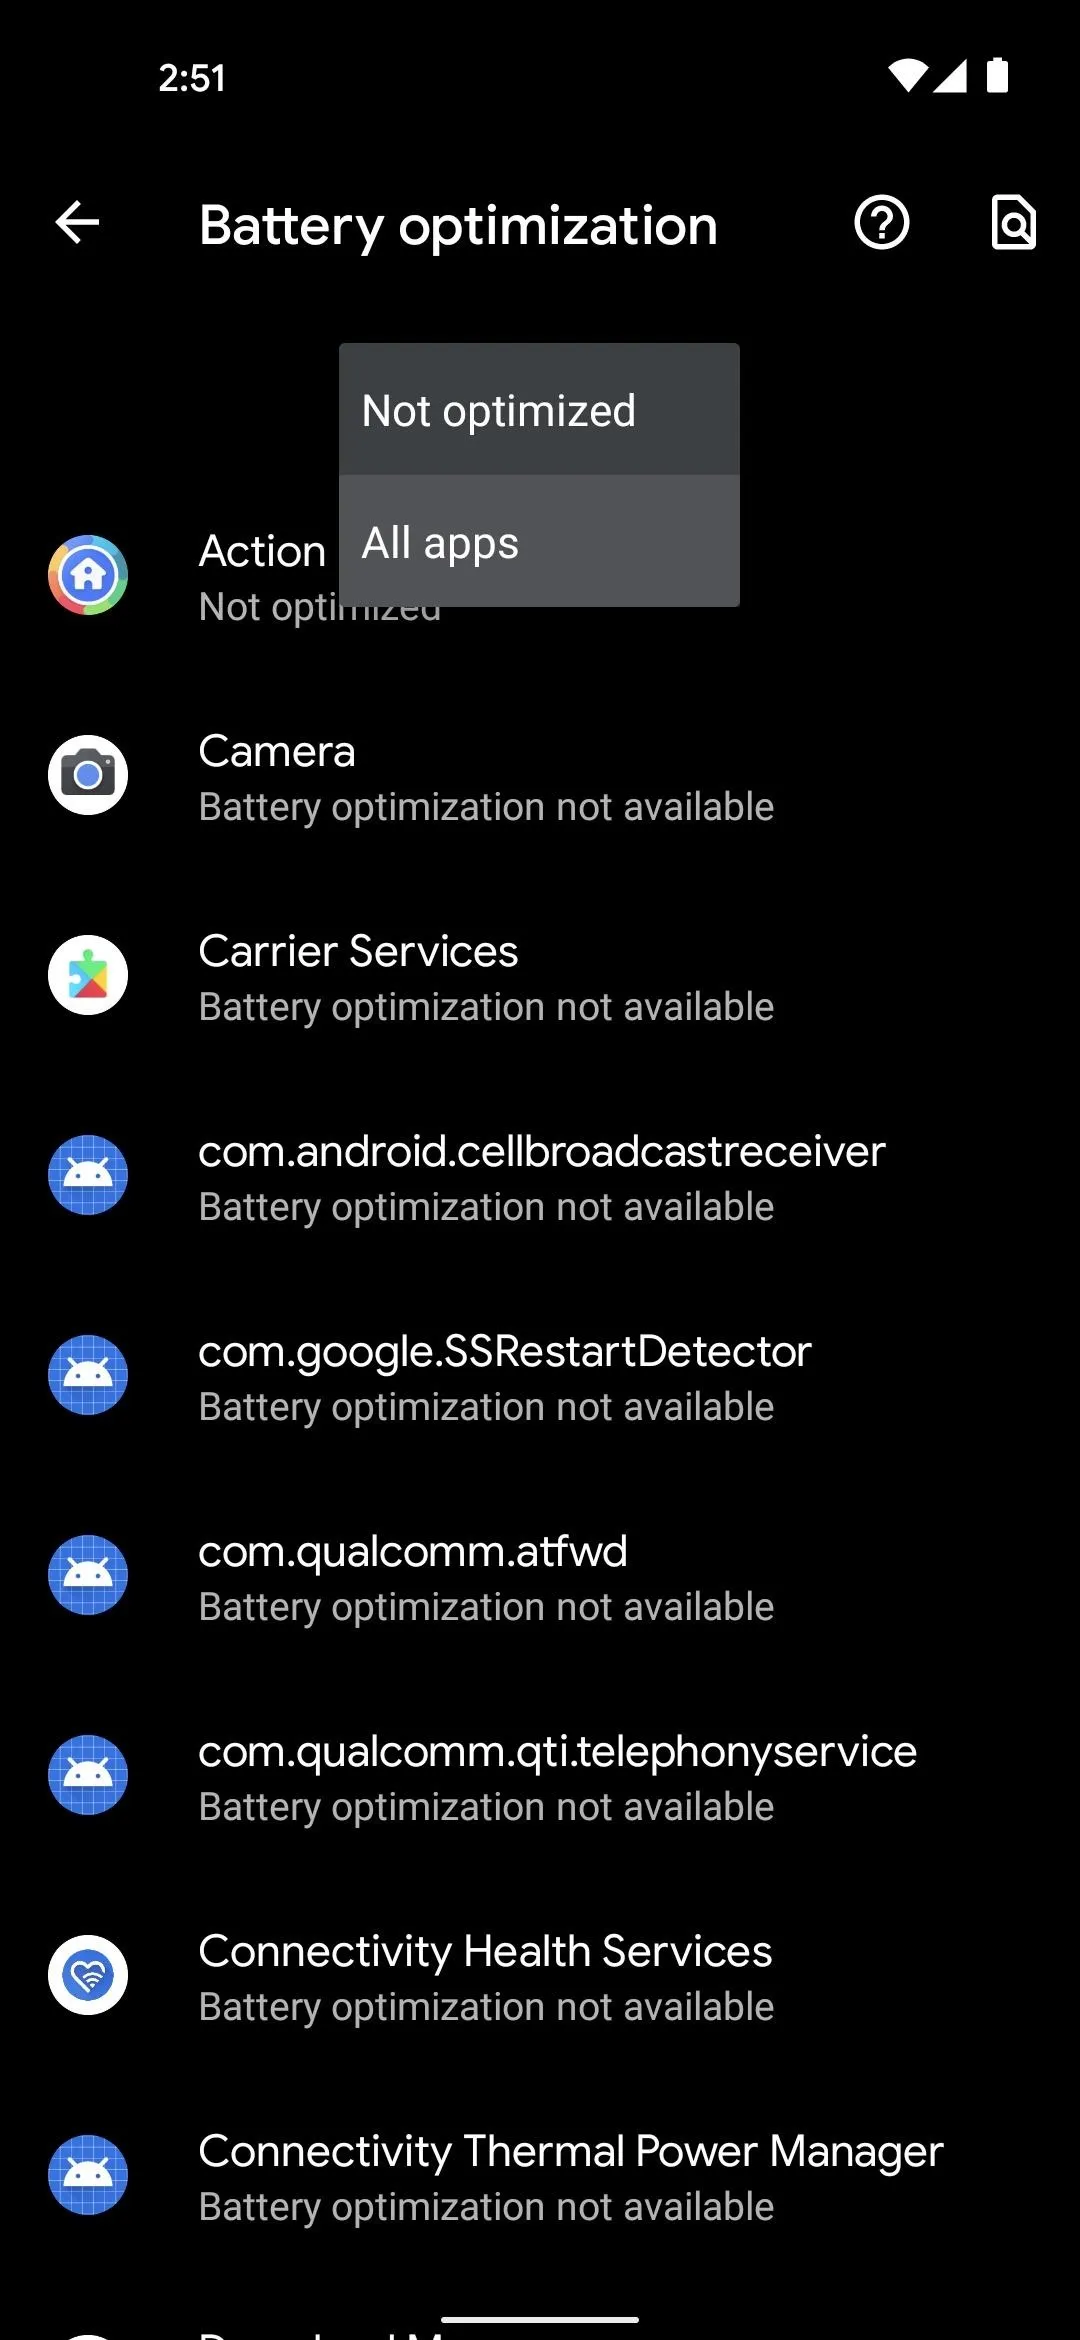
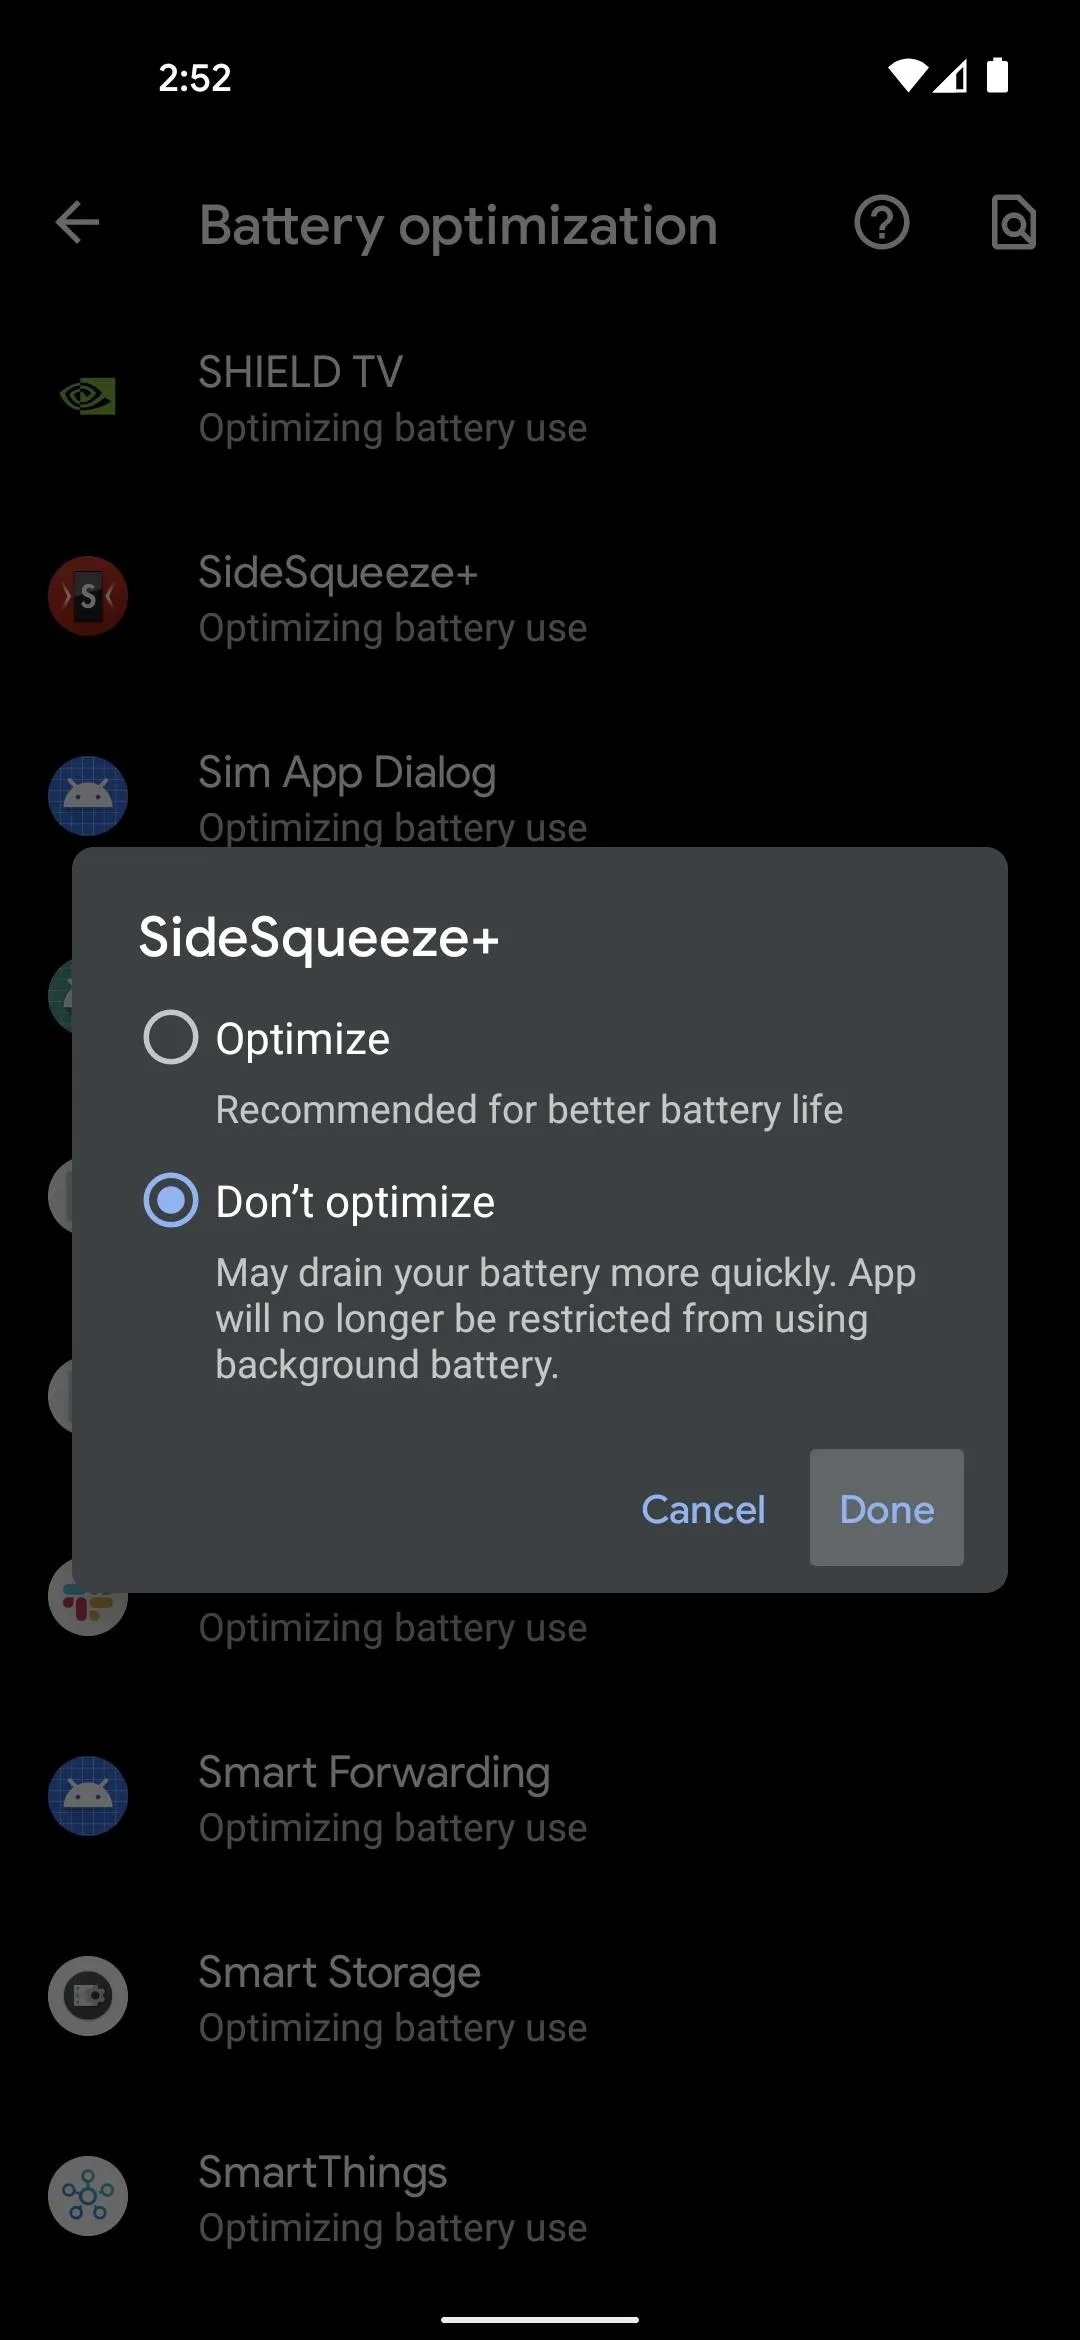
You'll now be taken to a system settings menu. Tap "Not optimized" towards the top of this screen, then select "All apps" from the drop-down menu. Now, scroll down and tap "SideSqueeze+" and select "Don't optimize" on the popup, then press "Done."


Step 5: Calibrate the Squeeze Gesture
Perform the back gesture twice to head back to the app, then you'll be asked to grant a special permission via ADB. This permission is not needed for the squeeze gesture feature, so tap "Not Now" on this prompt.
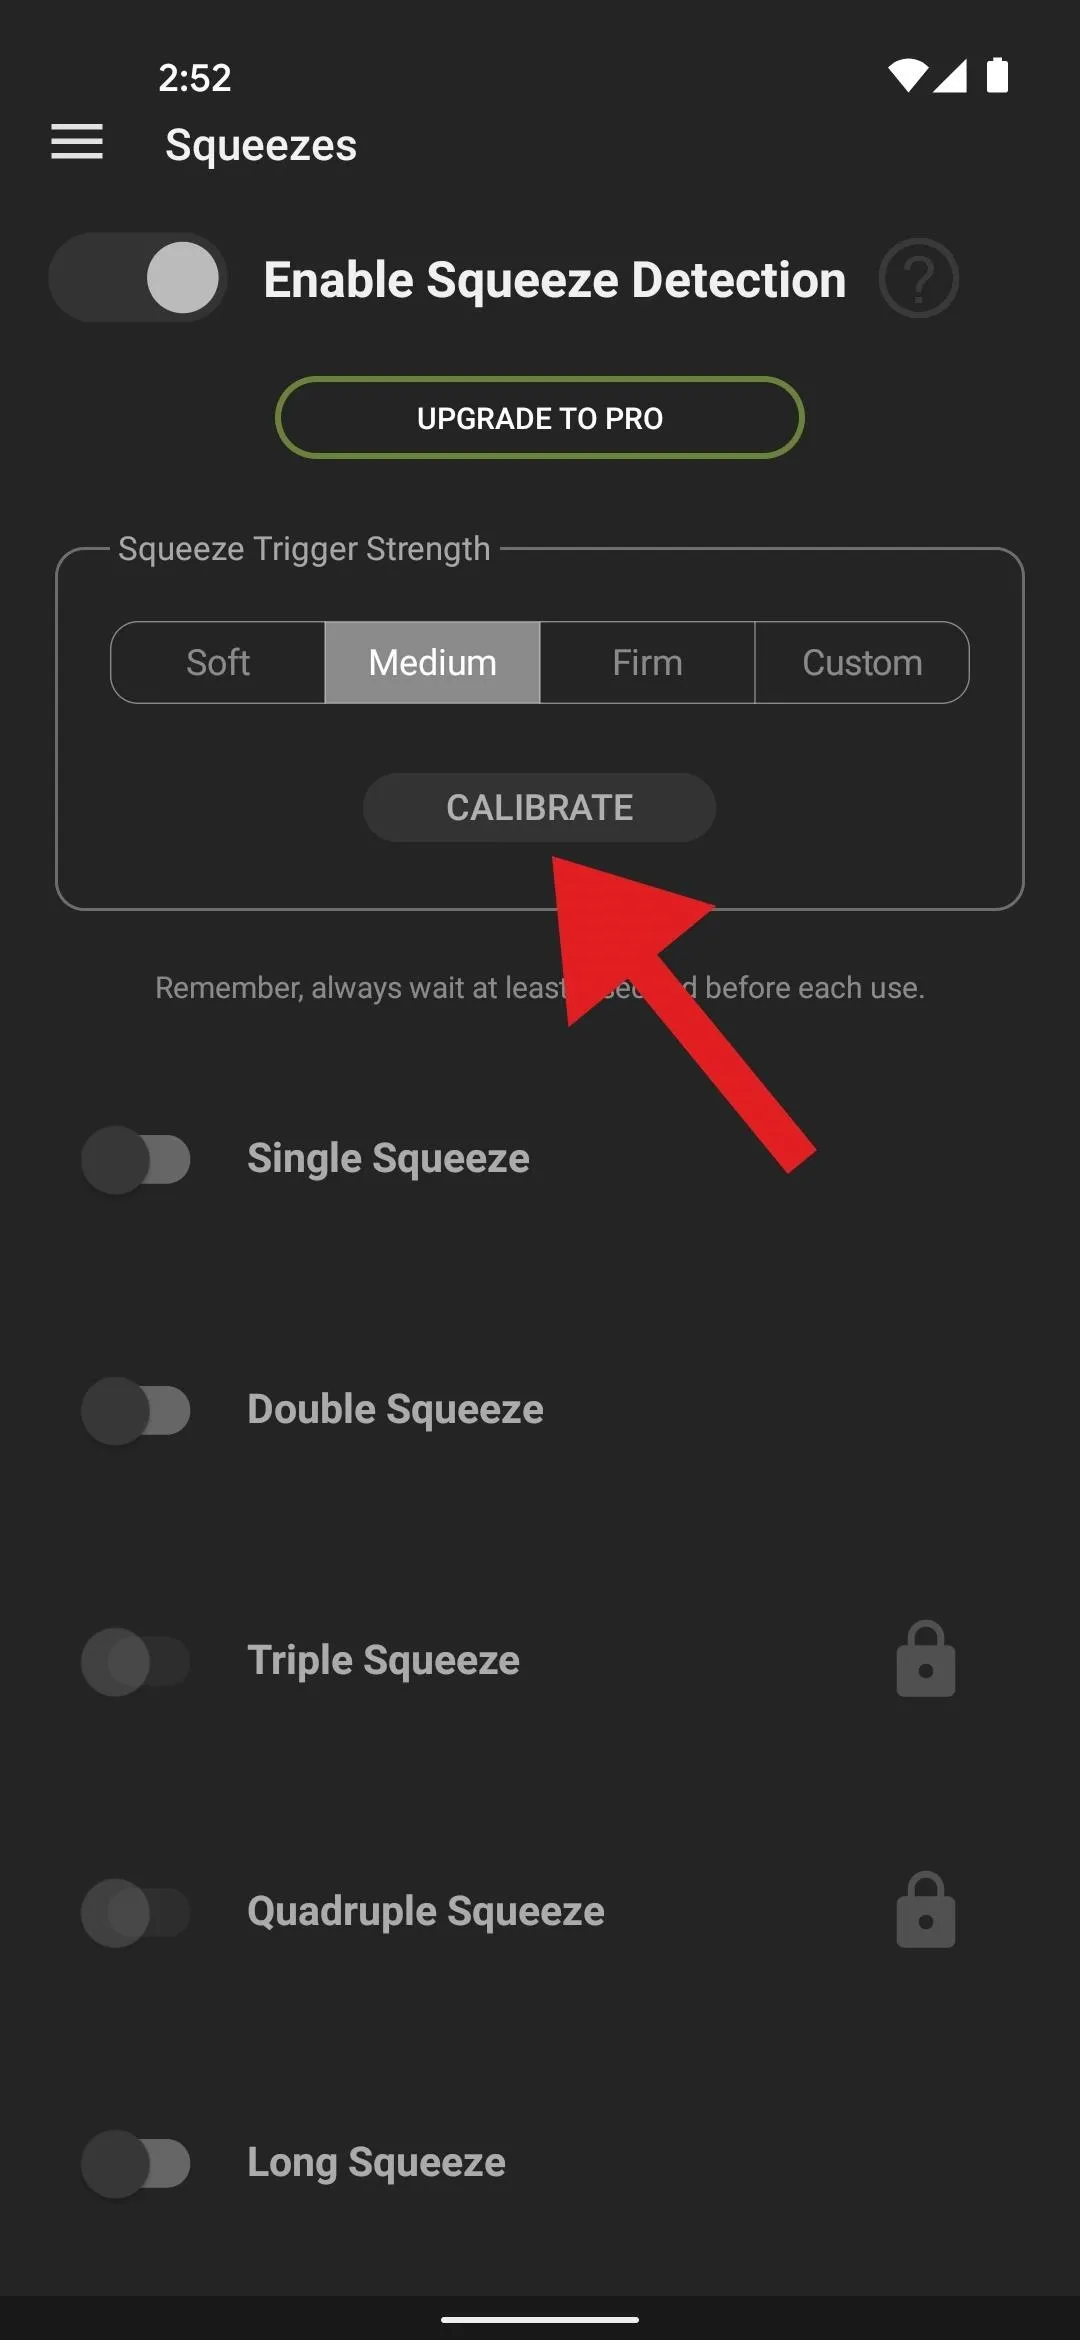
You'll now be looking at the app's main menu. Here, make sure the toggle next to "Enable Squeeze Detection" is turned on at the very top, then tap the "Calibrate" button. Tap "OK" on the next prompt, then hit "Start" at the bottom of the calibration screen. Now, you'll need to squeeze your phone three times to establish a baseline.
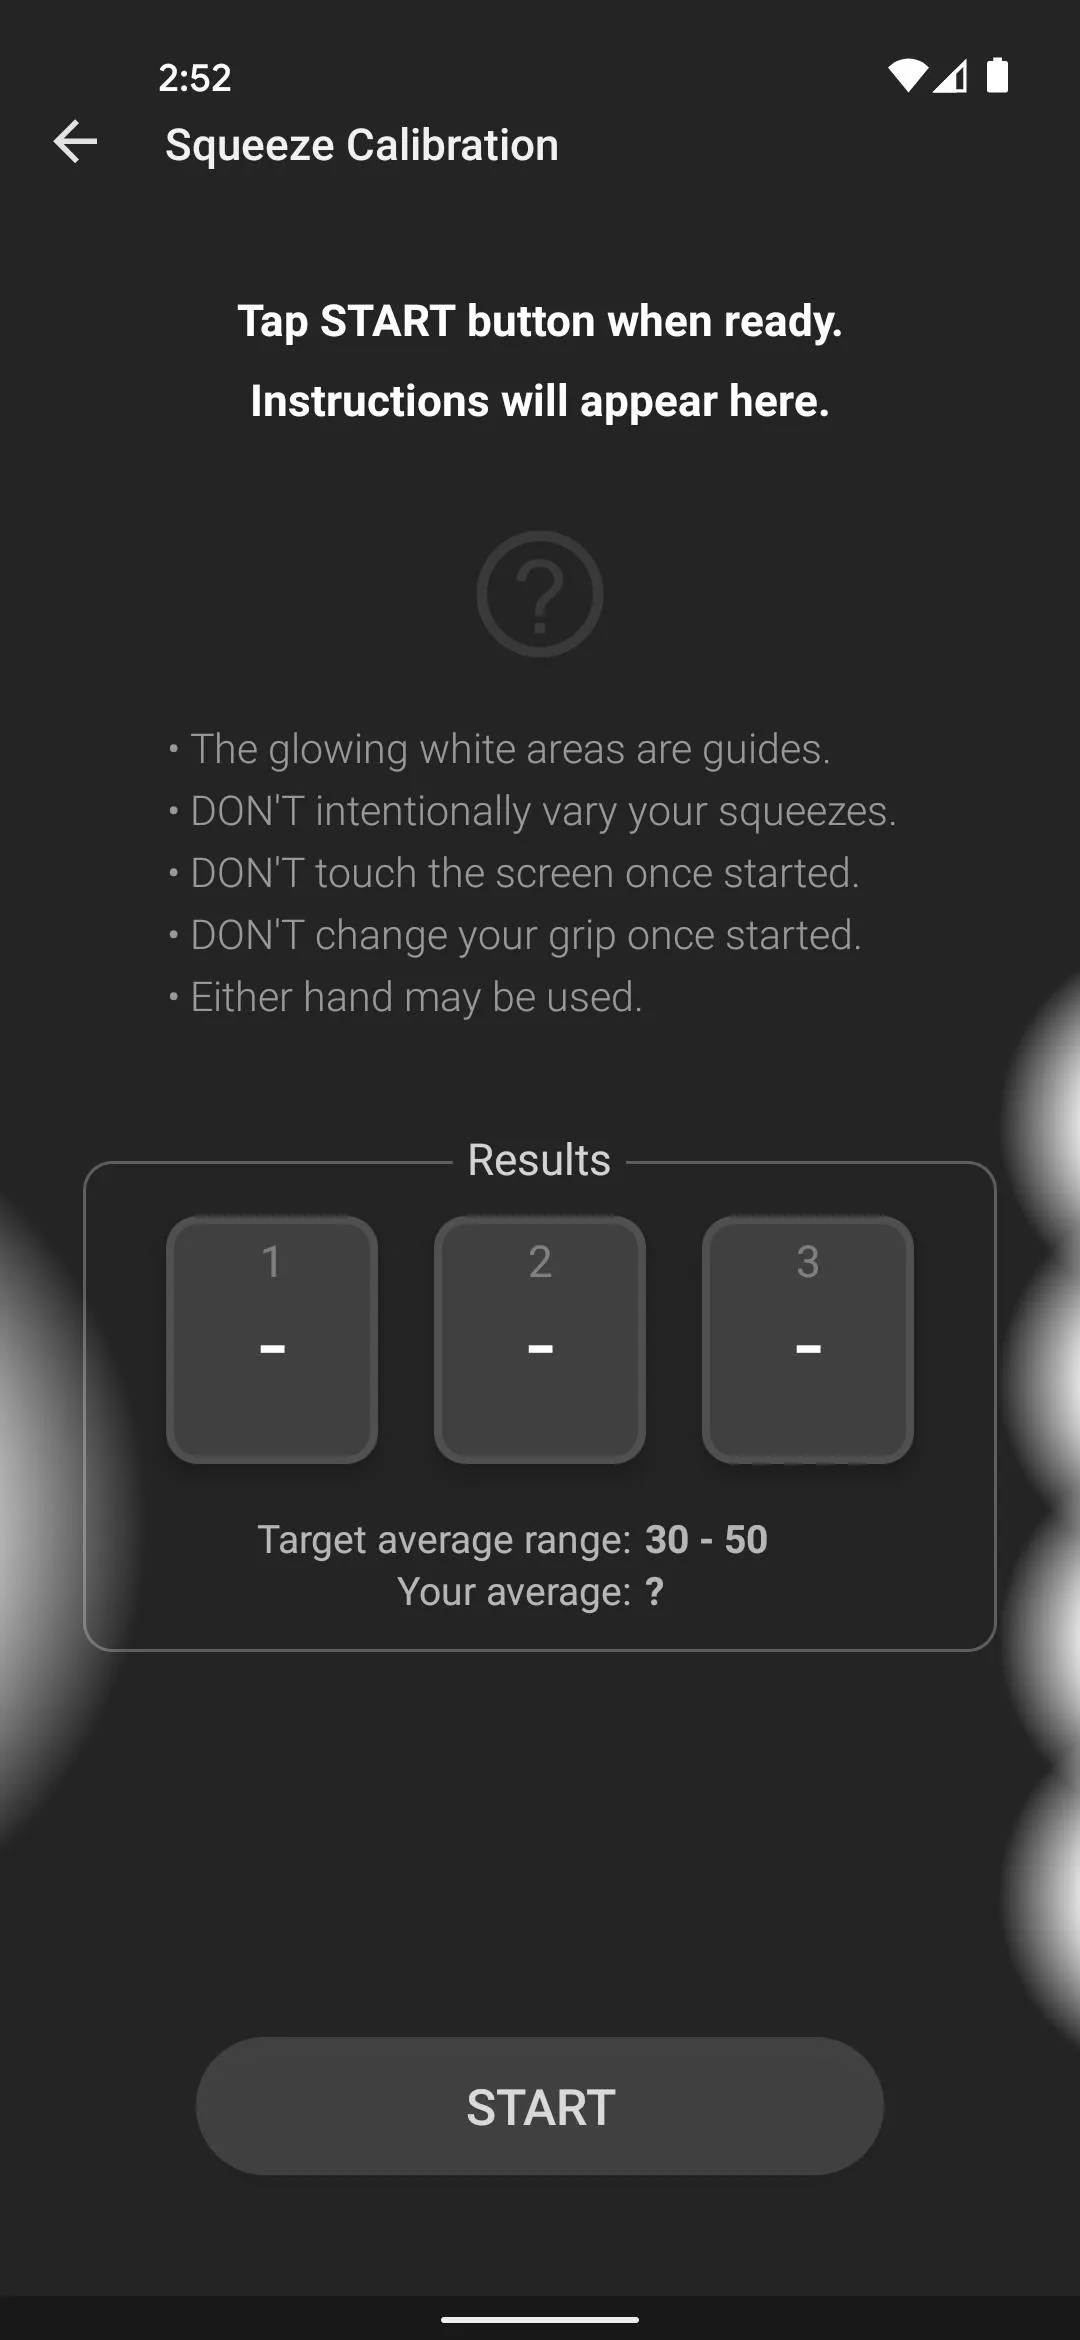
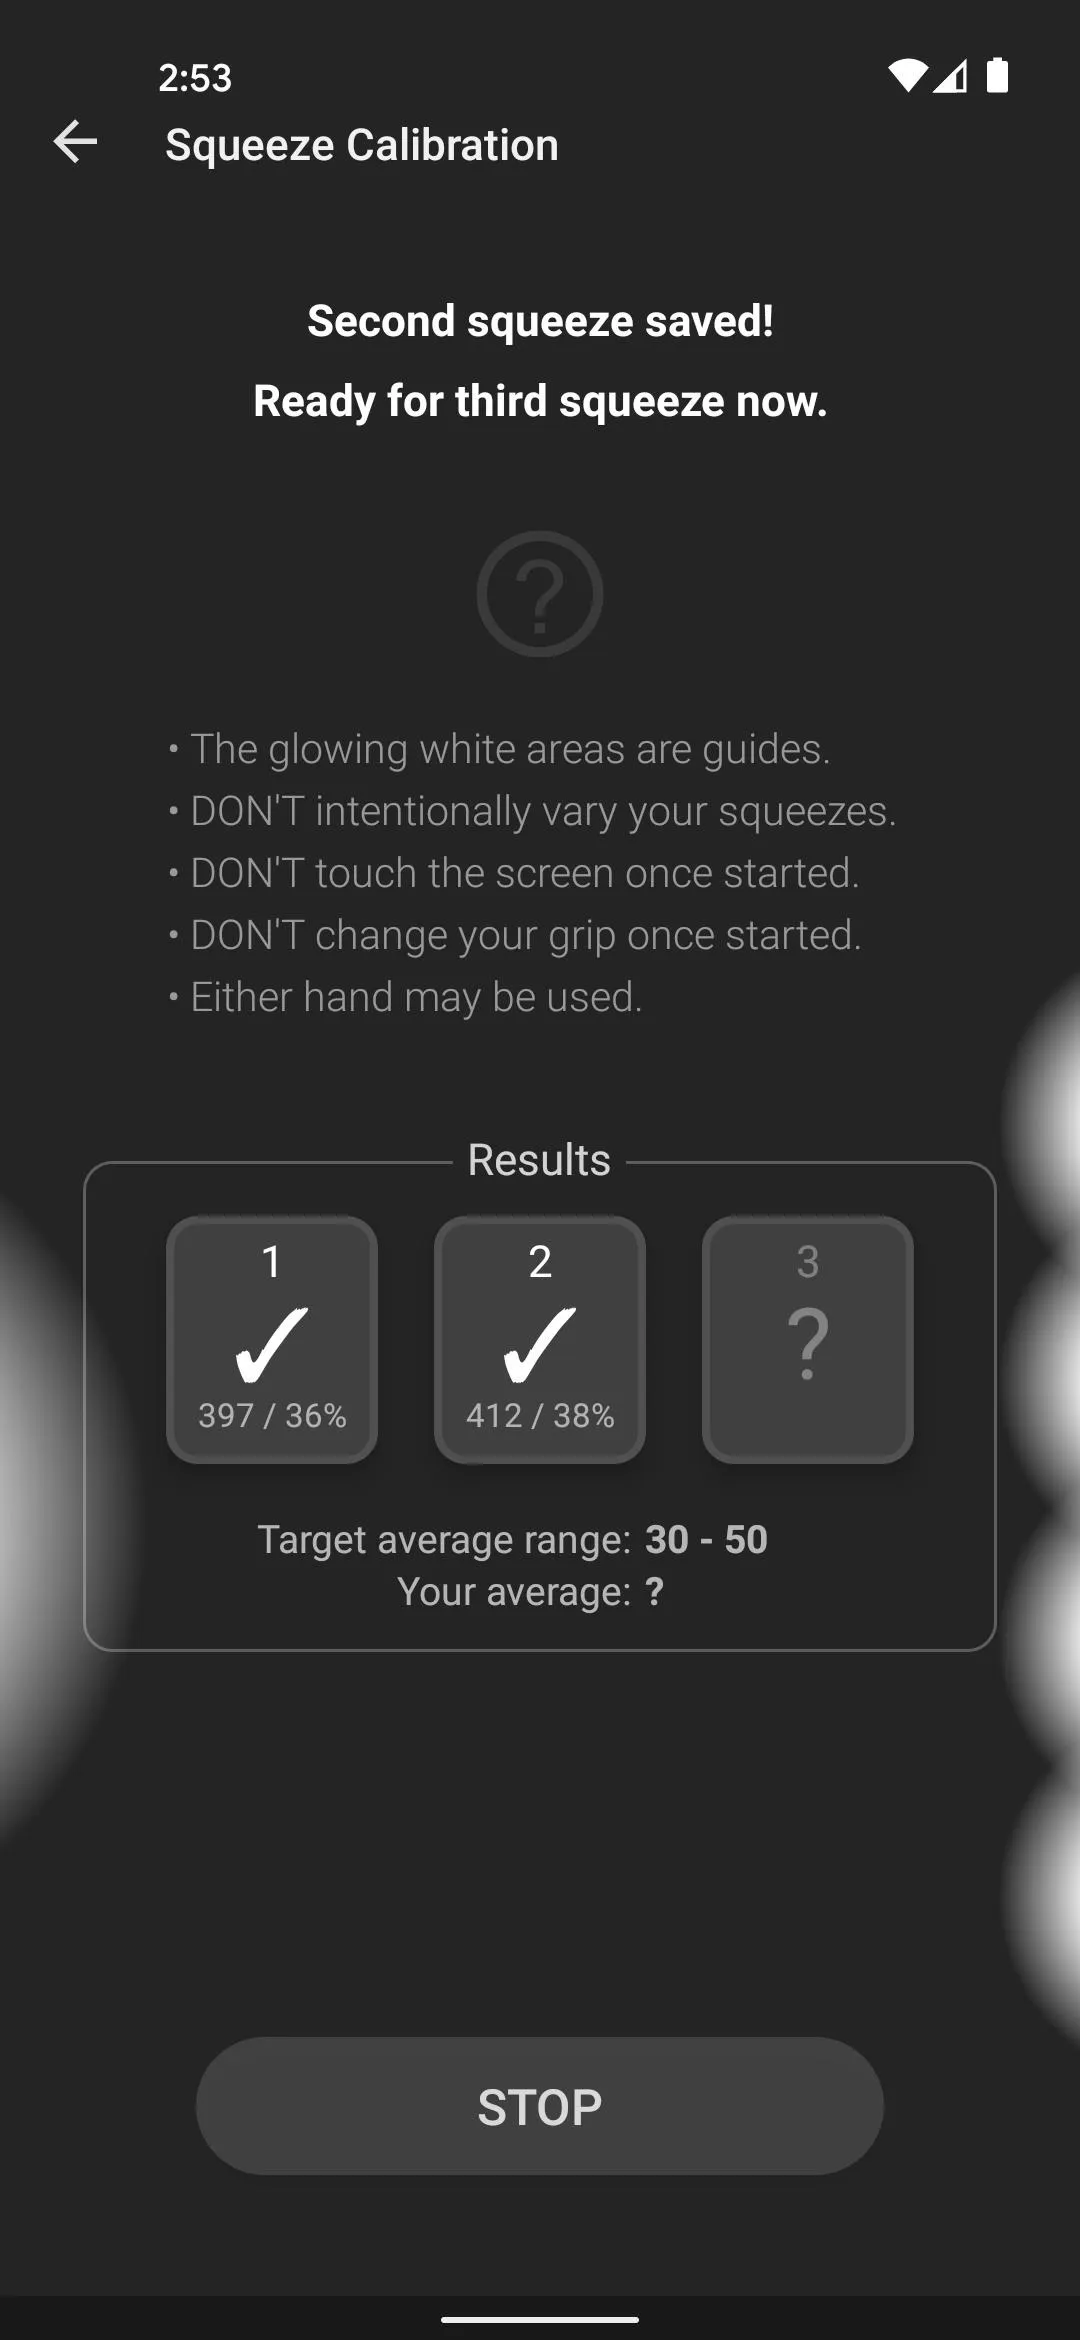


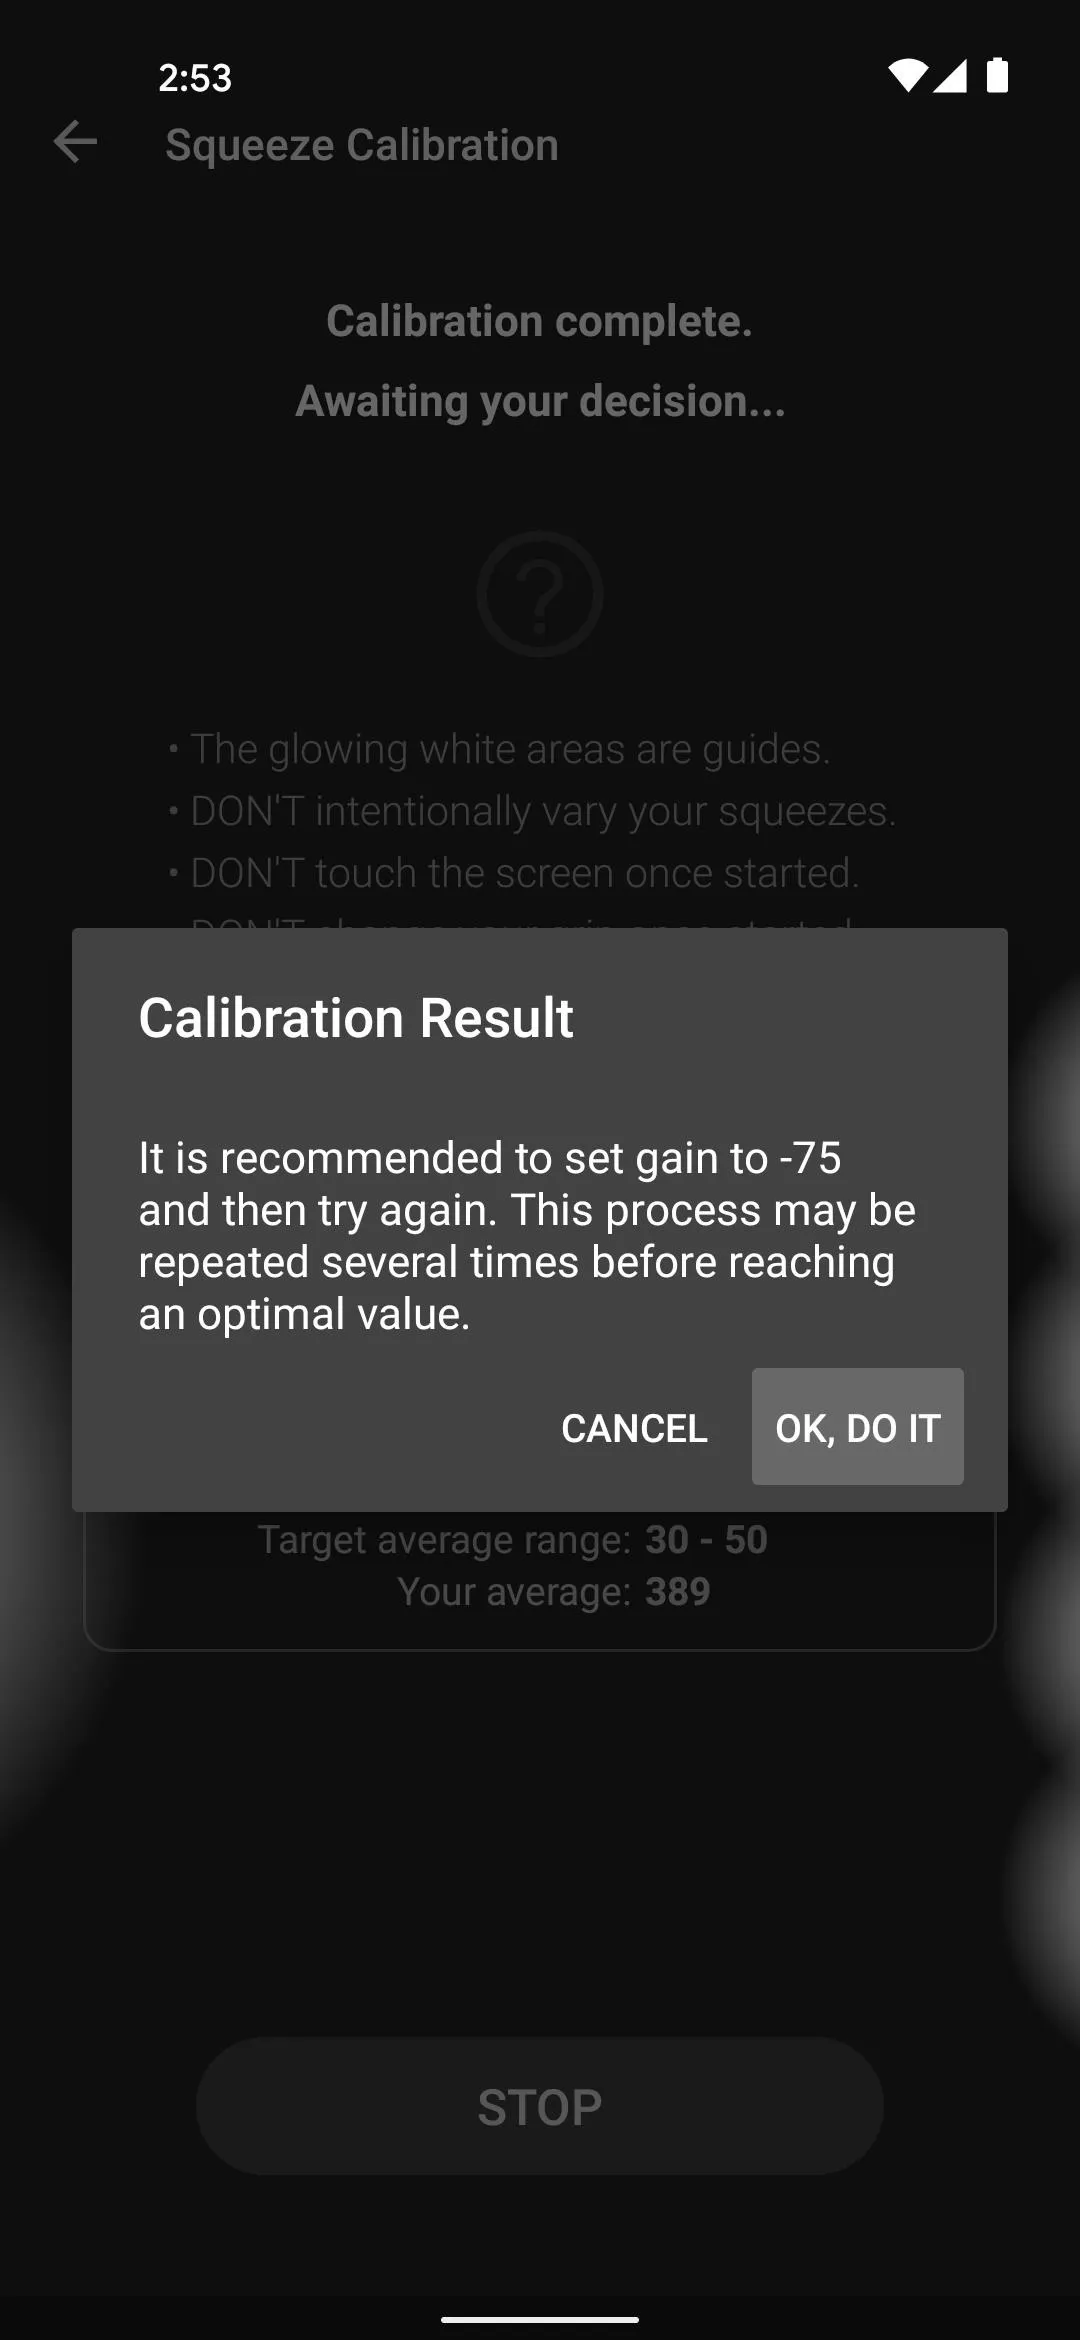
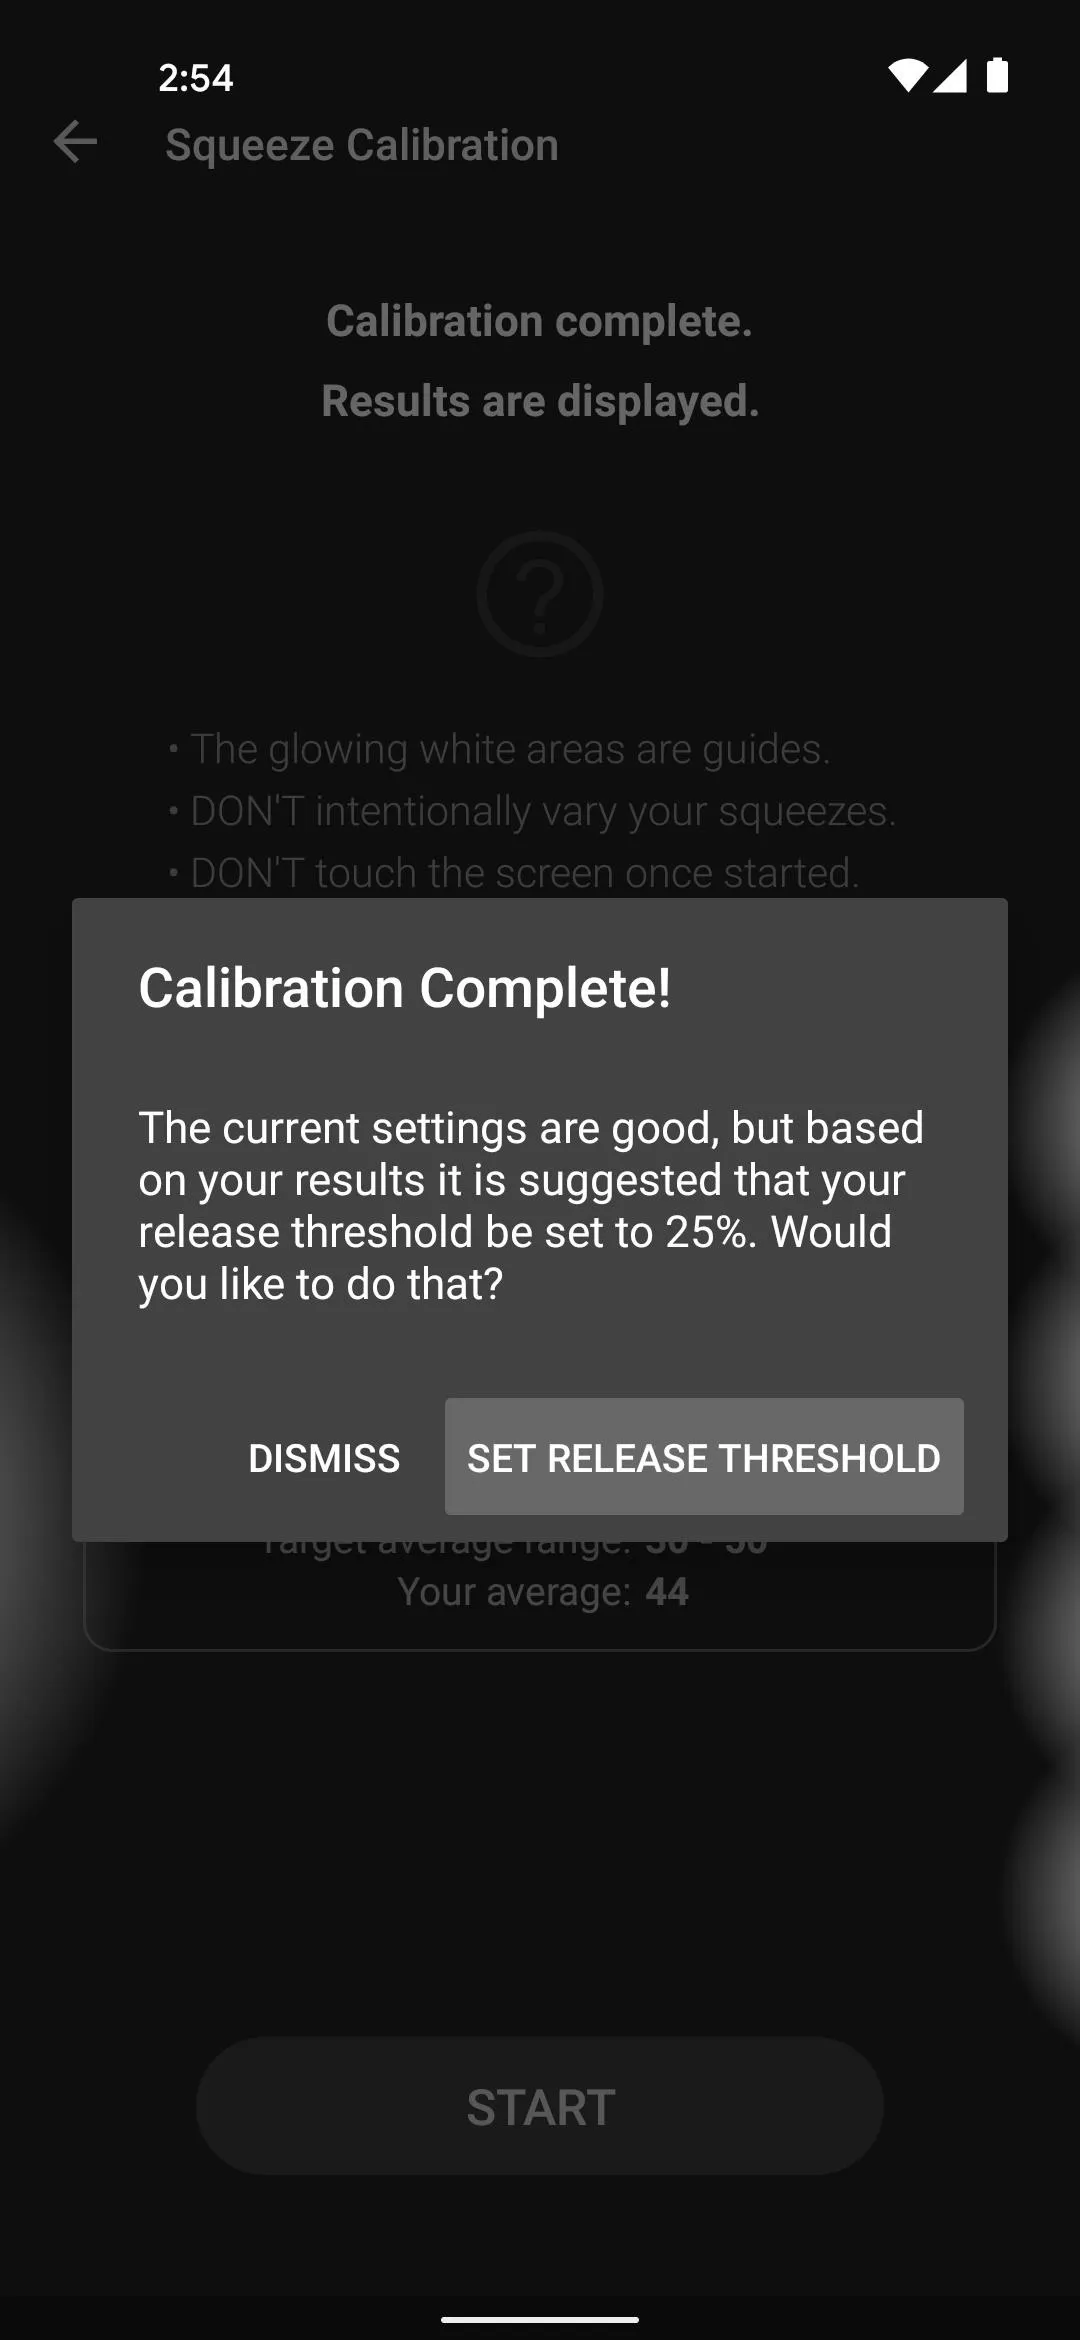
You'll likely be asked to "set gain" after the first calibration attempt. If so, tap "OK, Do It," then repeat the calibration process of squeezing your phone three times again. Ultimately, you'll get a "Calibration Complete!" popup, at which point you should tap "Set Release Threshold" to finish up.


Step 6: Configure the Squeeze Gesture
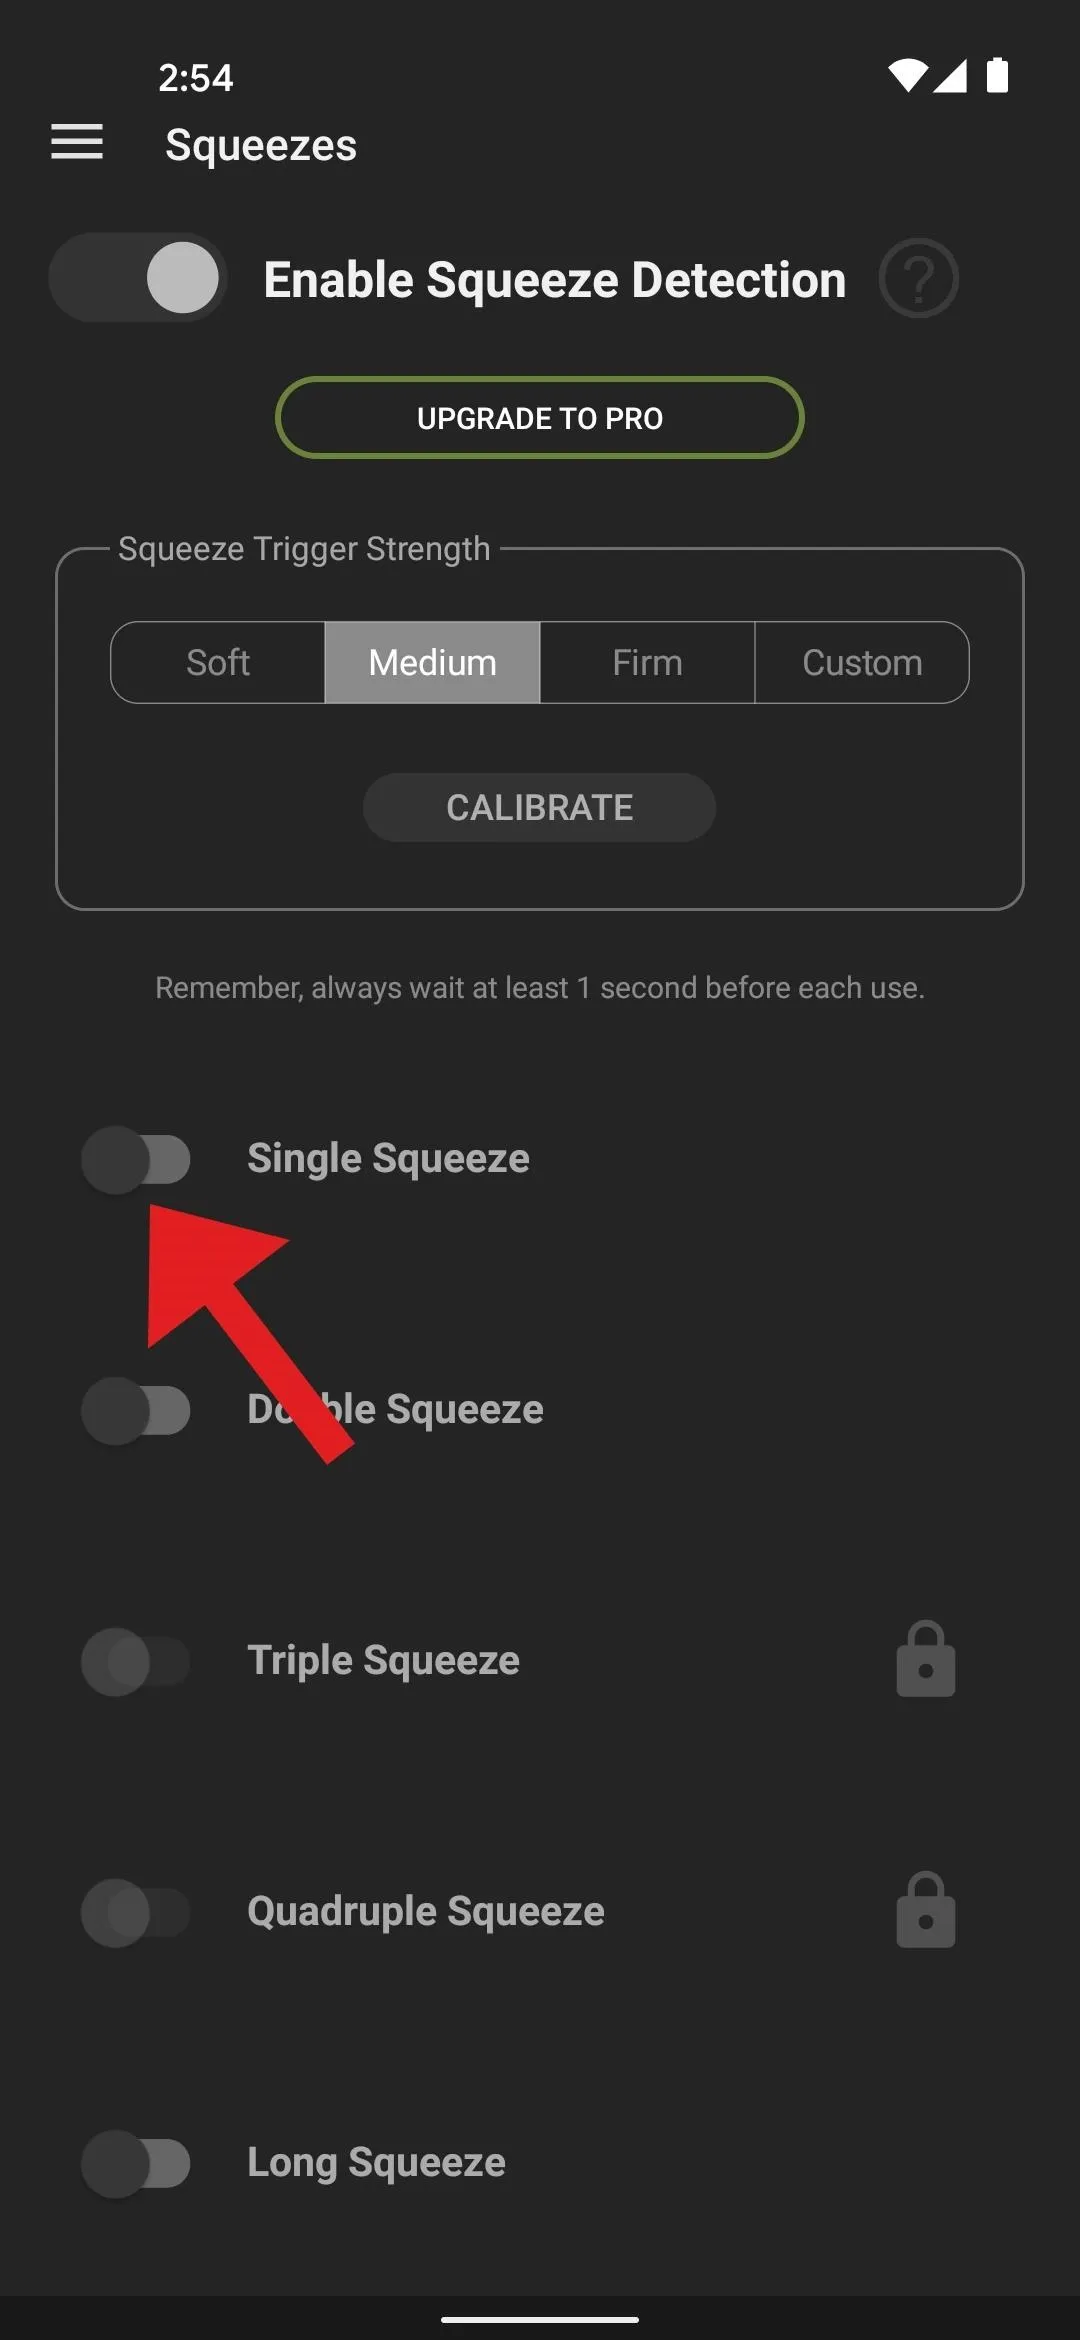
Now, enable the toggle switch next to "Single Squeeze" from the app's main menu. This will reveal more options — enable the toggle next to "Primary action while screen is on" here.
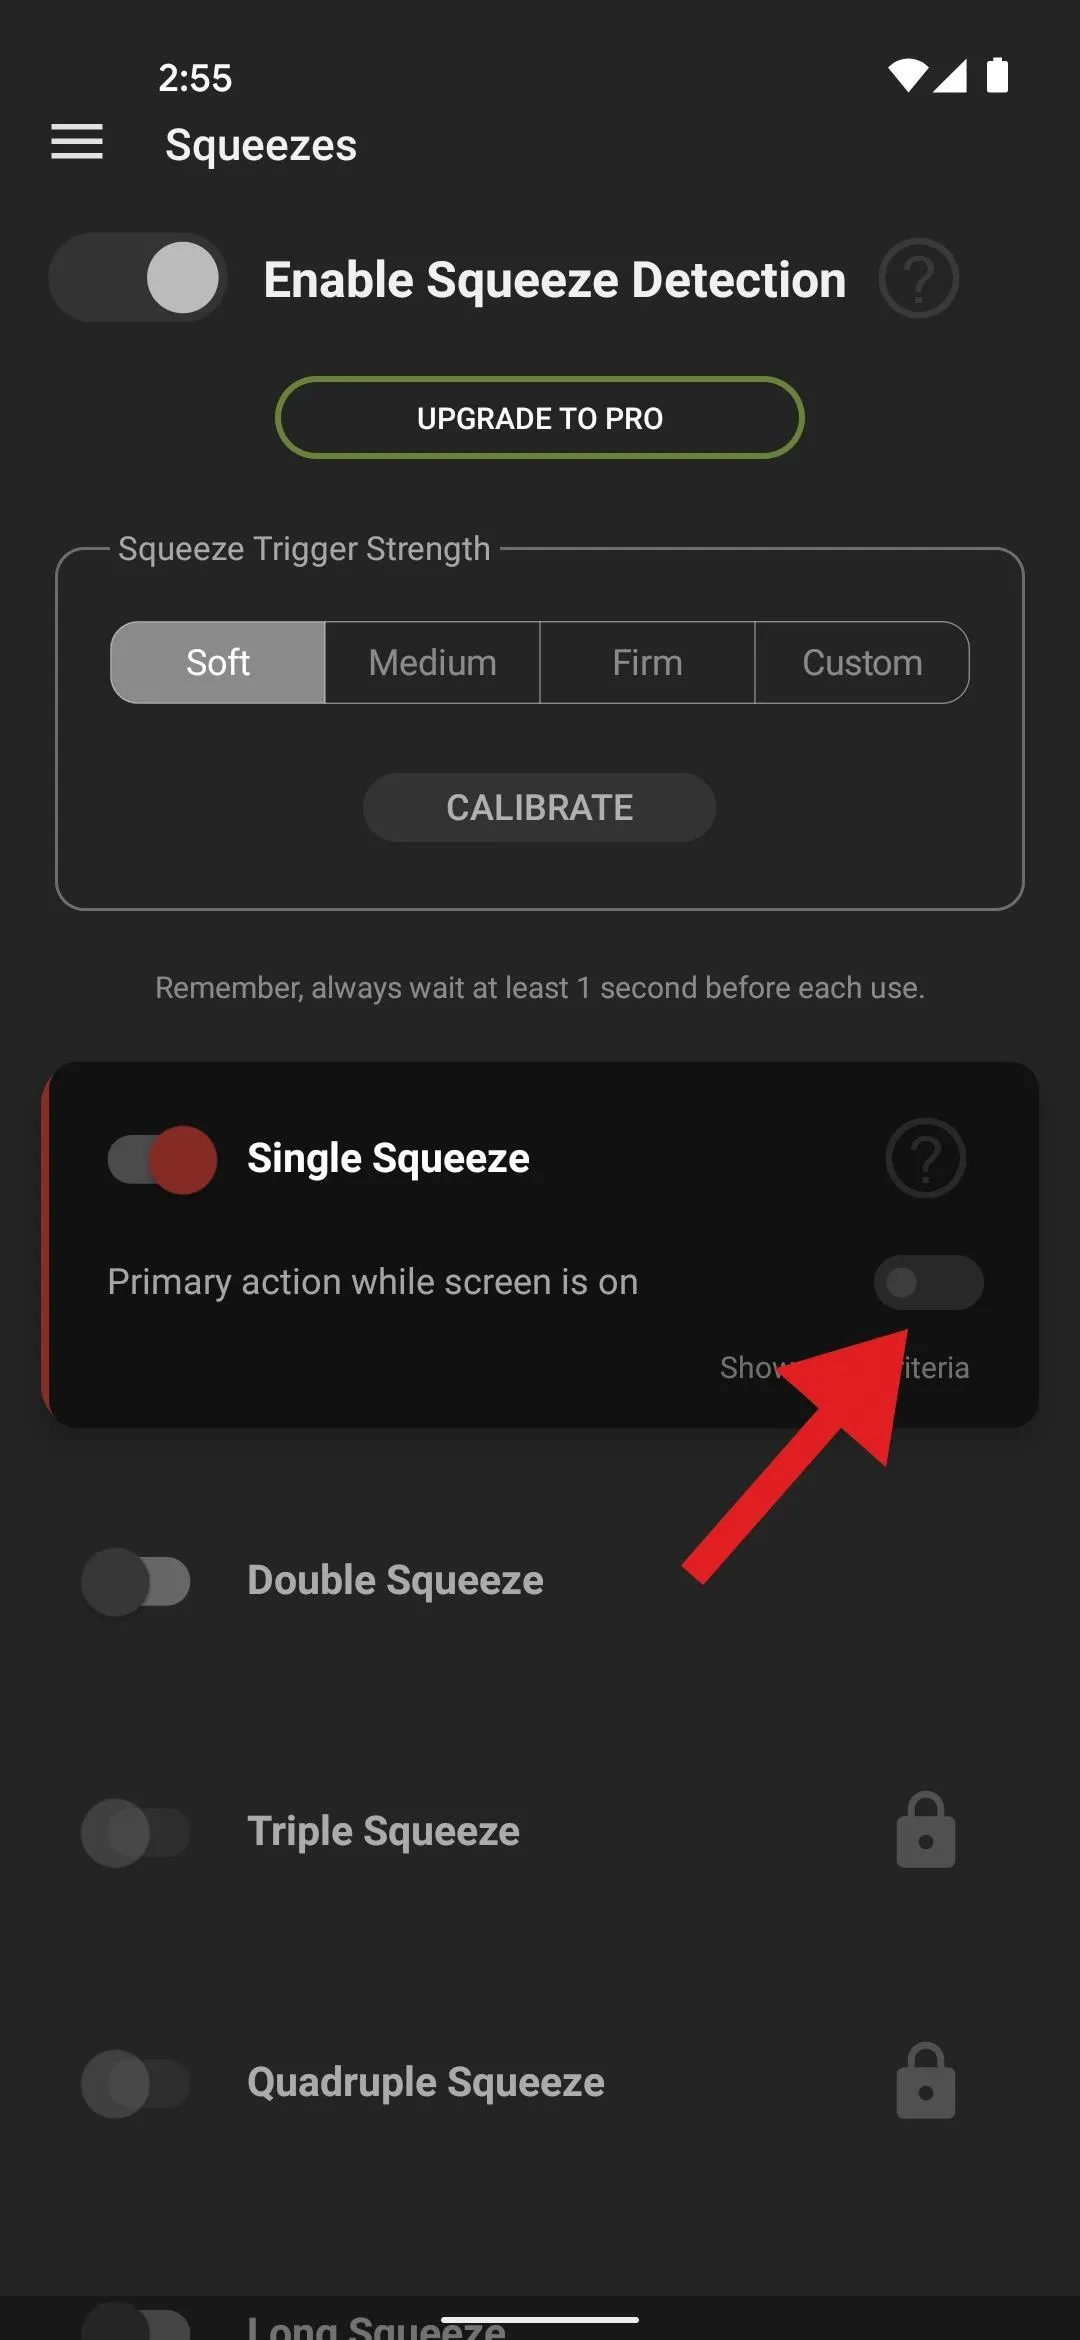


Now, you'll see a pair of tick boxes and a drop down menu. Leave the boxes set as they are and tap the "Home" text on the drop-down. Here, scroll down a bit and select "Launch Default Voice Assistant" from the list. You can now exit the app.
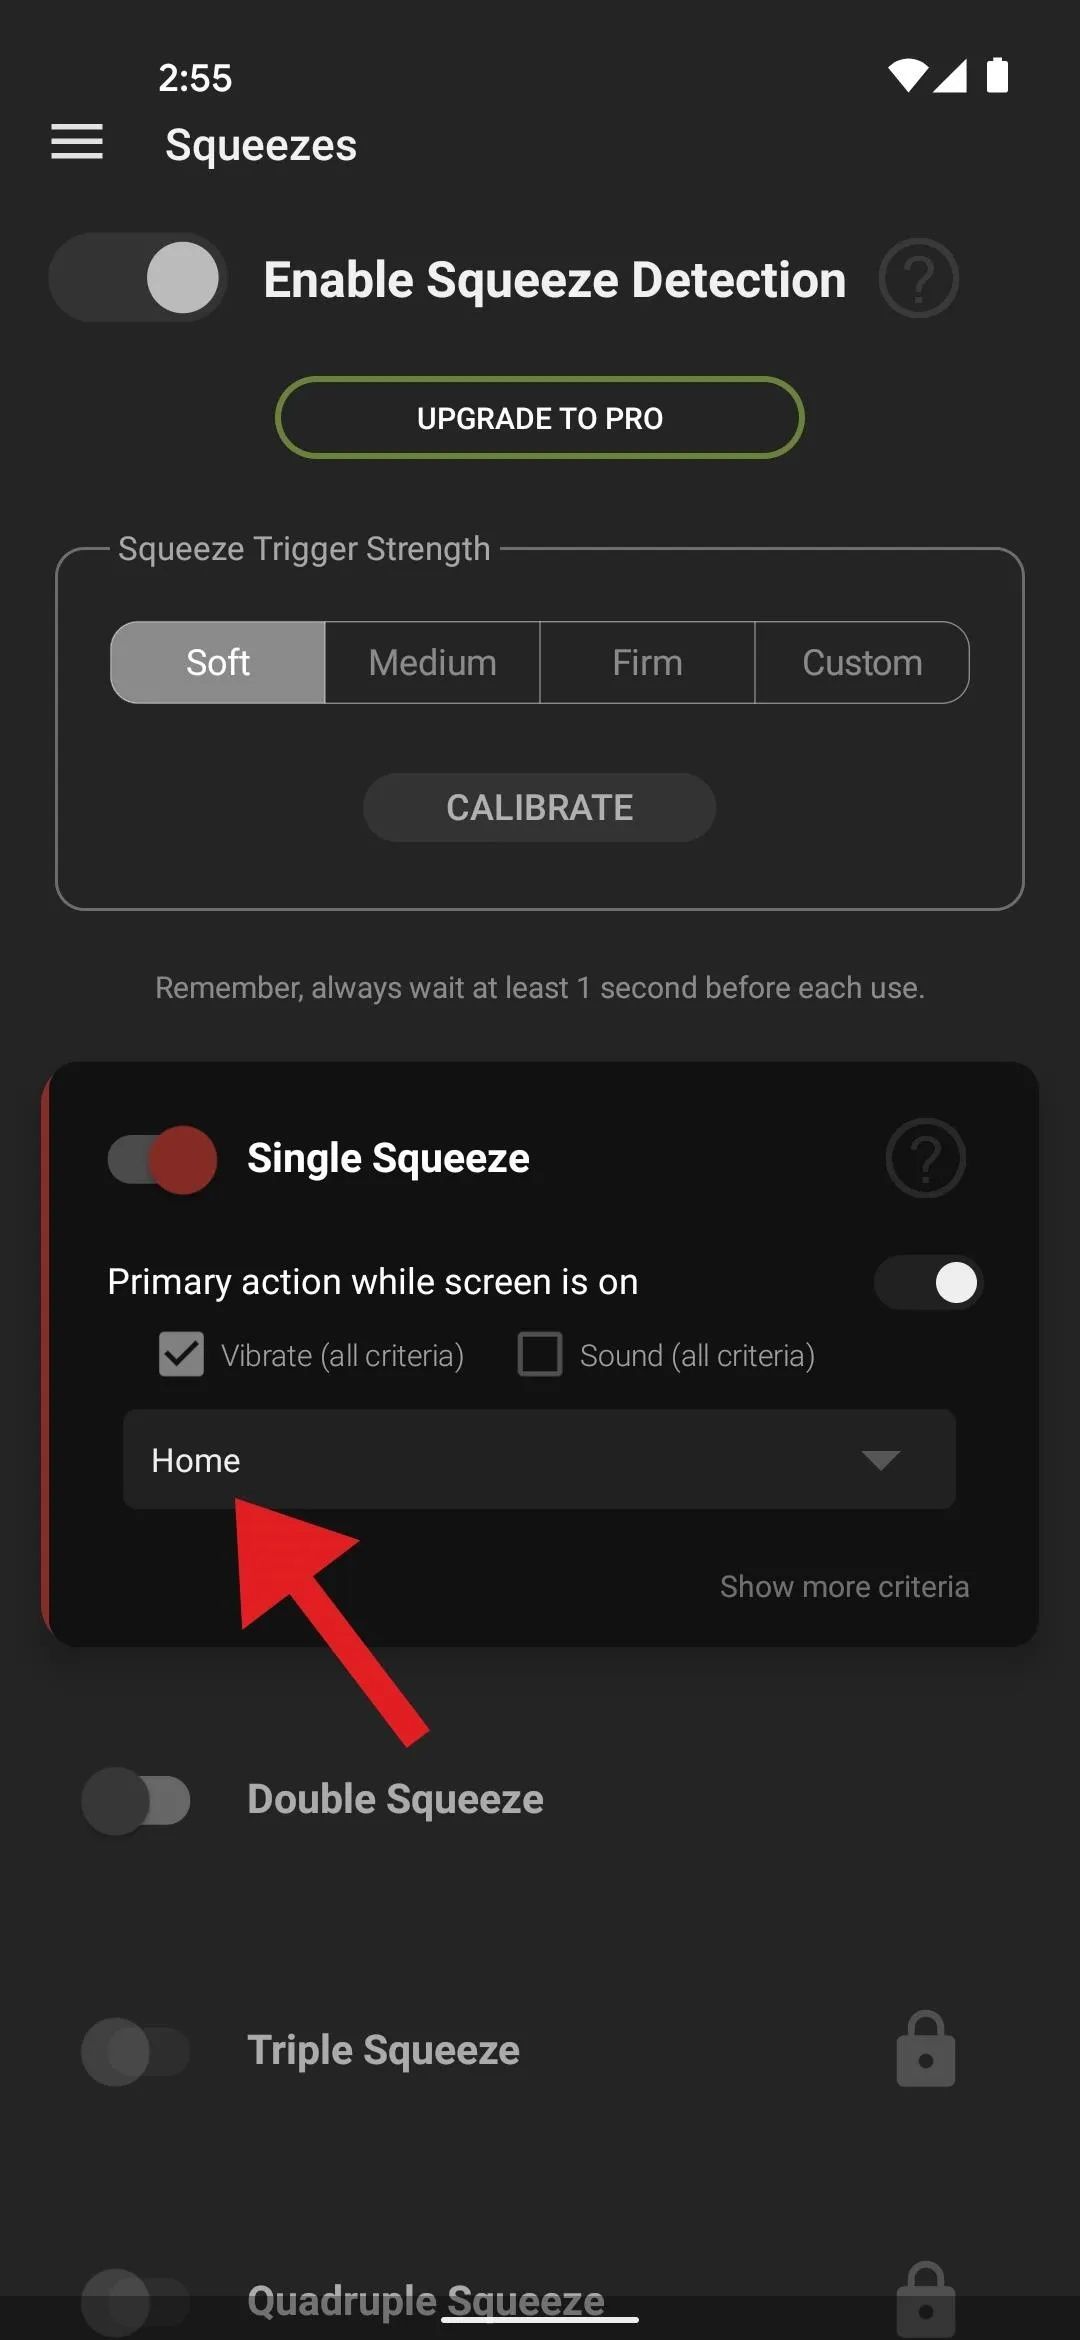
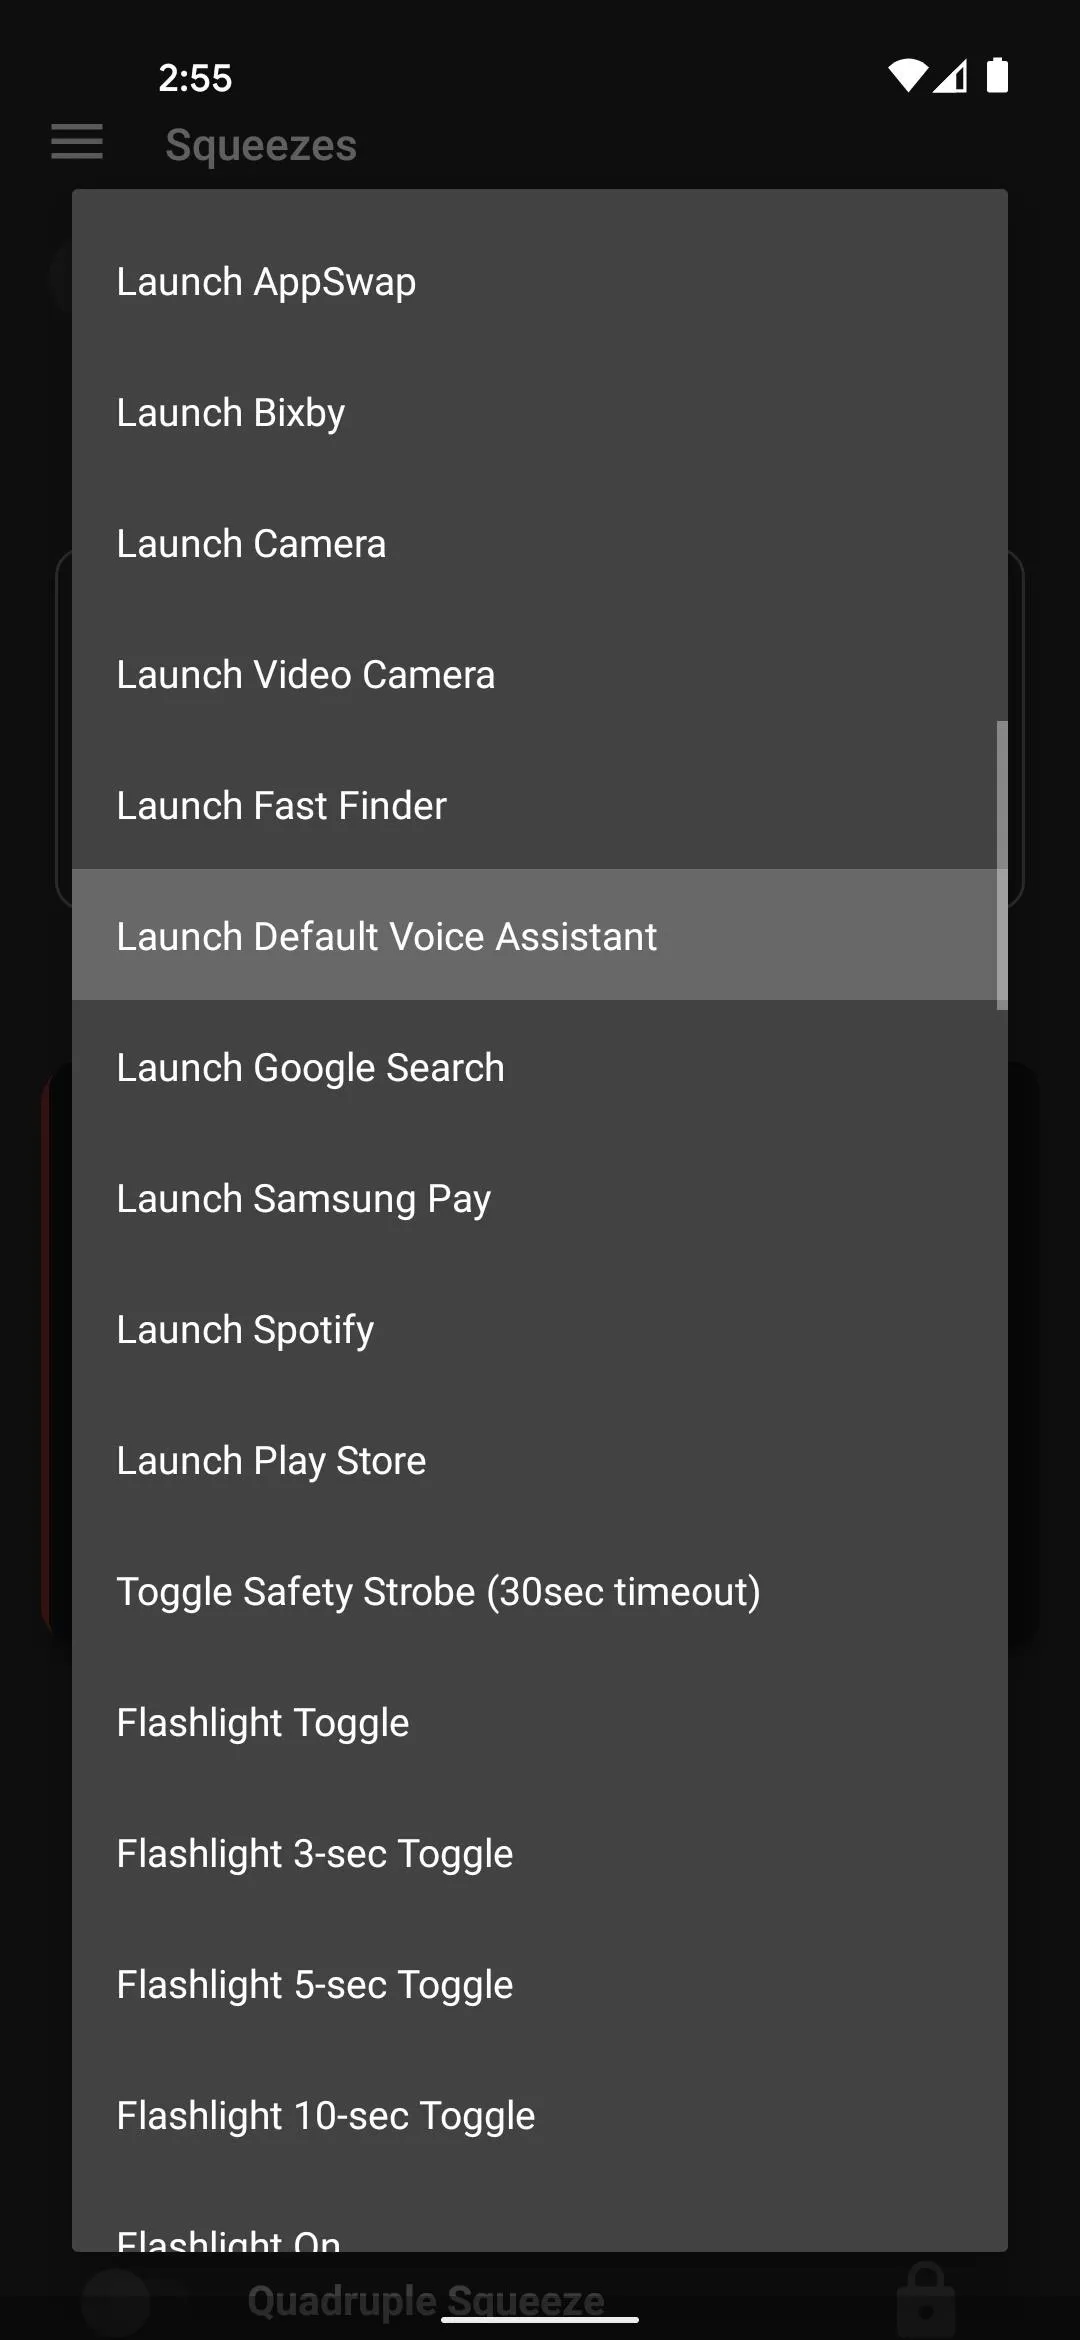


As you can see, there are other gestures like "Double Squeeze" and "Triple Squeeze," so if you'd like, you can take the time to set those up at this point. But none of them are central to the old Pixel functionality of squeezing for your Assistant, so it's totally up to you.
Step 7: Disable the Persistent Notification
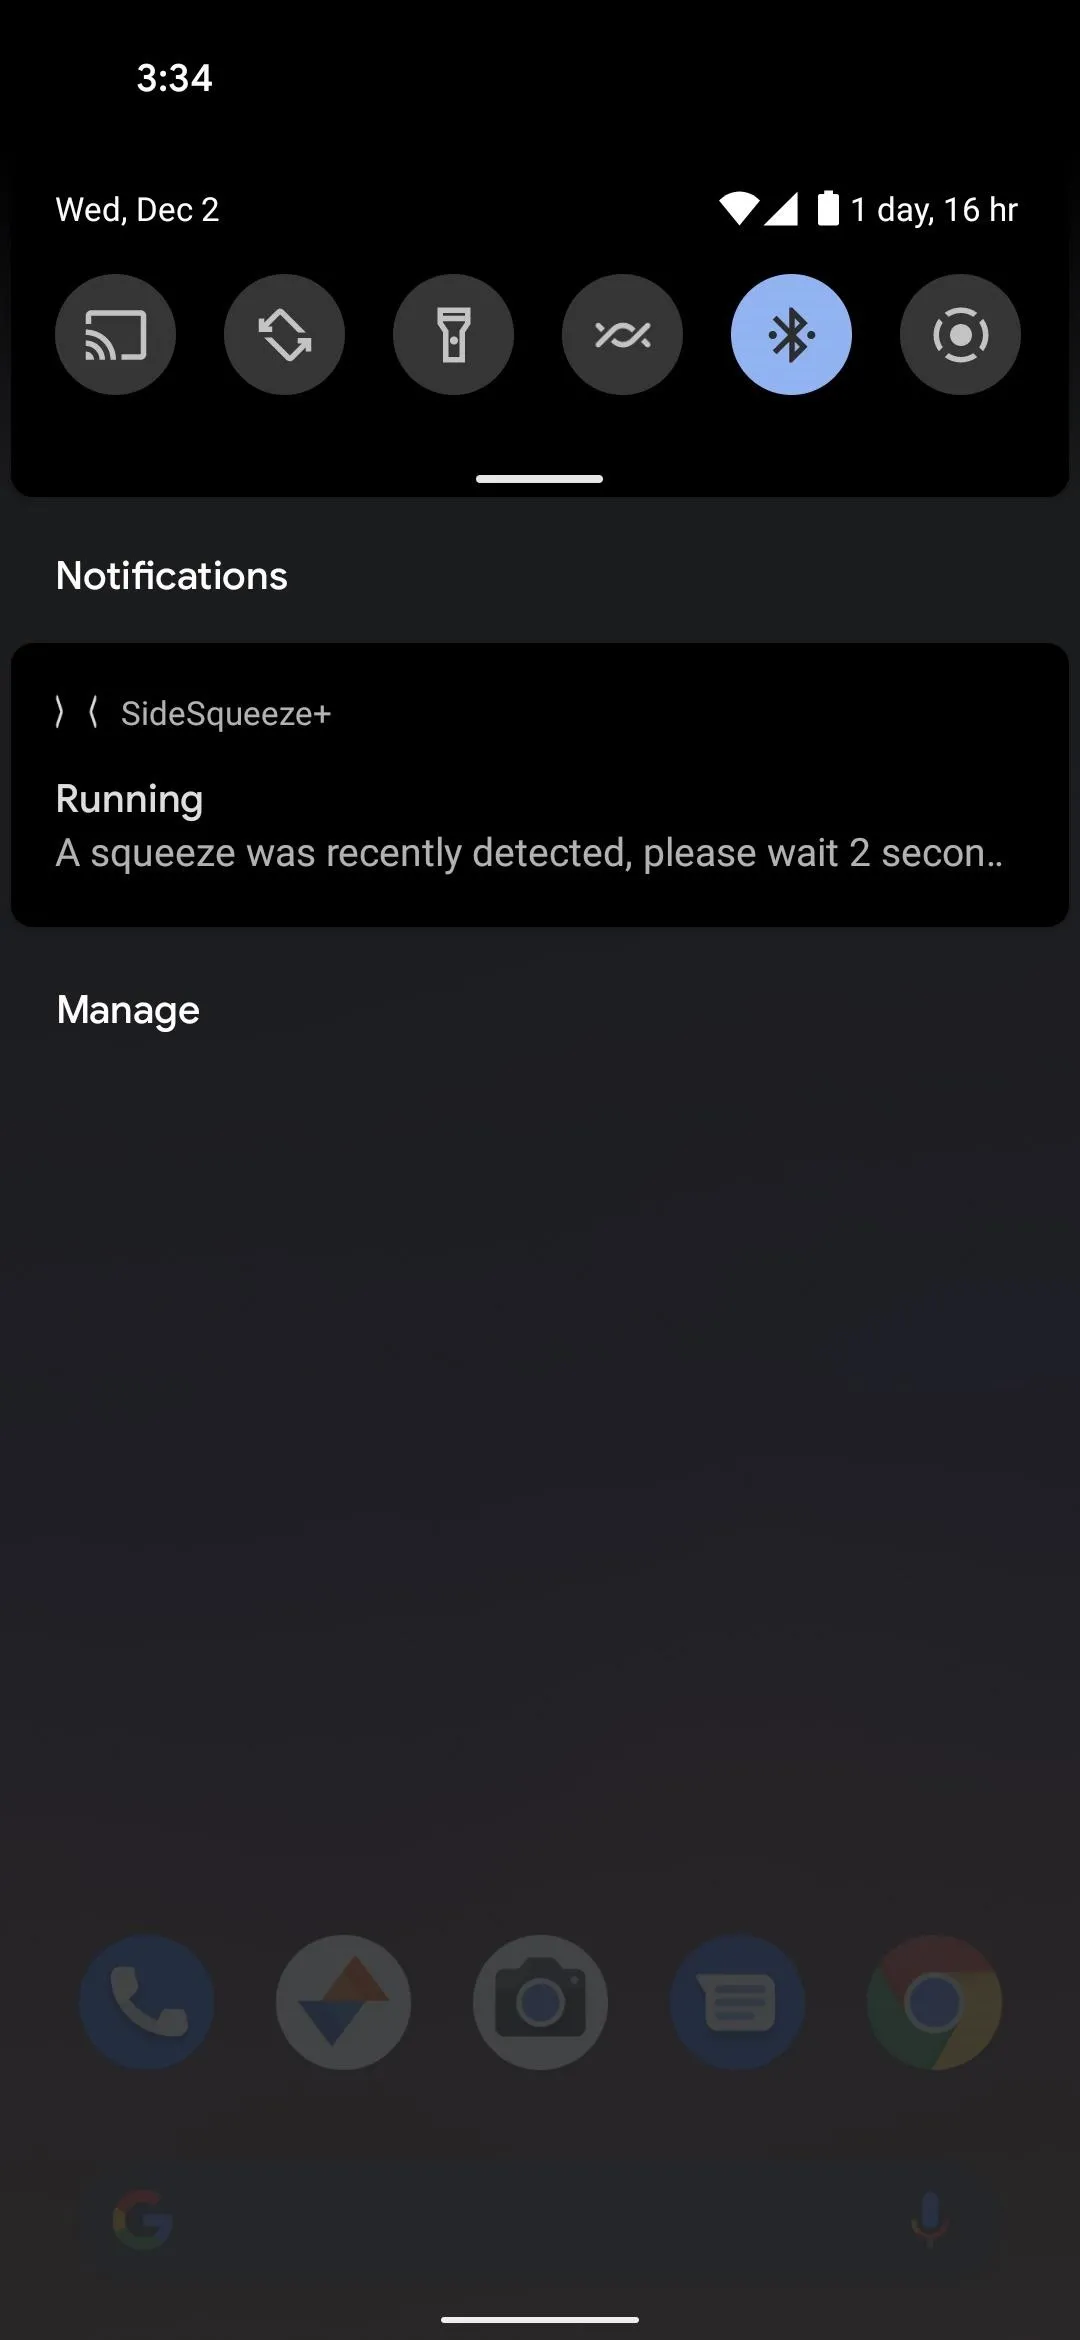
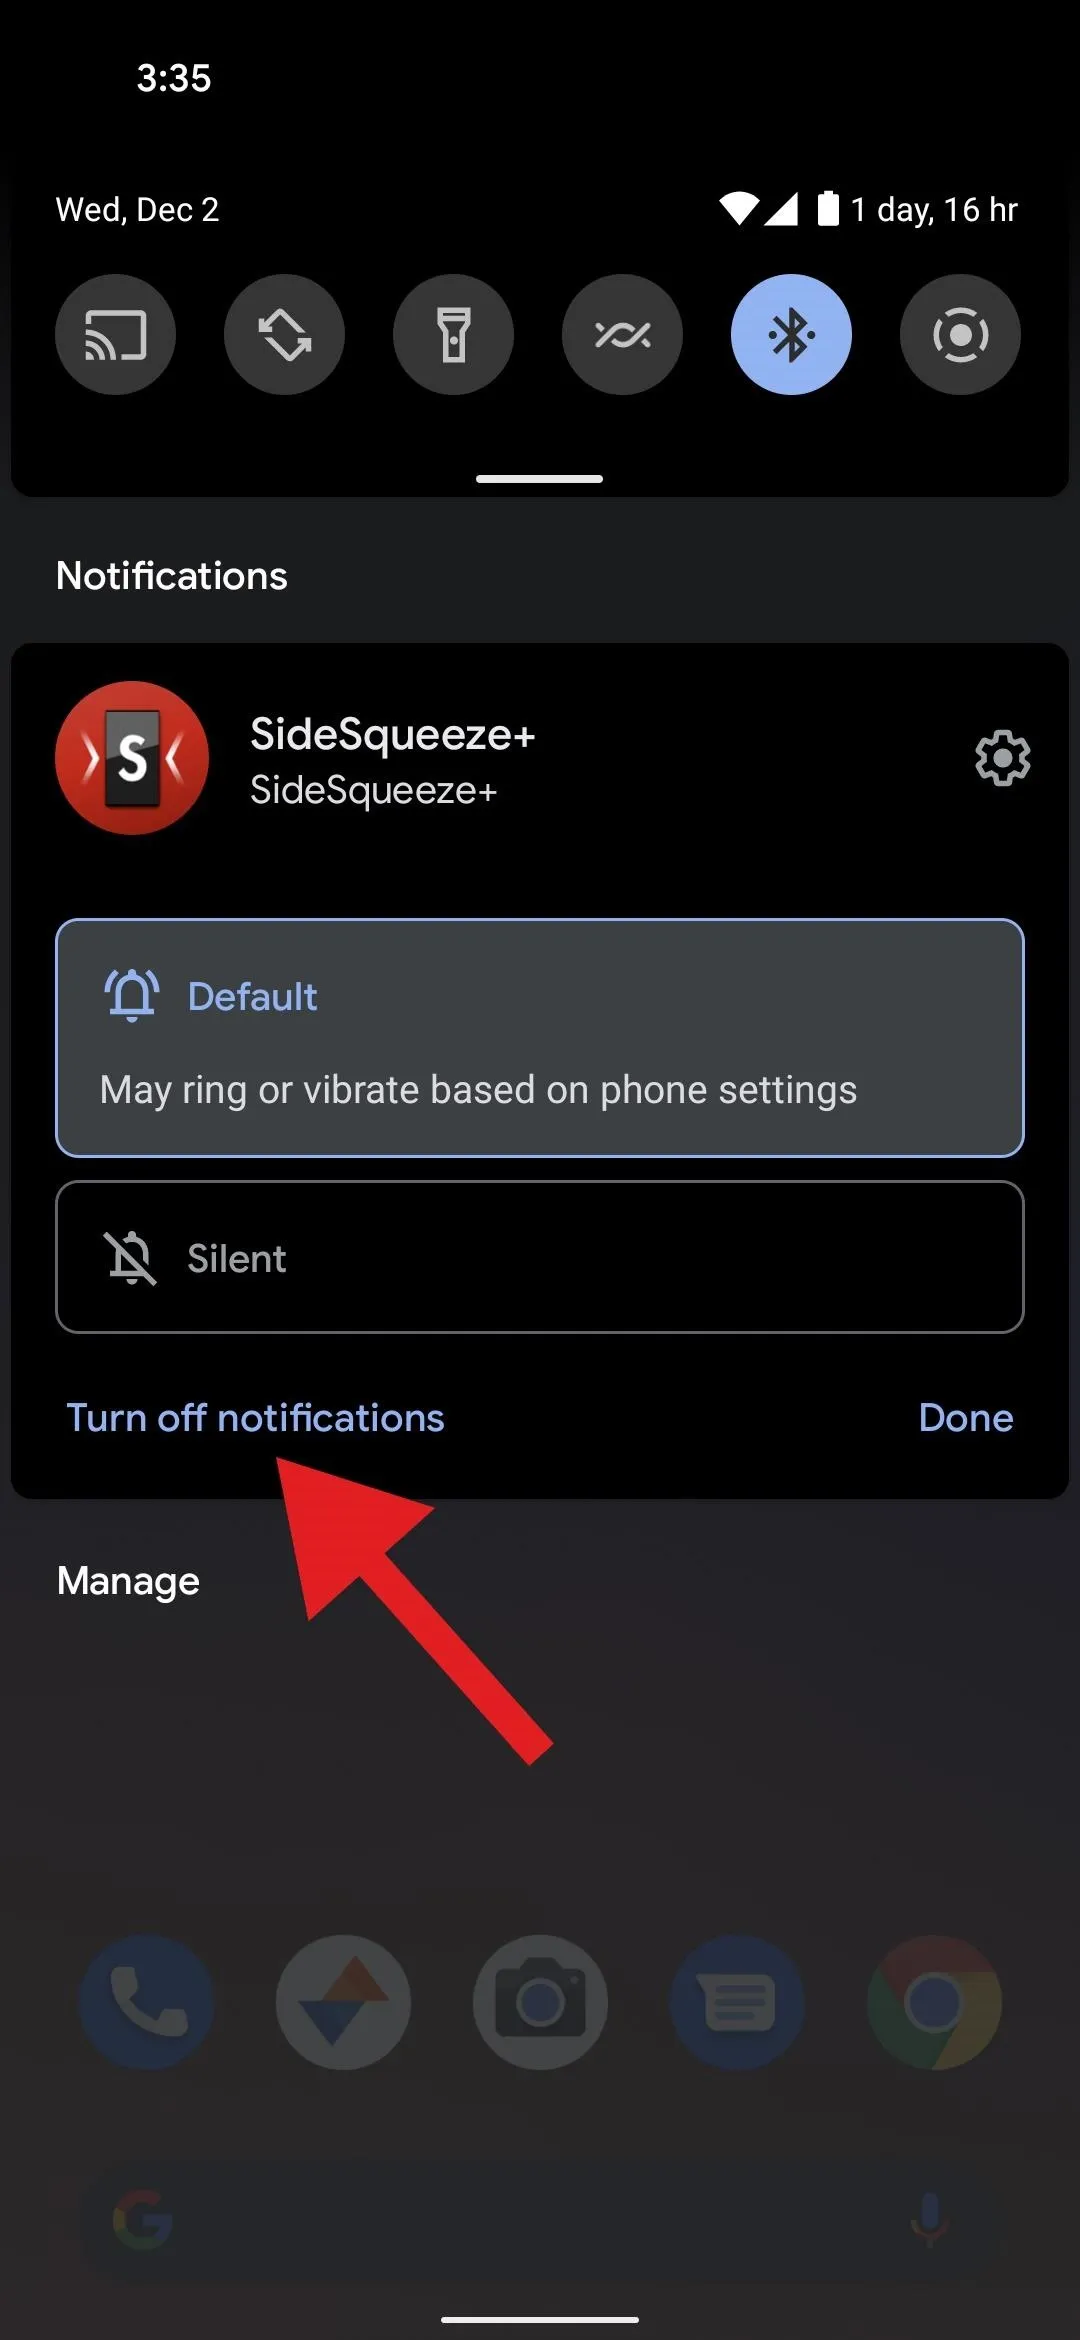
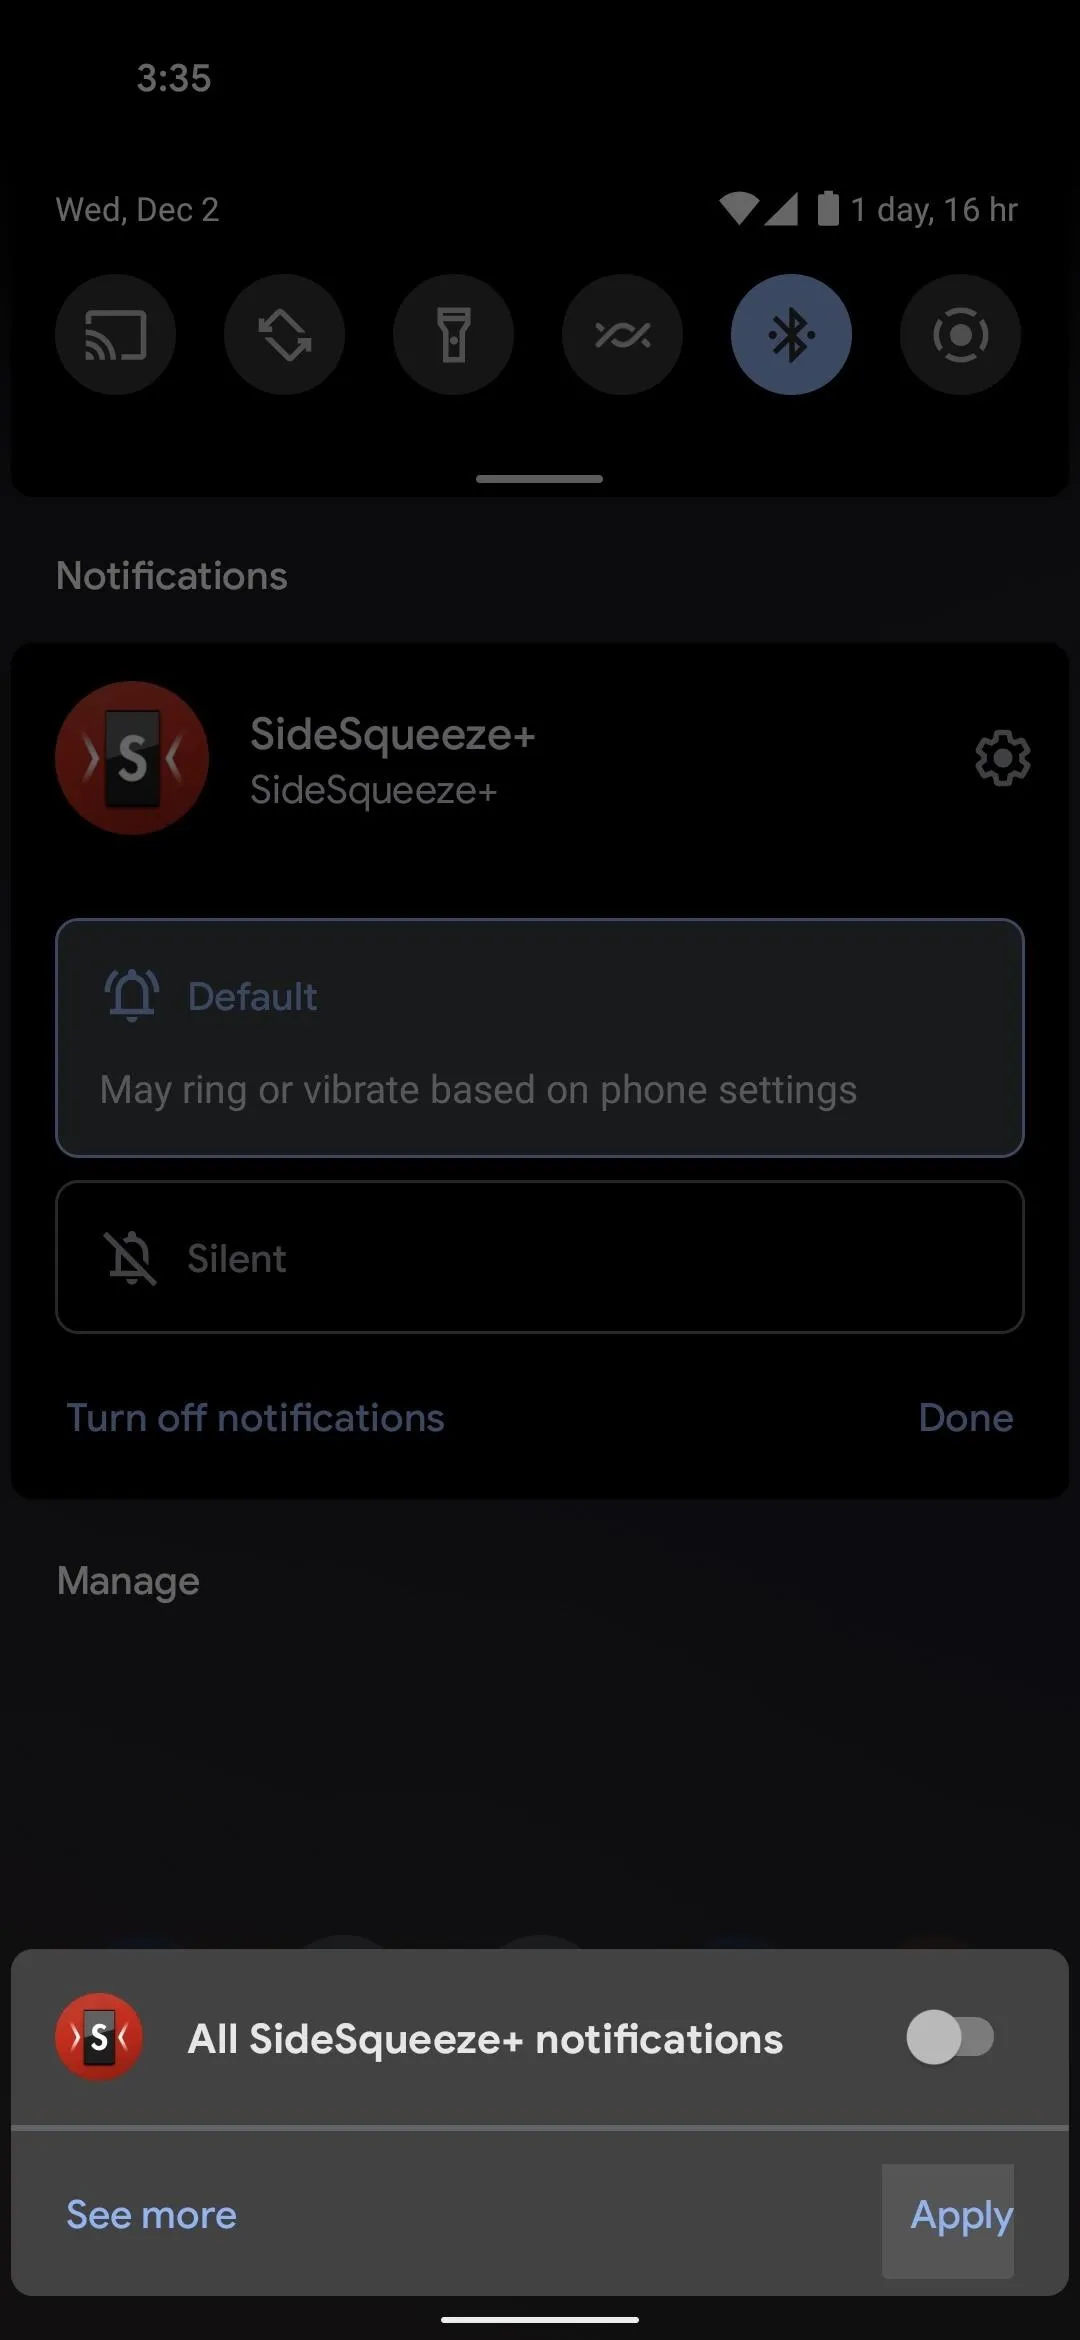
To help keep Android's memory management from closing SideSqueeze+ in the background, the app posts an ongoing notification. If you like a tidy status bar, you can long-press this notification, then choose "Turn off notifications" and disable the toggle next to "All SideSqueeze+ notifications" before hitting "Apply." This will not affect the background process.


Step 8: Squeeze for Your Assistant!
You're now ready to try out the new feature. Just like on previous Pixels, you simply squeeze your phone from the sides while holding it towards the bottom, then Google Assistant pops right up!

Cover image, screenshots, and GIF by Dallas Thomas/Gadget Hacks


Comments
No Comments Exist
Be the first, drop a comment!