Your Pixel's Now Playing song discovery tool received a few updates in Android 12, and the feature is finally comparable to other music recognition services.
The most significant upgrades for Now Playing on Google Pixel phones include the ability to favorite identified music and manually search for tracks from your lock screen when the tool doesn't recognize the music automatically. Combine that with its offline music database, automatic song identification, and bulk-editing options, and it's come a long way to winning you over. Here's a rundown of how it all works.
Step 1: Unlock Now Playing in Settings
Unless Now Playing is already enabled on your Android phone, you'll have to turn the feature on manually, which is available for the Google Pixel 2 and newer.
To do so, go to Settings –> Display –> Lock screen –> Now Playing.
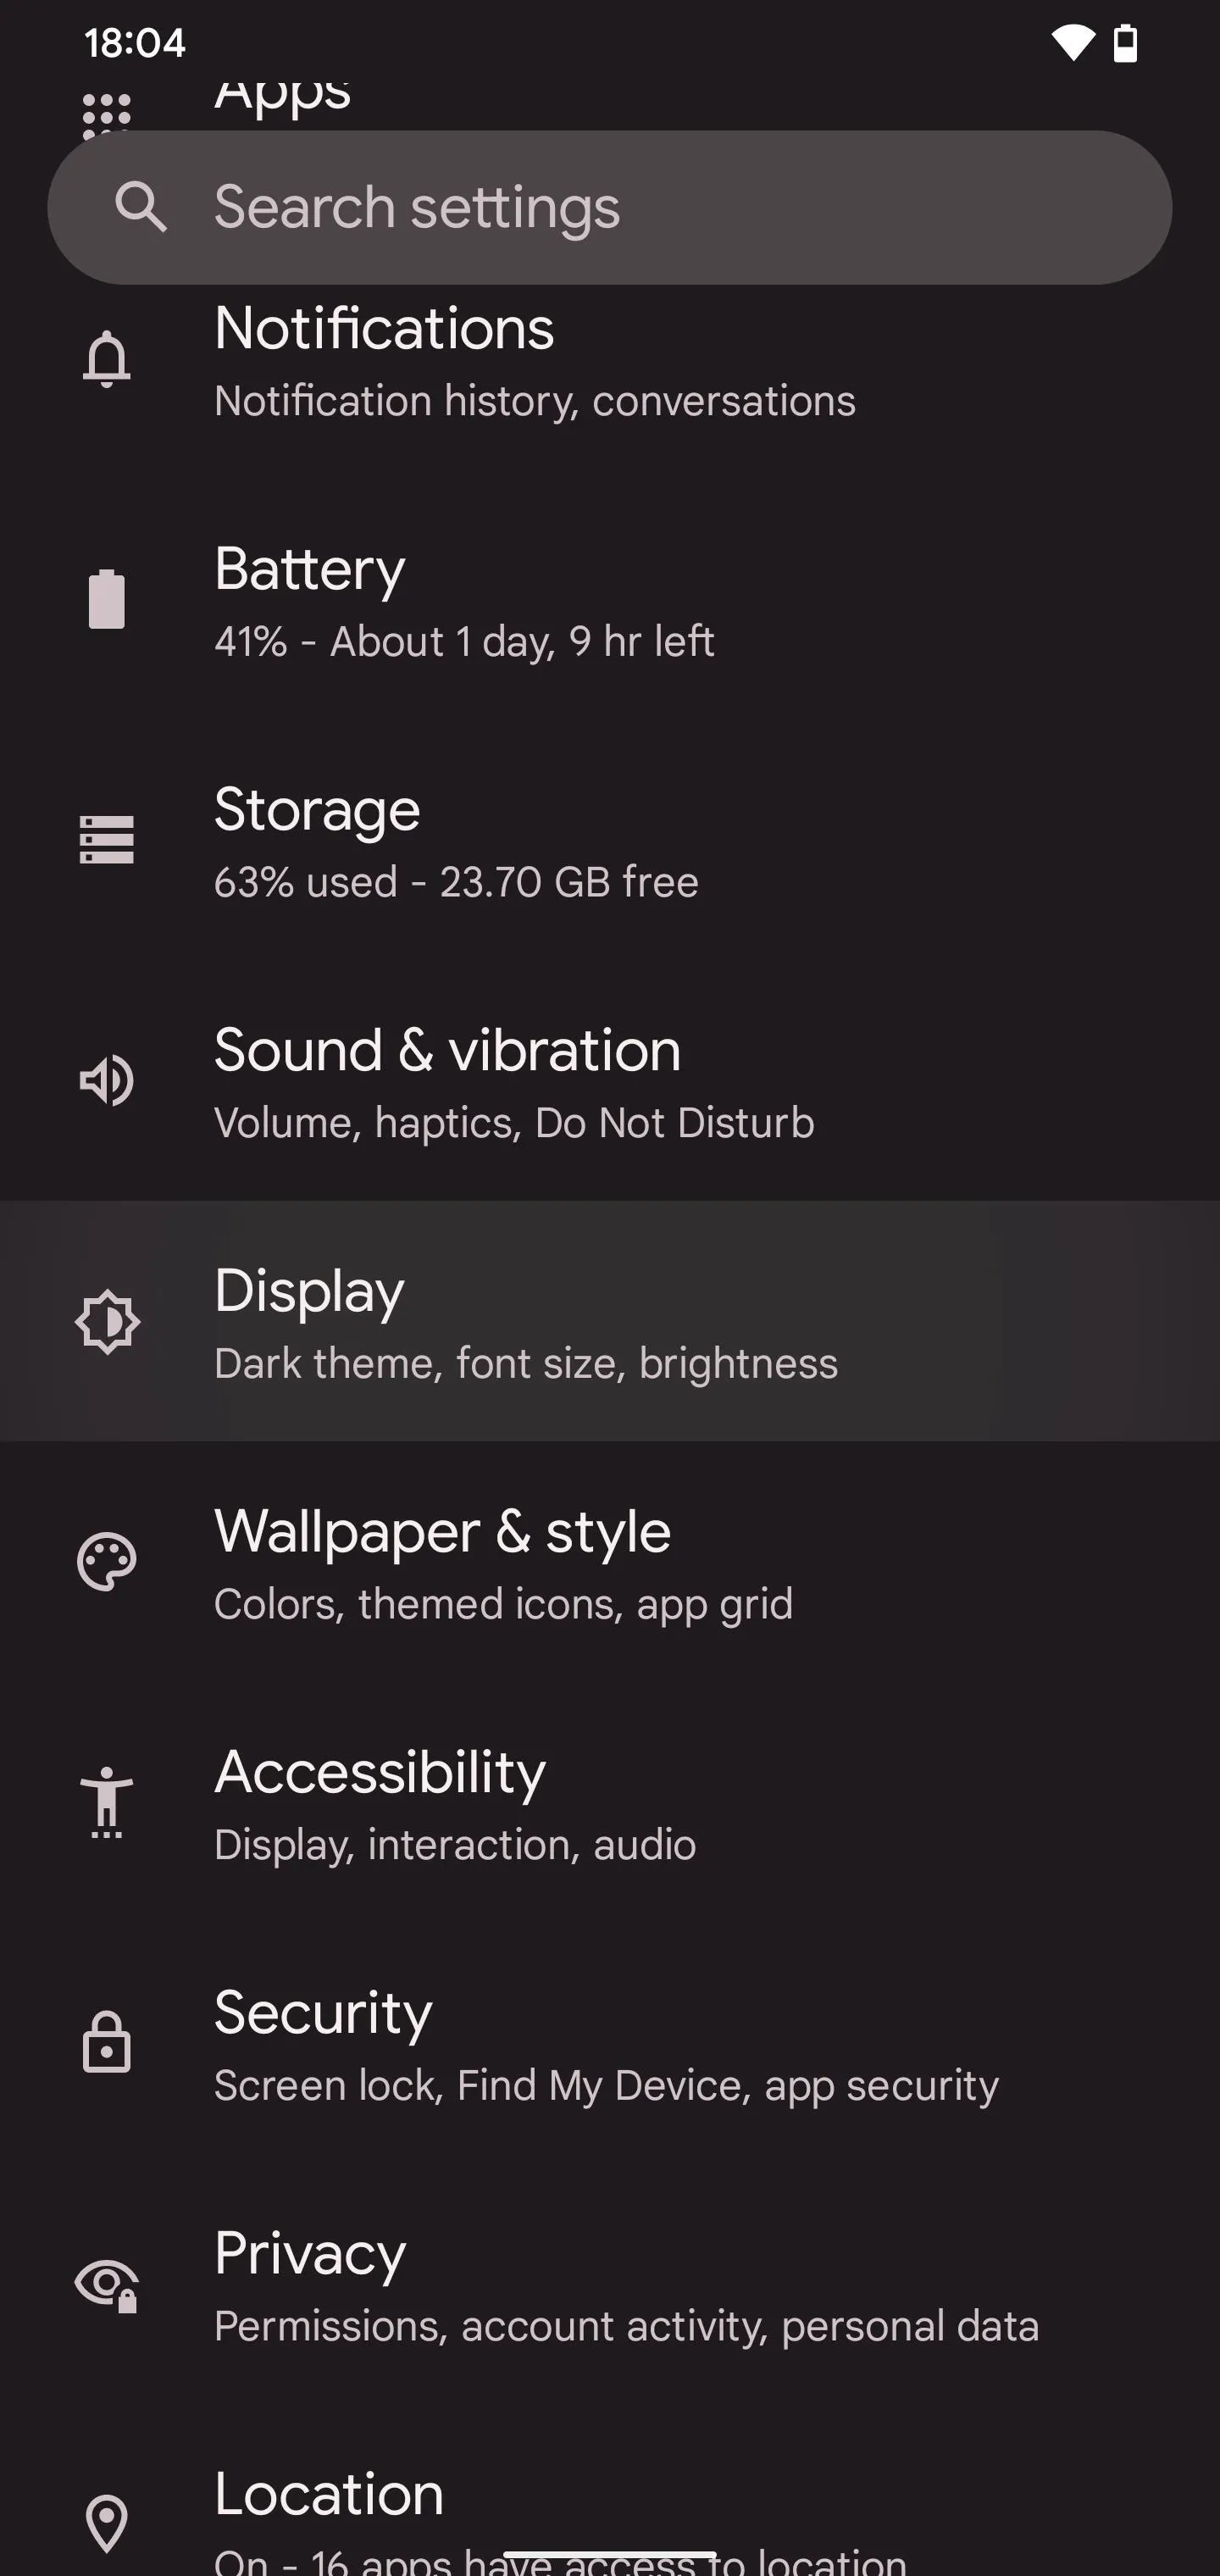
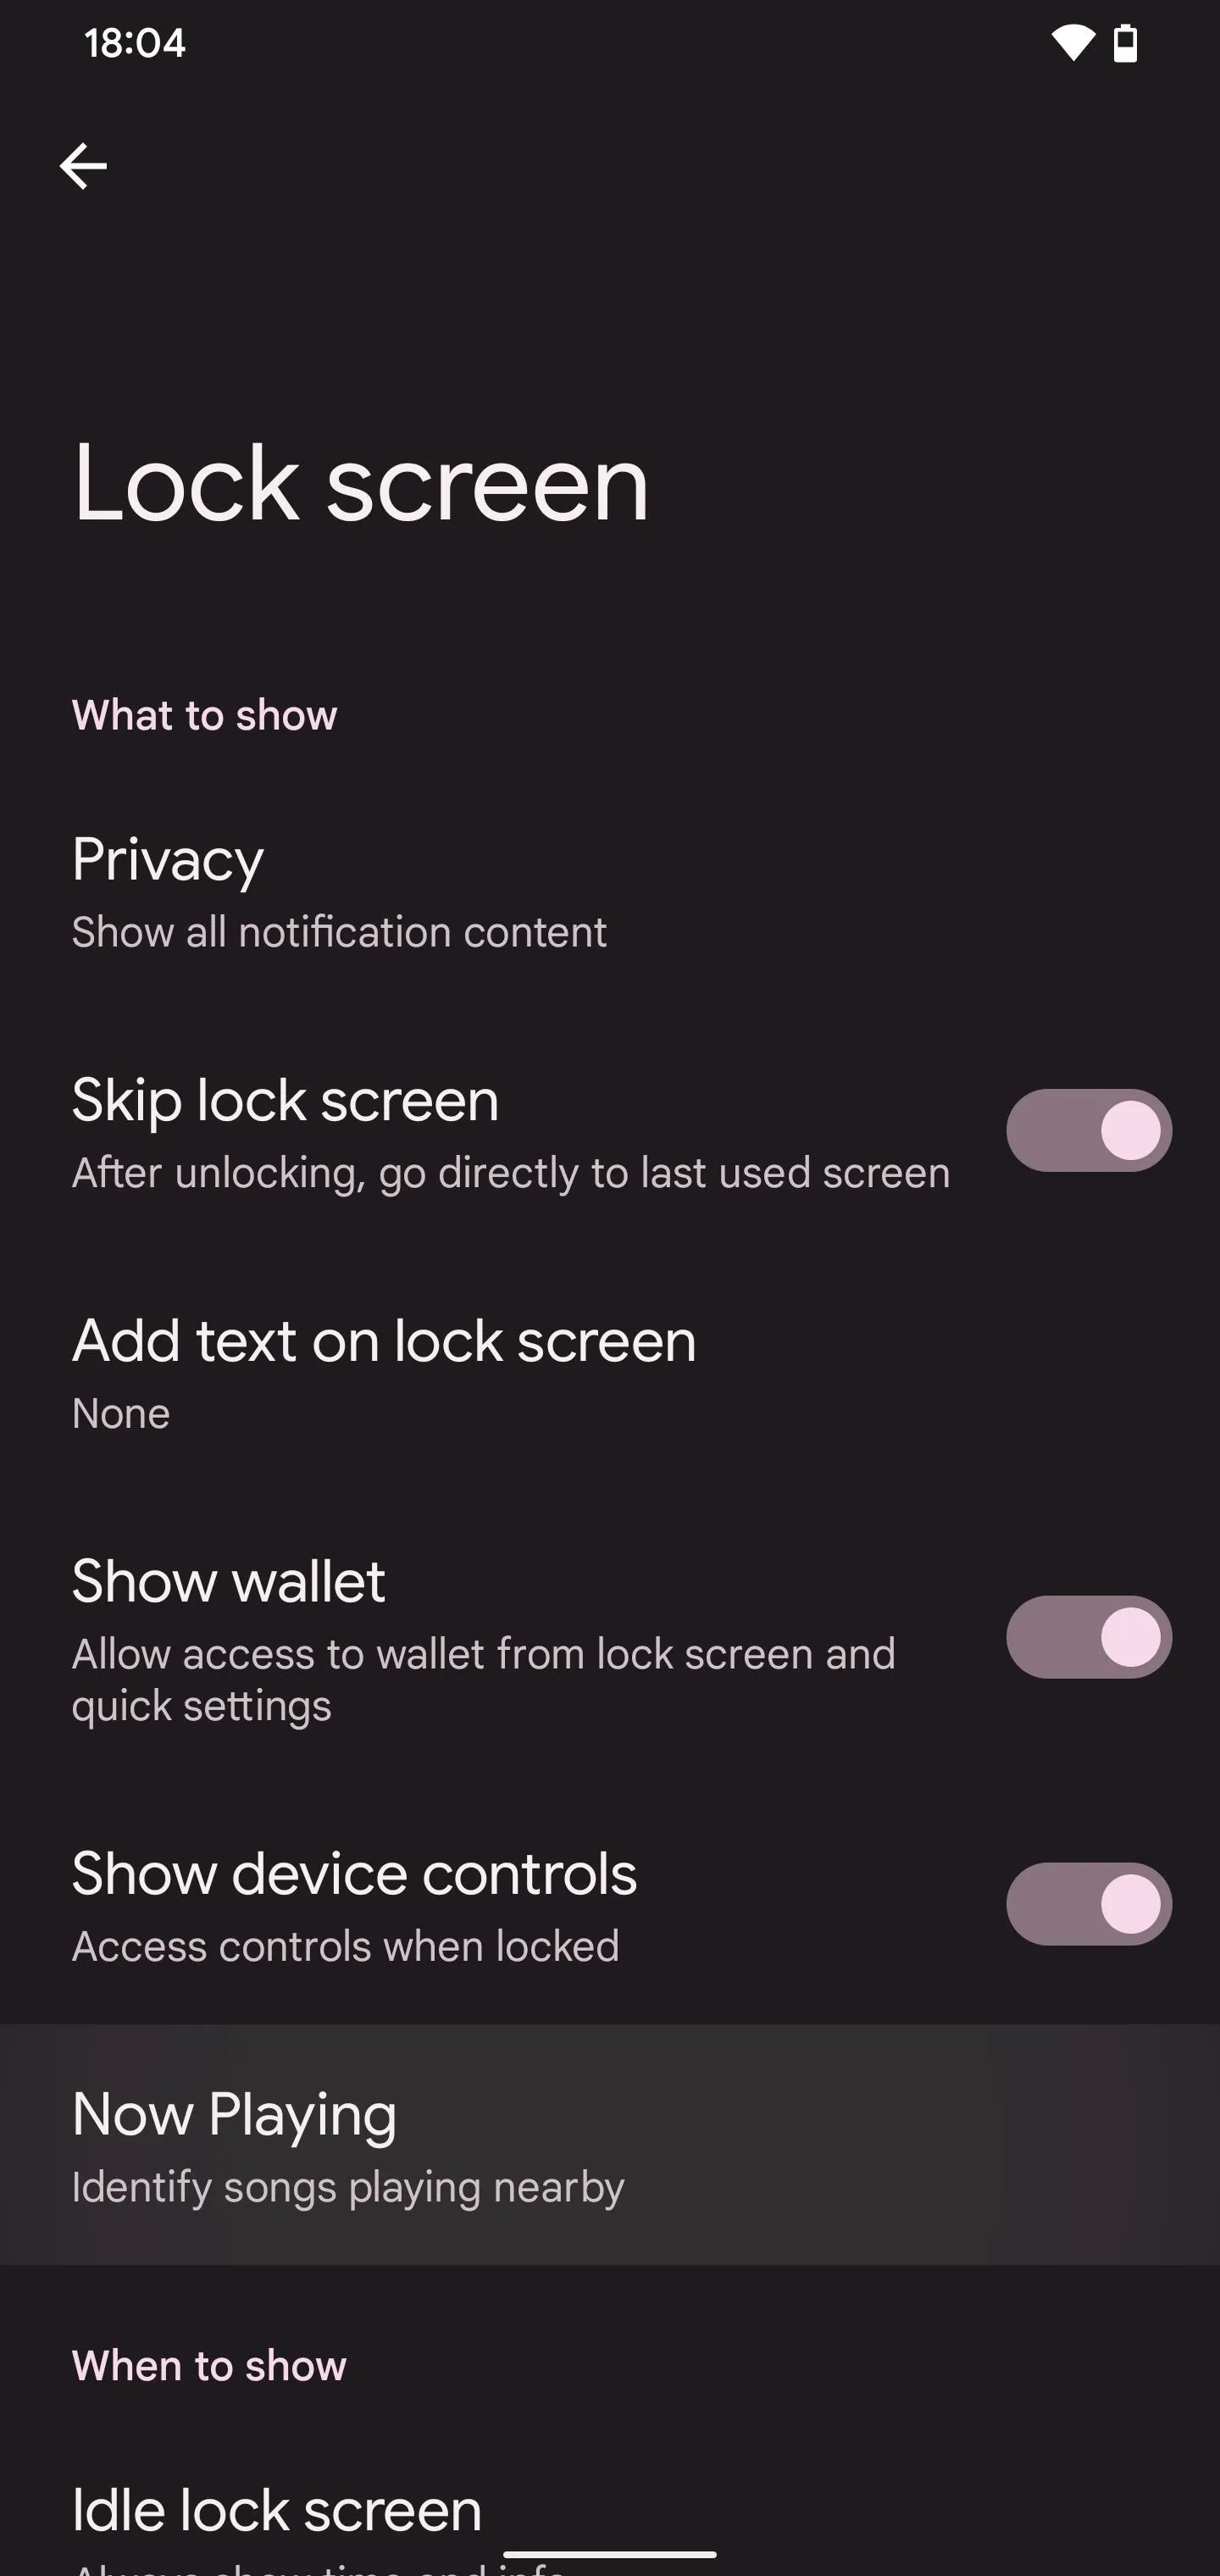
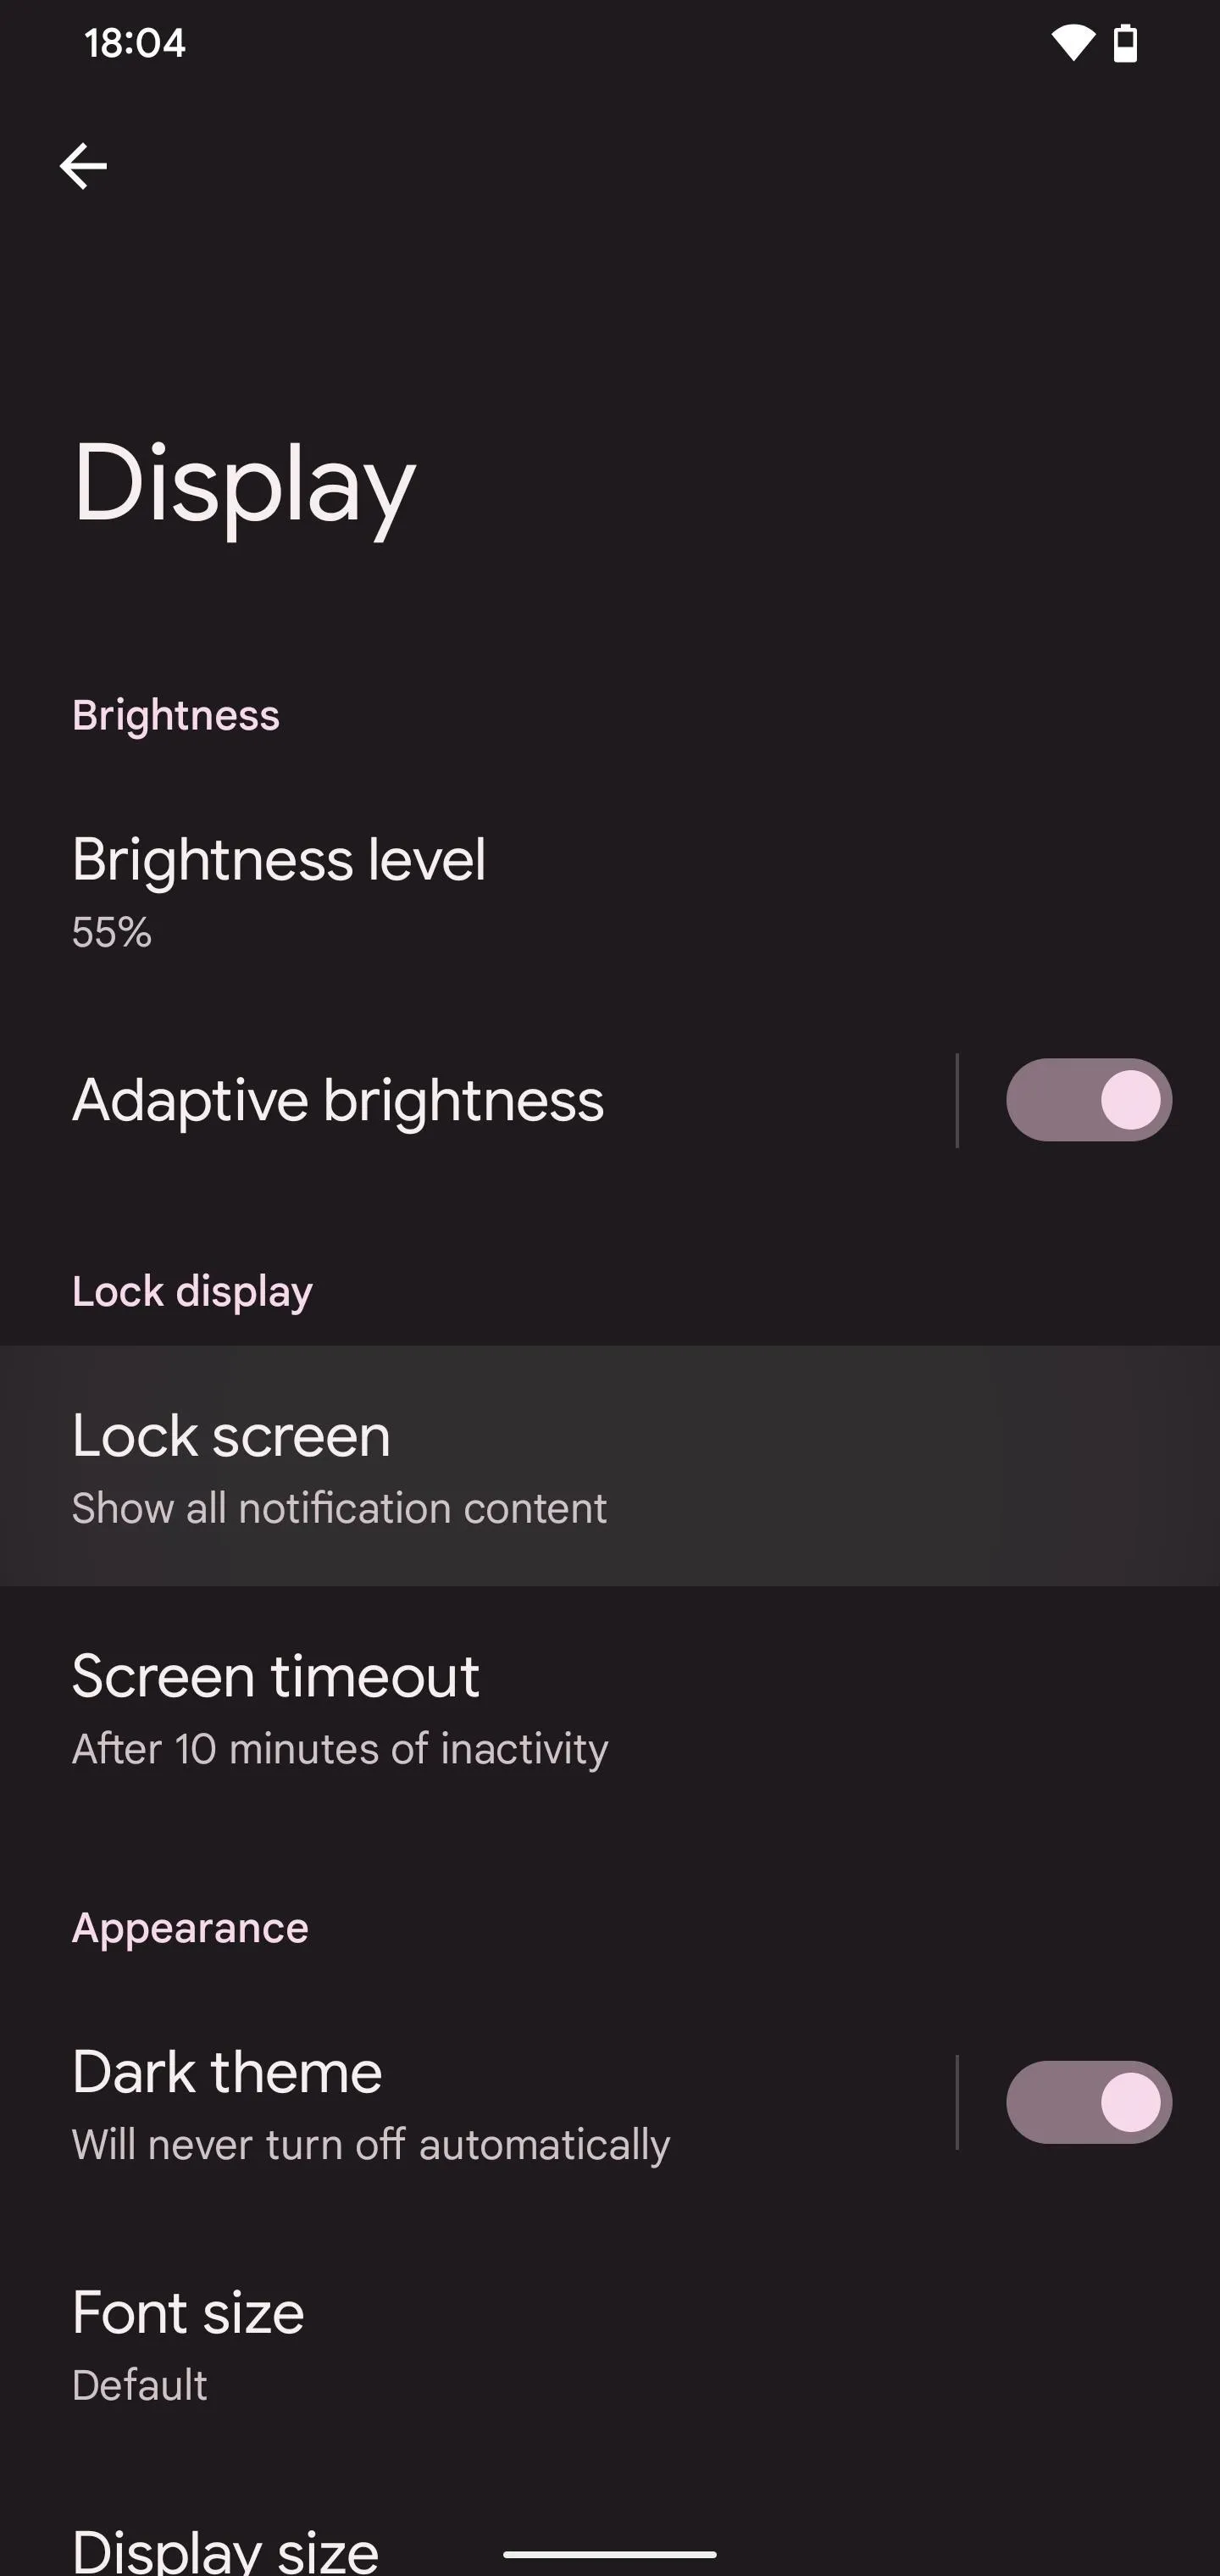


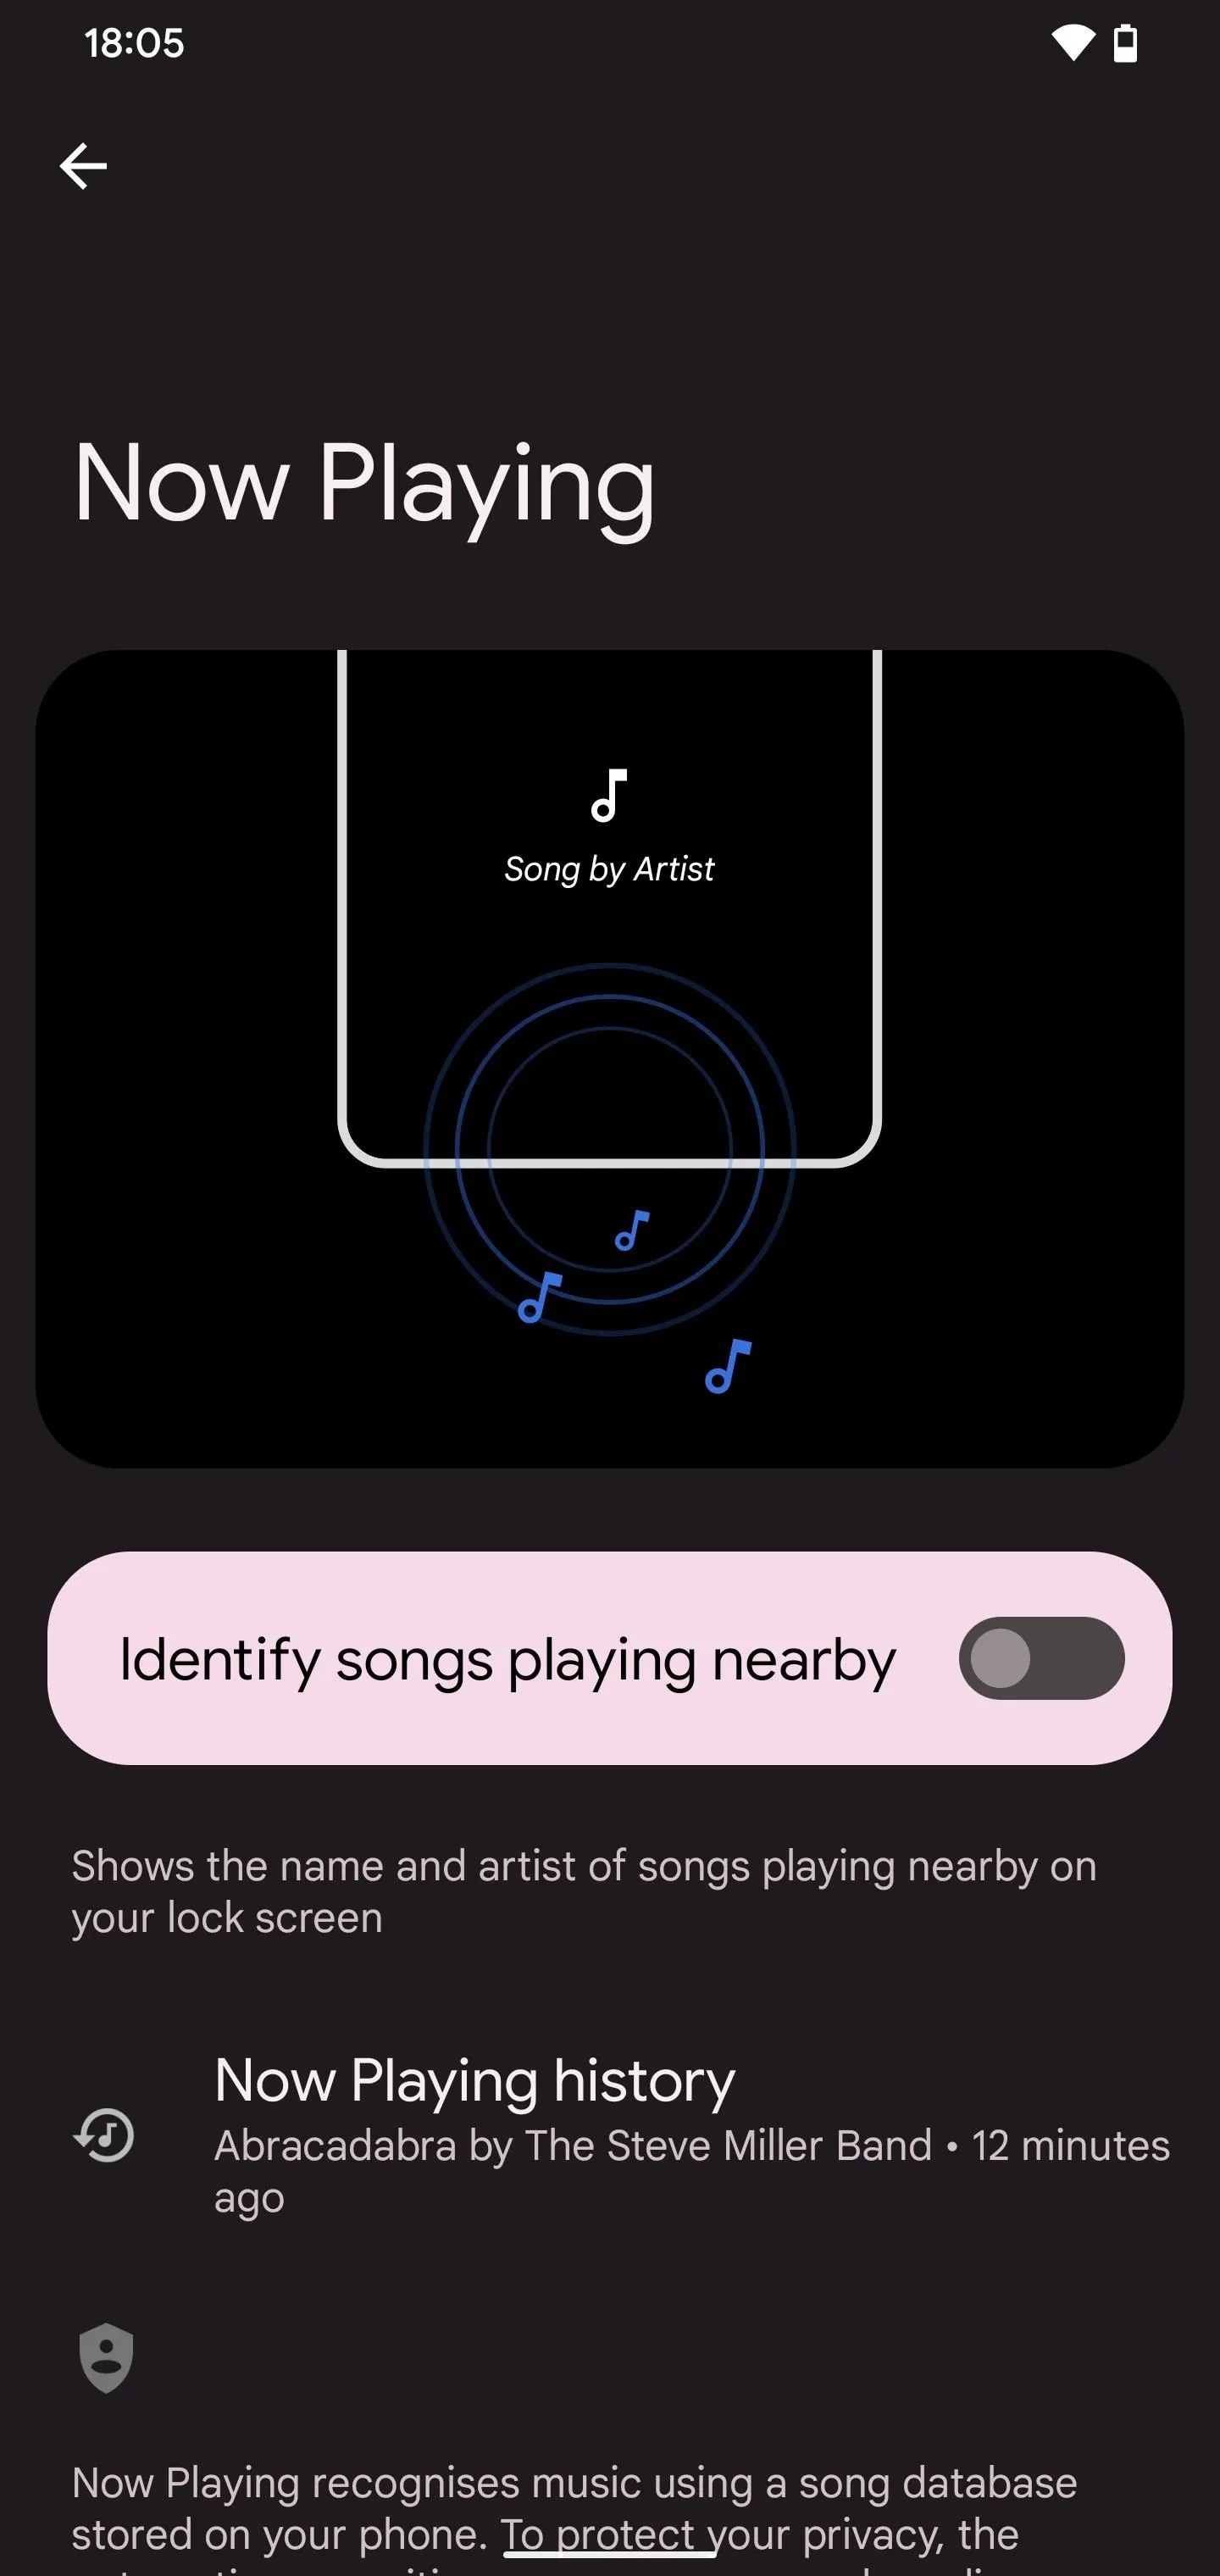
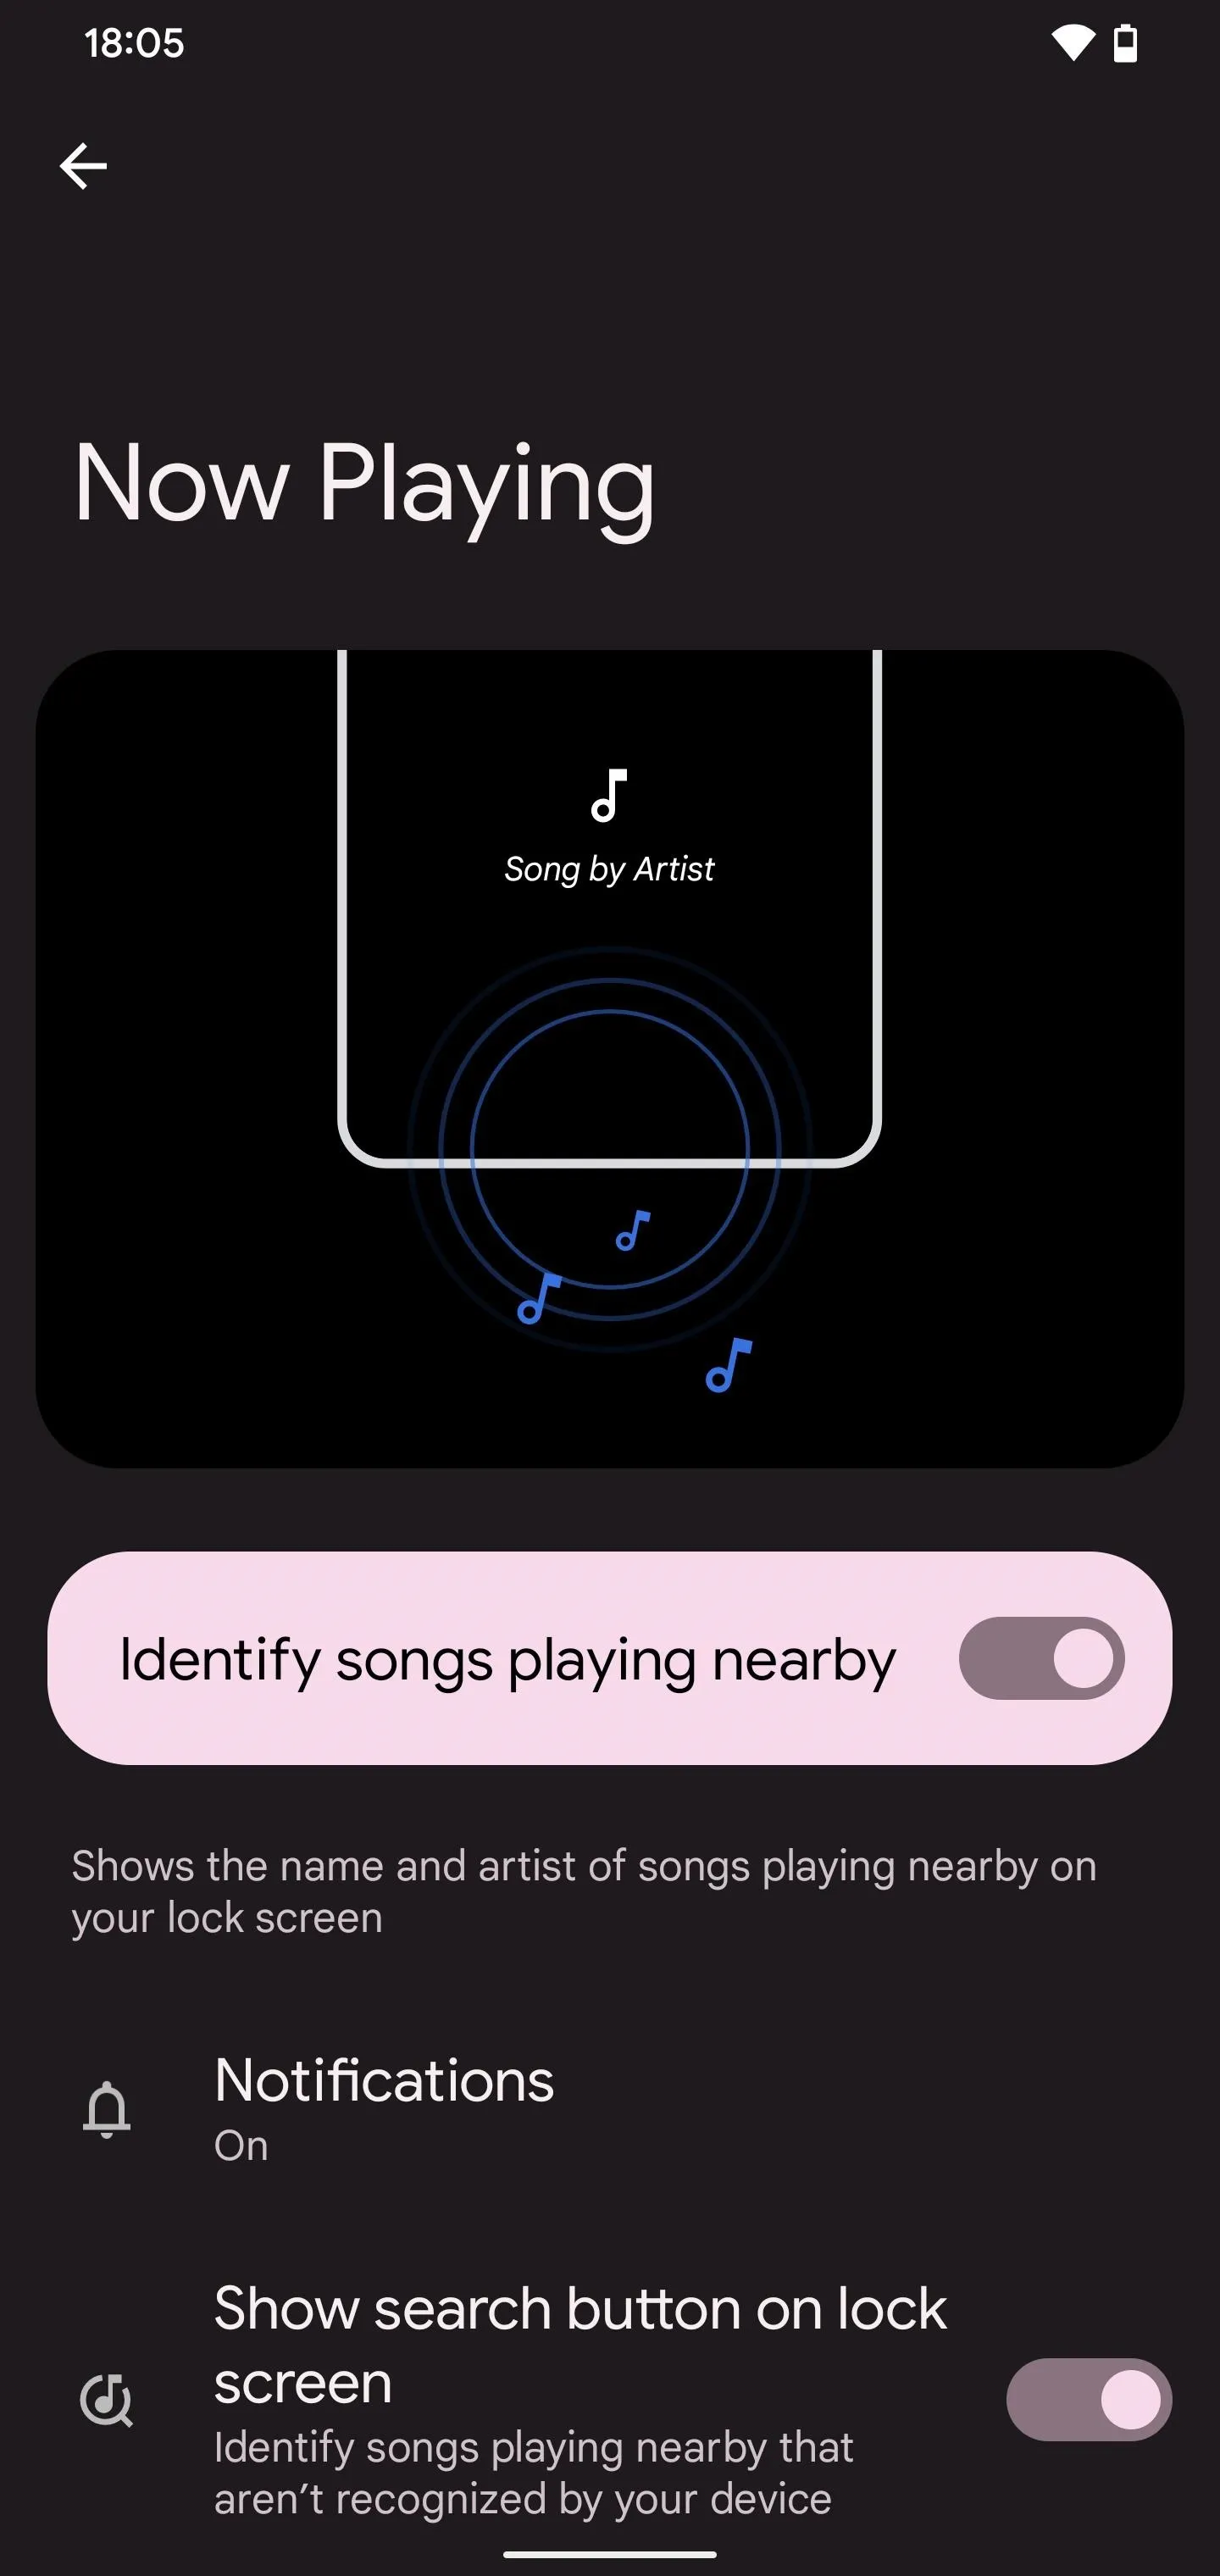
Then, in the Now Playing preferences, toggle the "Identify songs playing nearby" switch. Your phone may take a few minutes to download the song database on your device. Then, your phone can identify music without an internet connection using that database.
To protect your privacy, the automatic recognition process never sends audio or background conversations to Google. Now Playing uses privacy-preserving analytics.


Step 2: Customize Your Now Playing Notifications
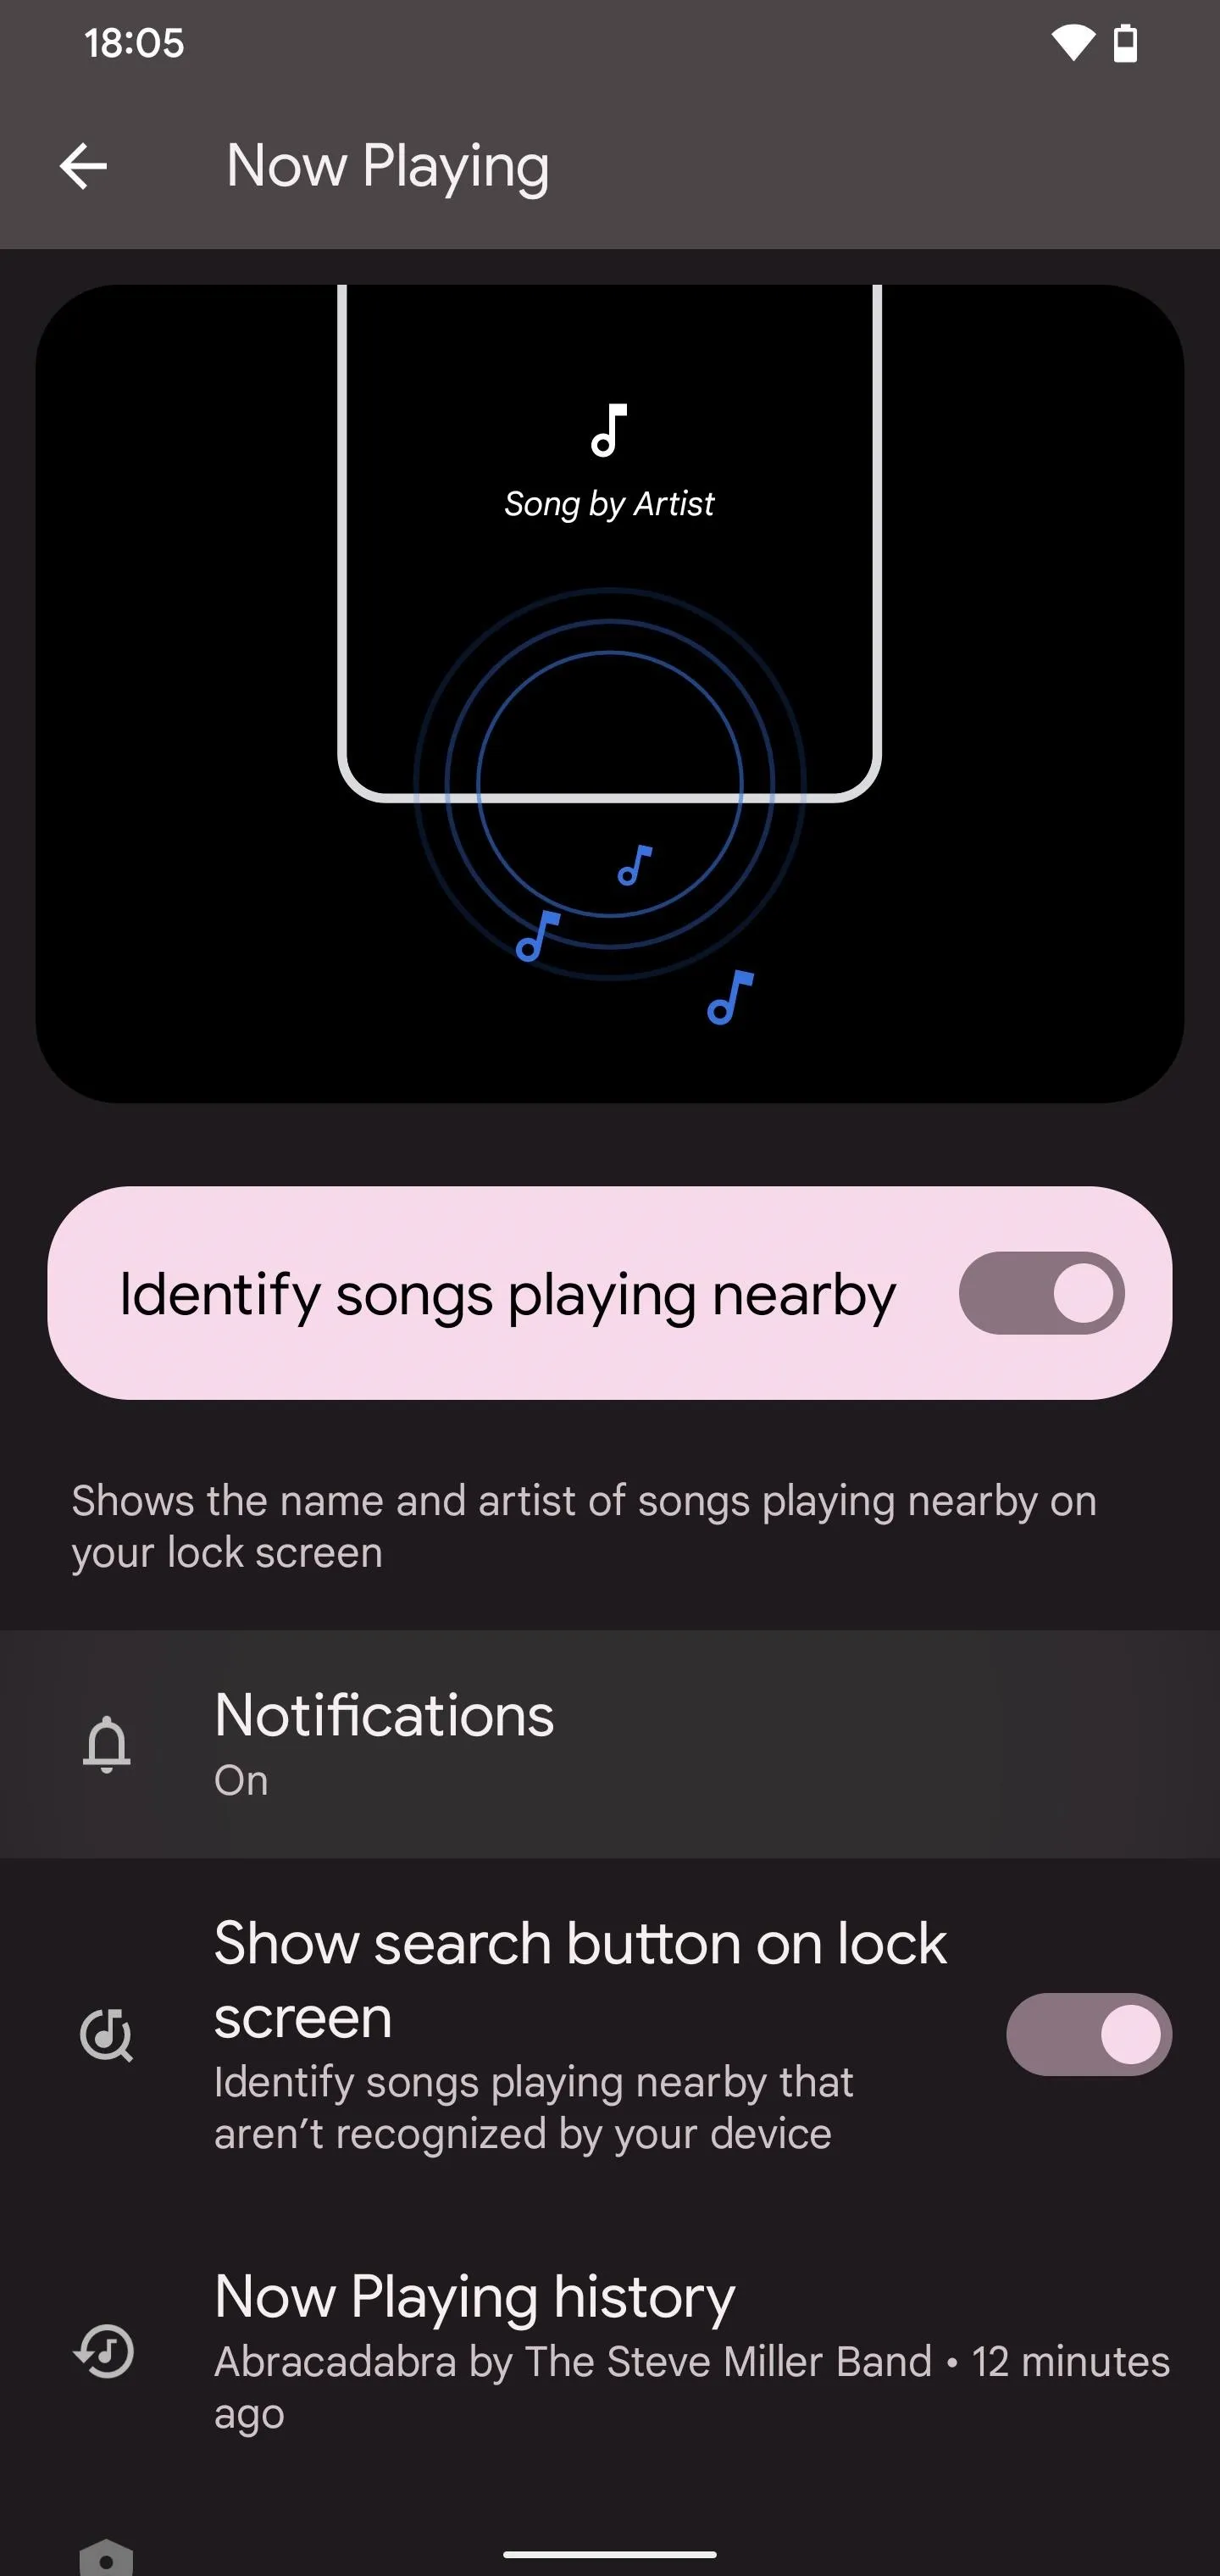
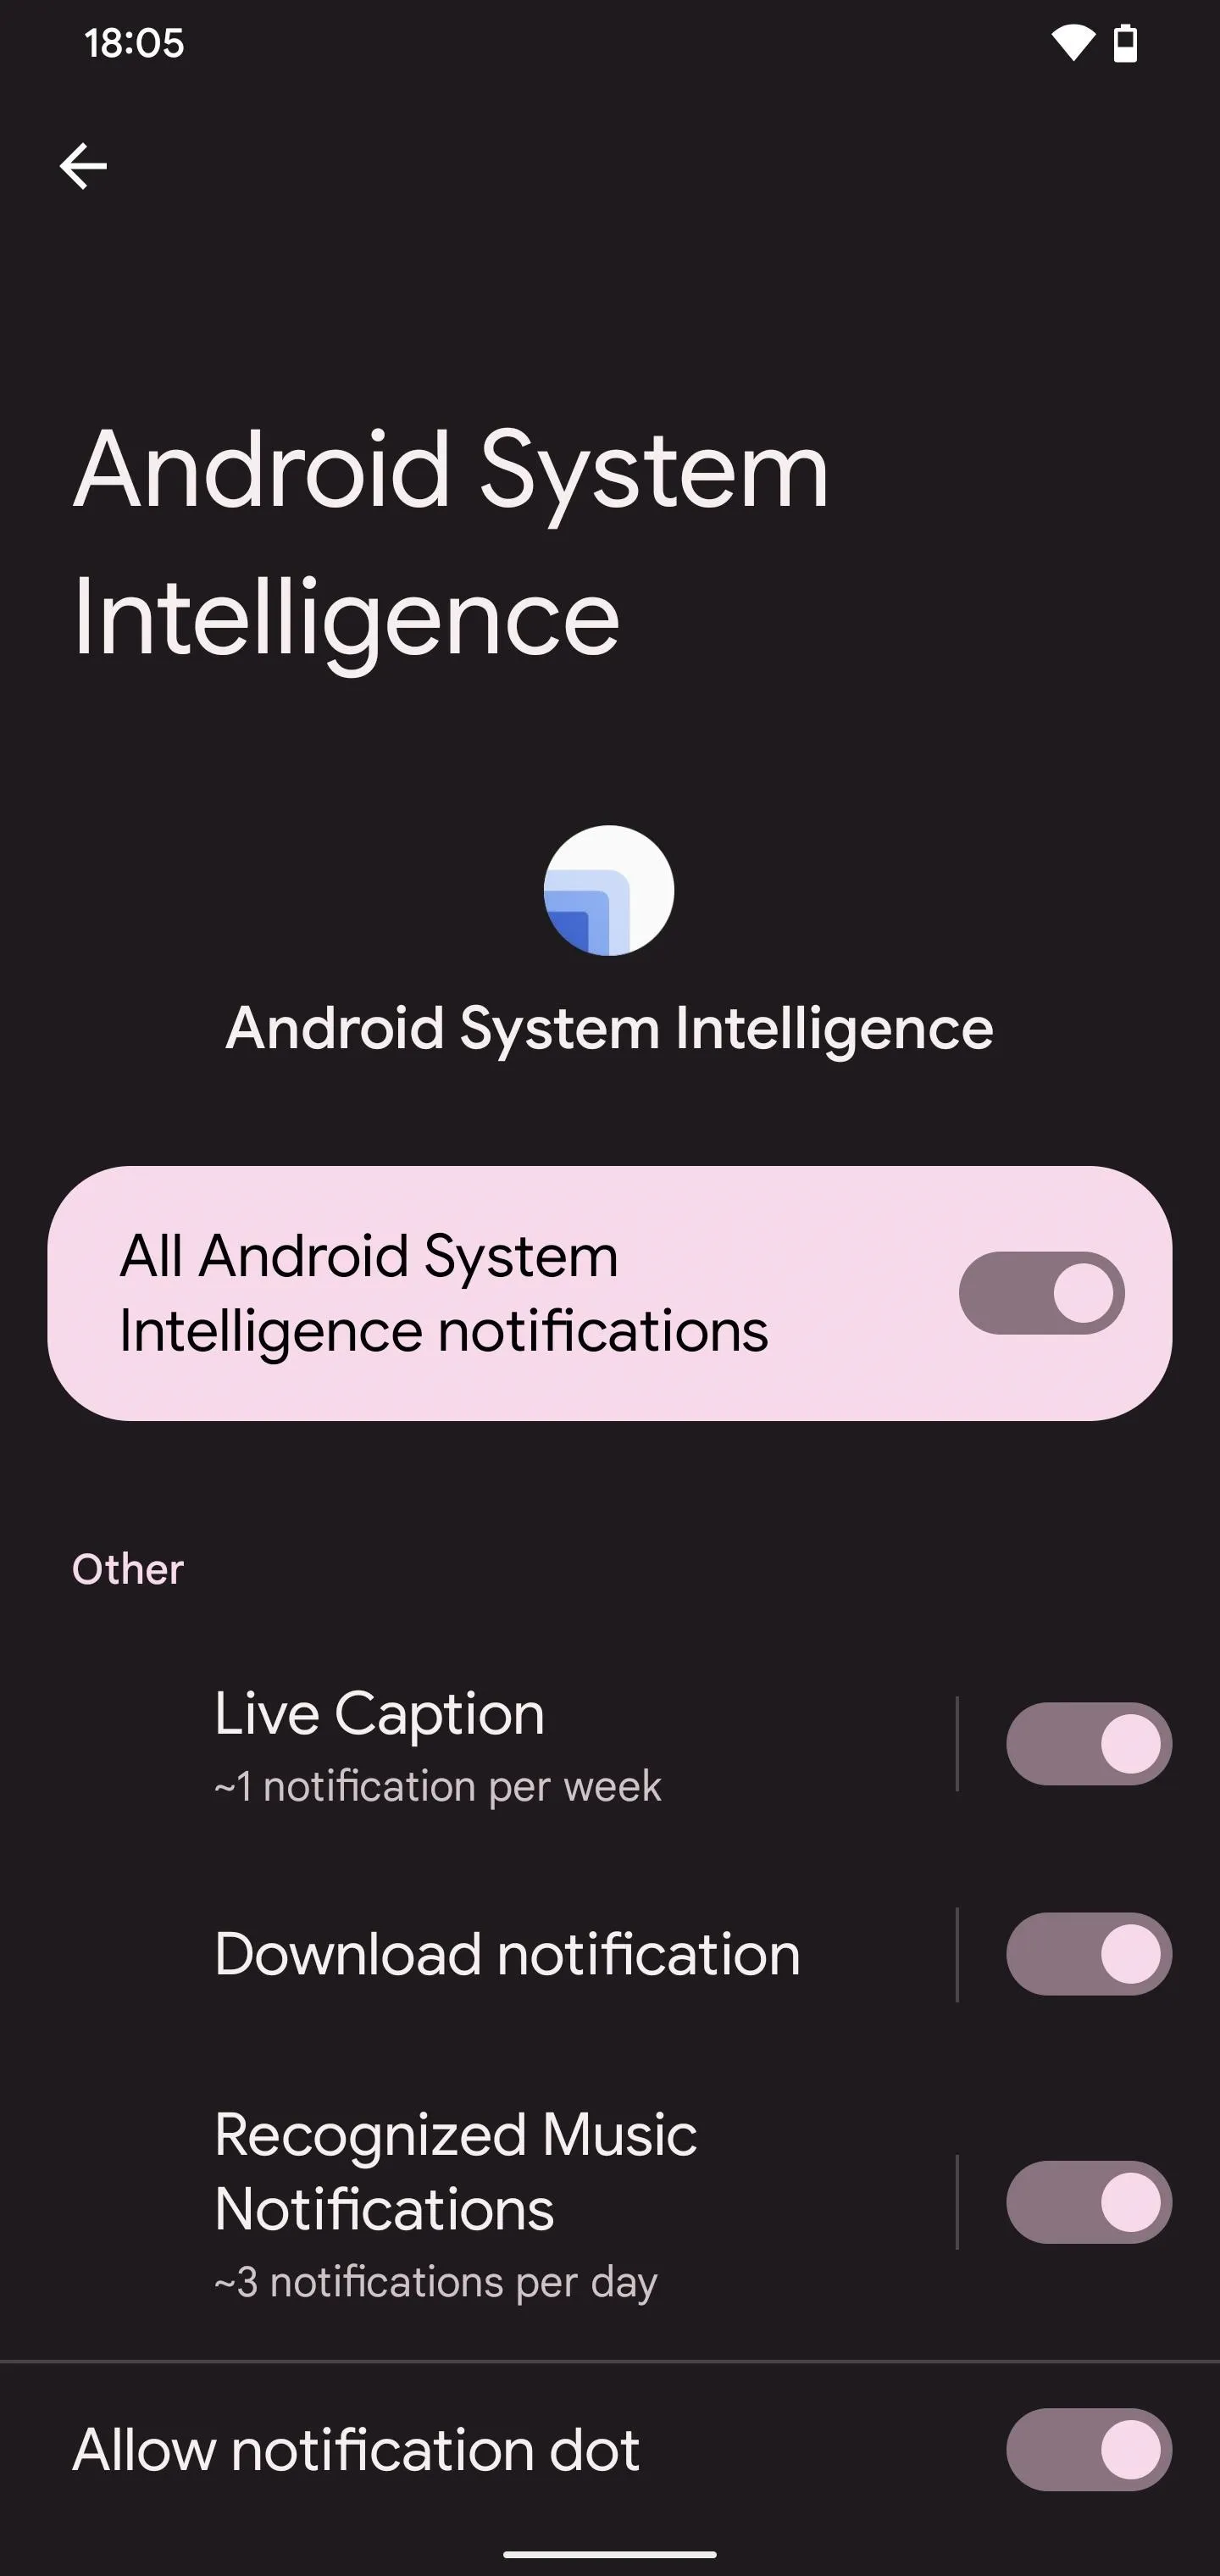
Now Playing offers a variety of settings to customize, the first of which is notifications for new songs it detects. Tapping "Notifications" in the Now Playing settings takes you to the Android System Intelligence screen, where you can toggle on or off the "Recognized Music Notifications" switch.
The switch will tell you the average number of notifications your phone may send you per day, based on your prior use. When enabled, detected songs will show up on your lock screen and in your notifications when unlocked.


Step 3: Activate the Now Playing Search Button
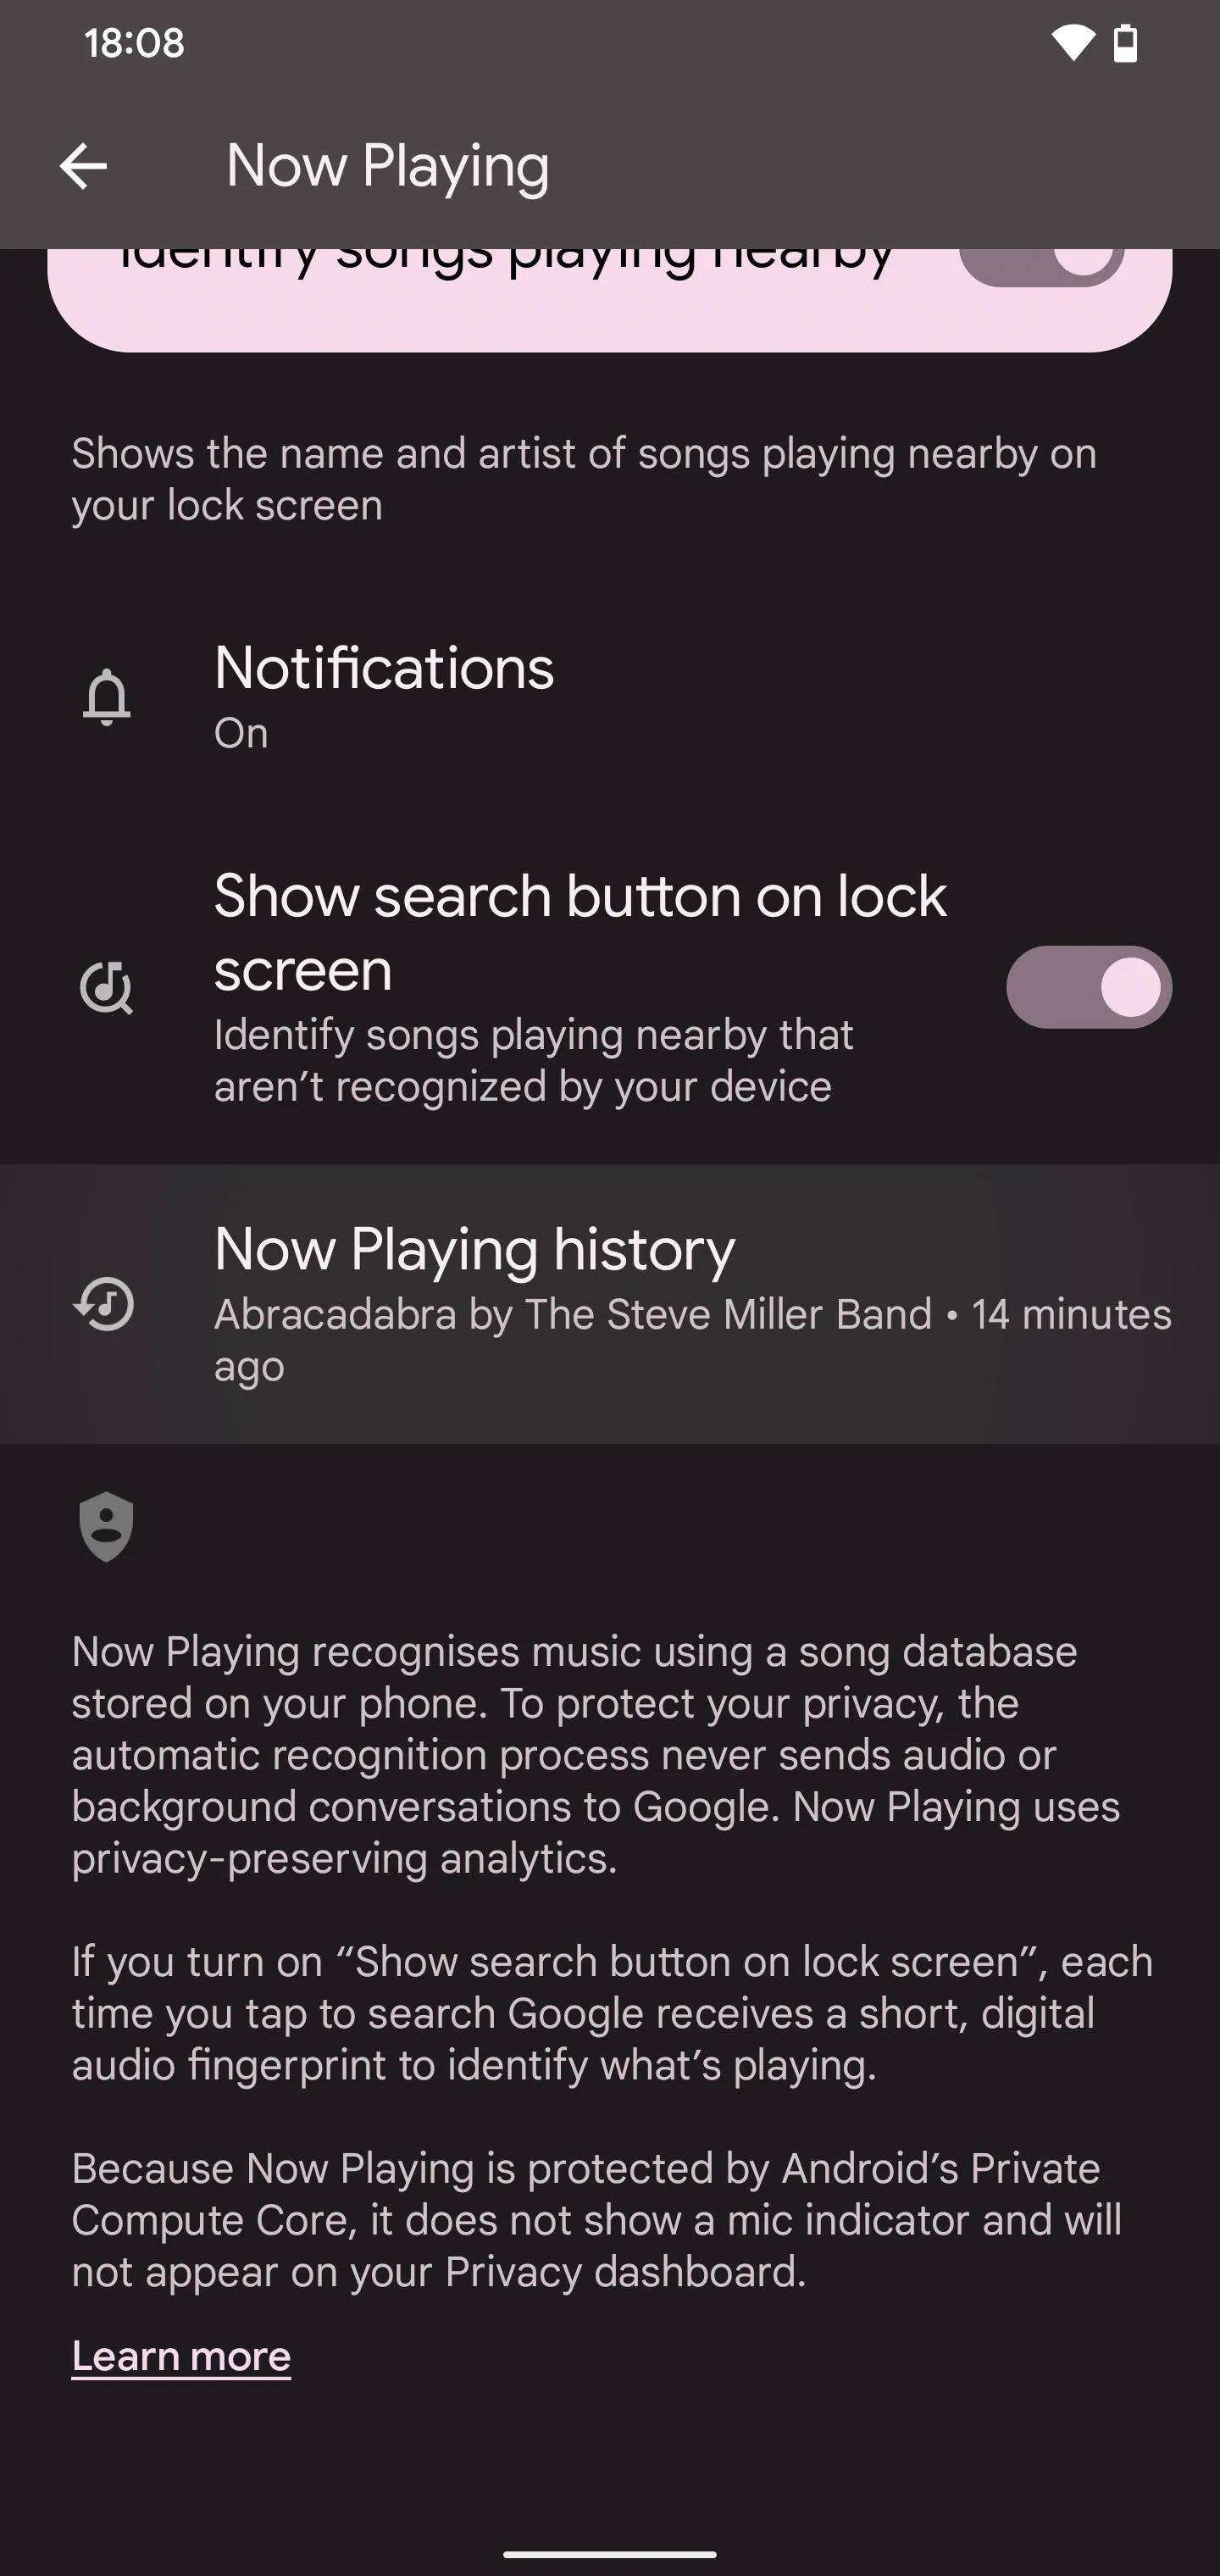
Also in the Now Playing settings is a switch for "Show search button on lock screen." Turning the switch on lets you manually "identify songs playing nearby that aren't recognized by your device."
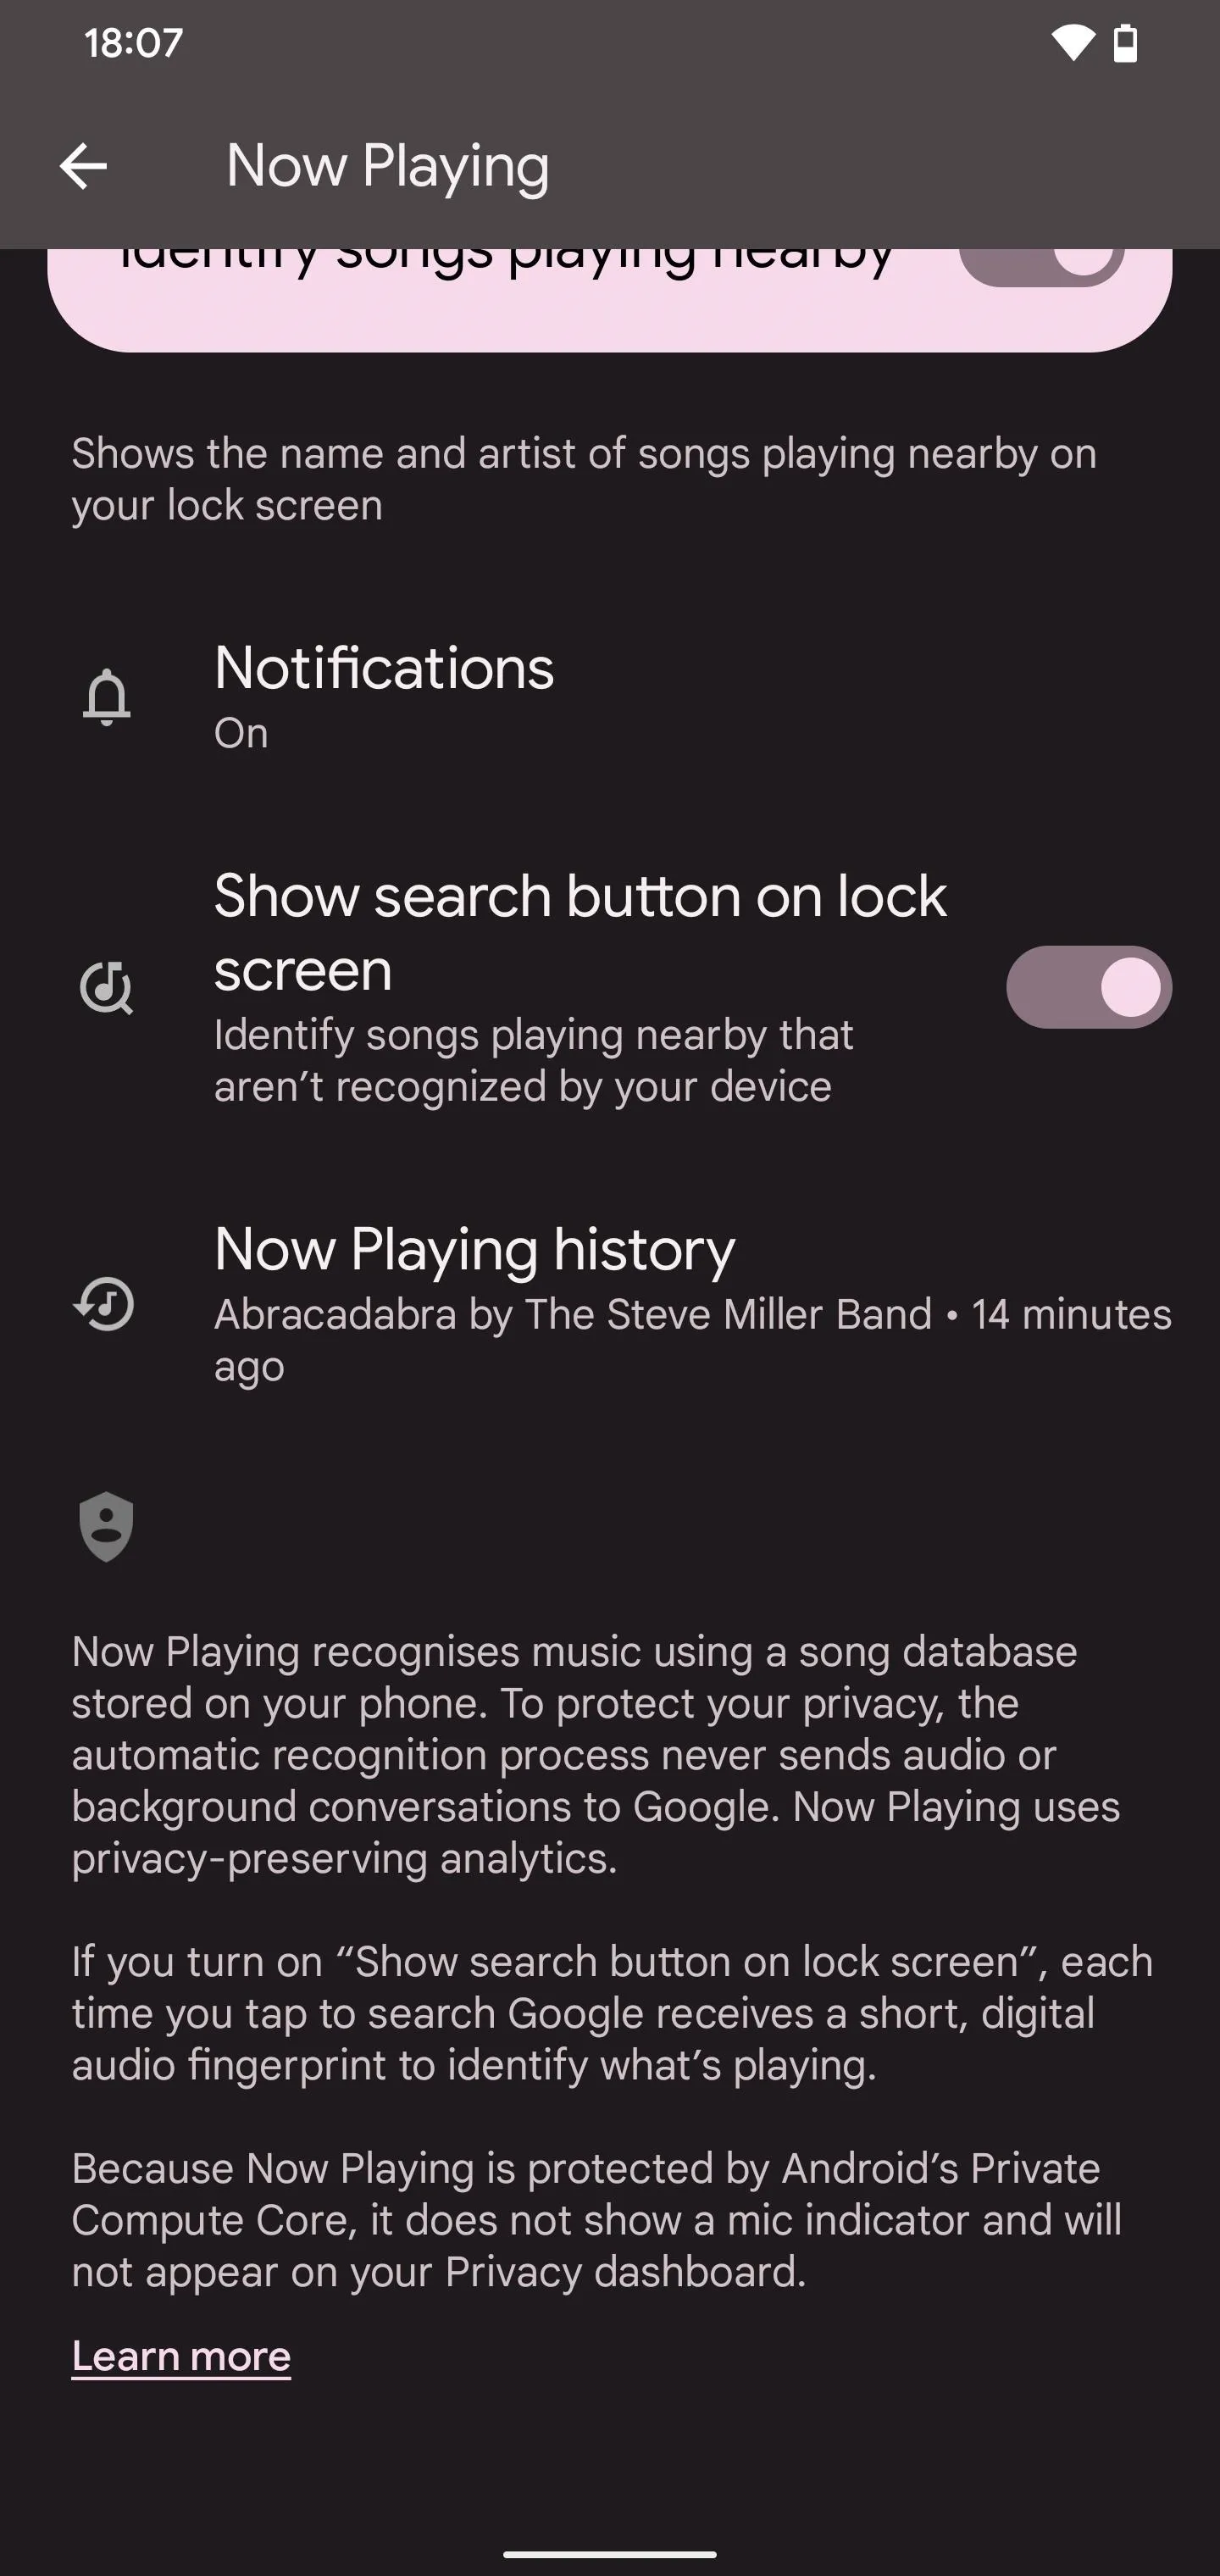
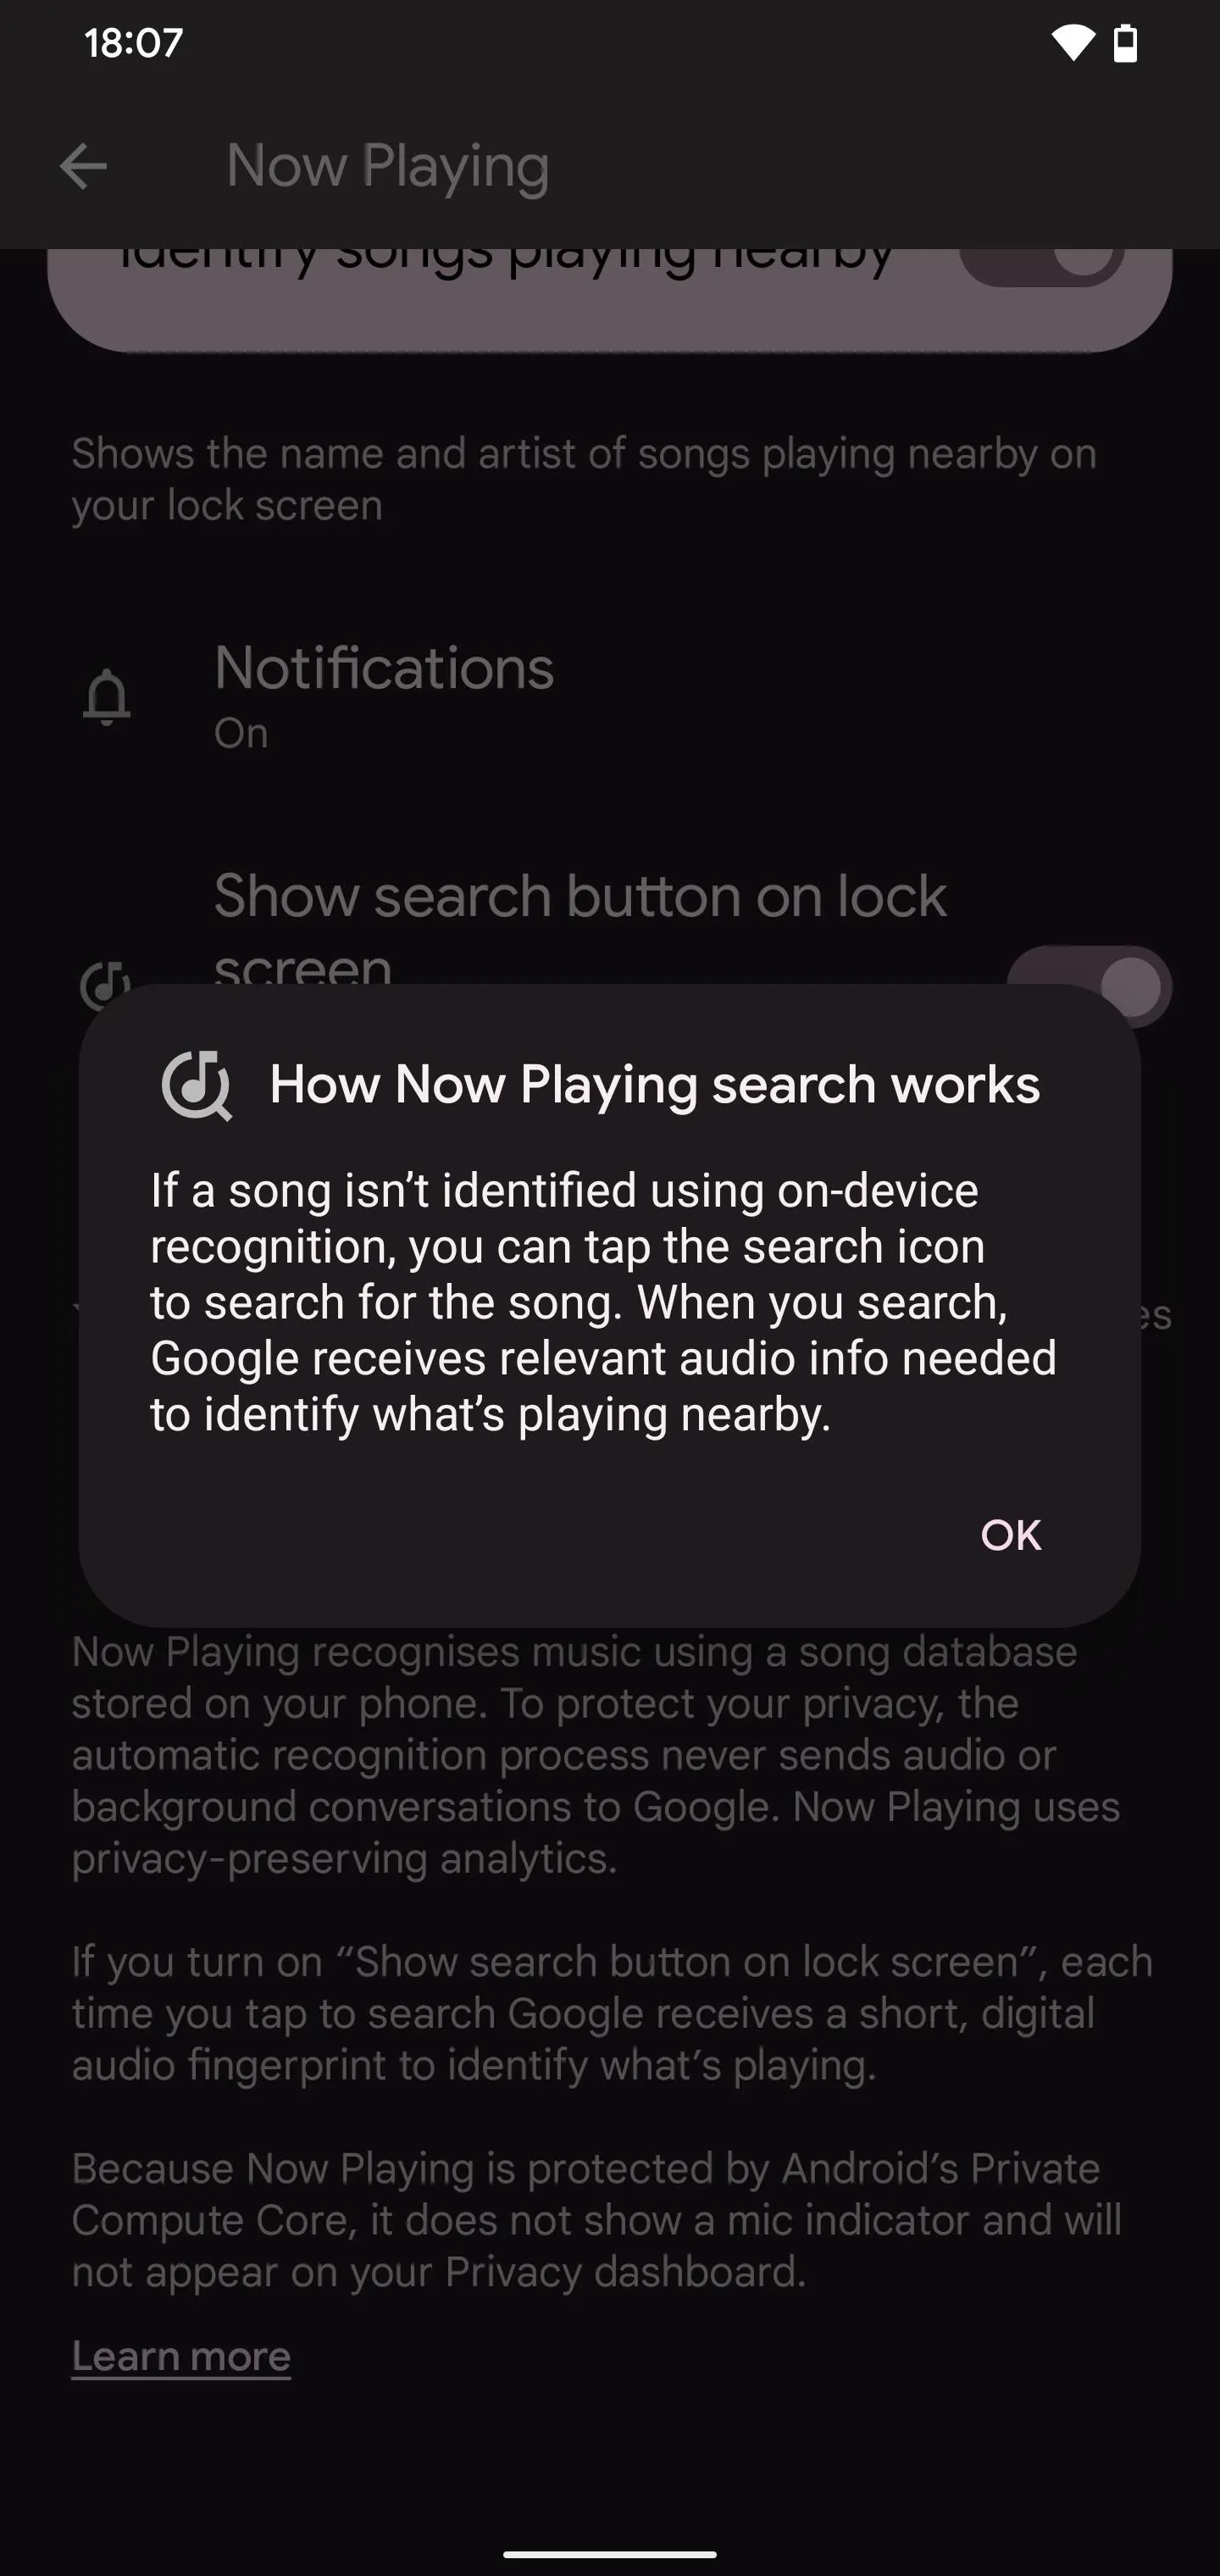


With it enabled, you can tap the small music search button near the bottom of your screen to make it listen to a song that it couldn't find itself automatically. An internet connection is needed since your phone will send Google a "short, digital audio fingerprint" to identify the music. This feature first became available in November's features drop for Google Pixel 4 and newer.
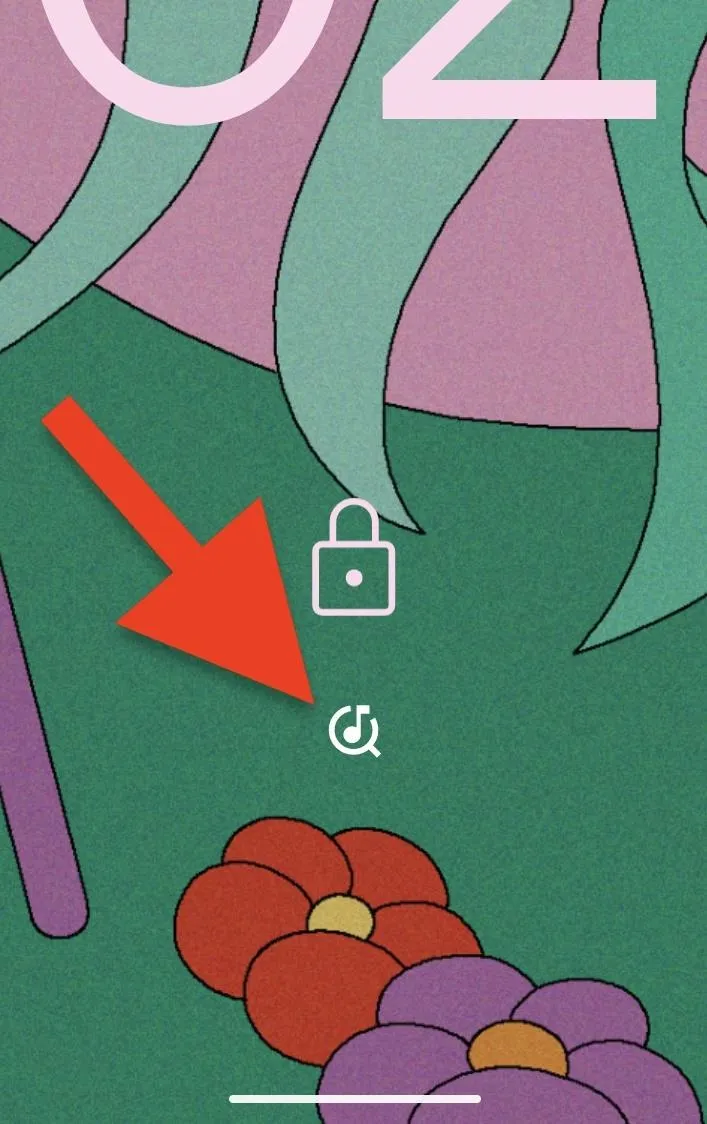
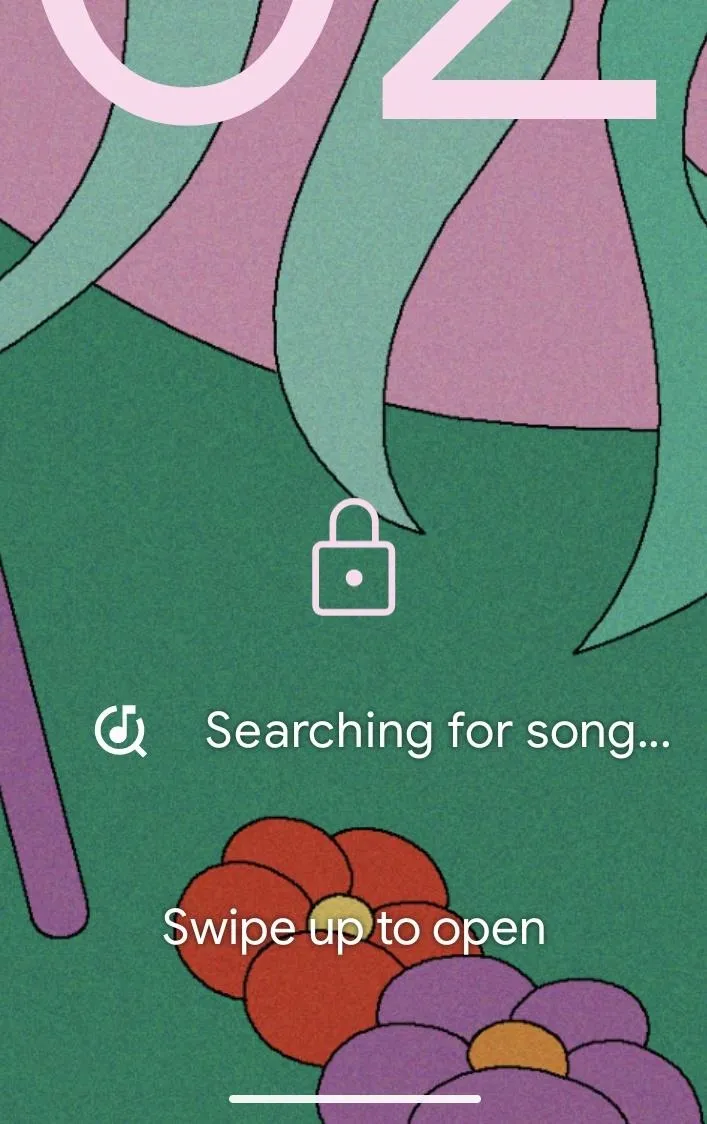
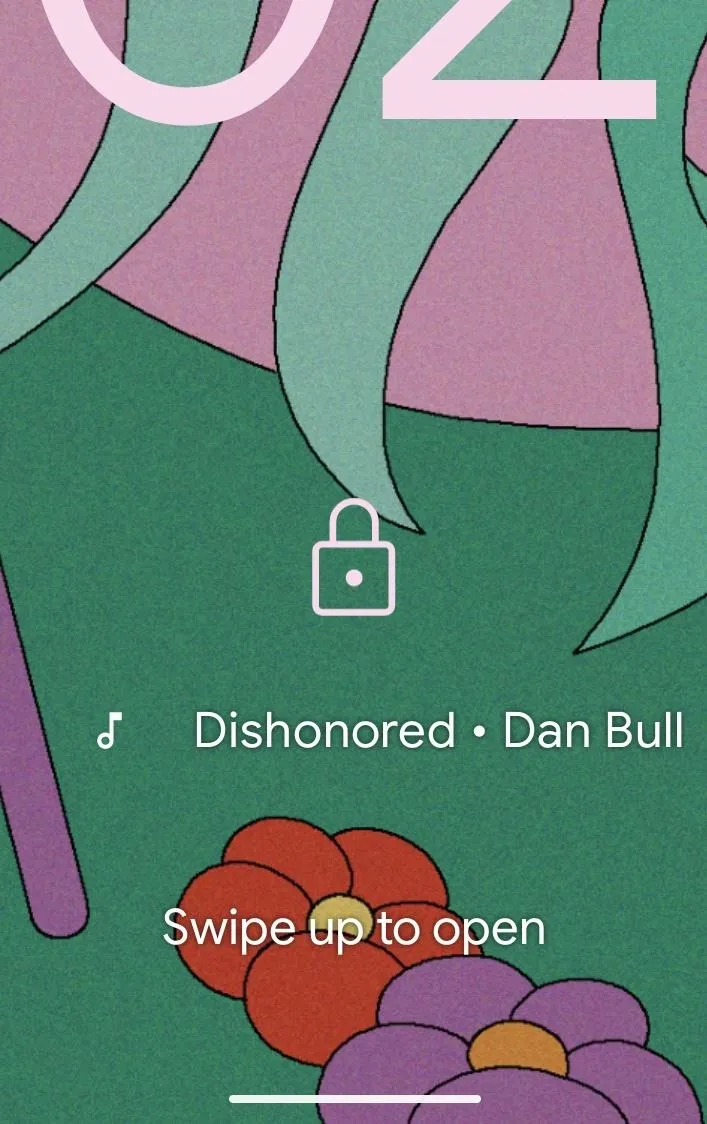


Note that the music search button is different from the "Search a song" option in the Google app's audio detection feature. The former connects to Now Playing, while the latter only performs a Google search for the identified music.
Step 4: Access Your Now Playing History
The last option in the Now Playing settings is "Now Playing history." Tap it to view all of the songs your phone detected automatically or manually.
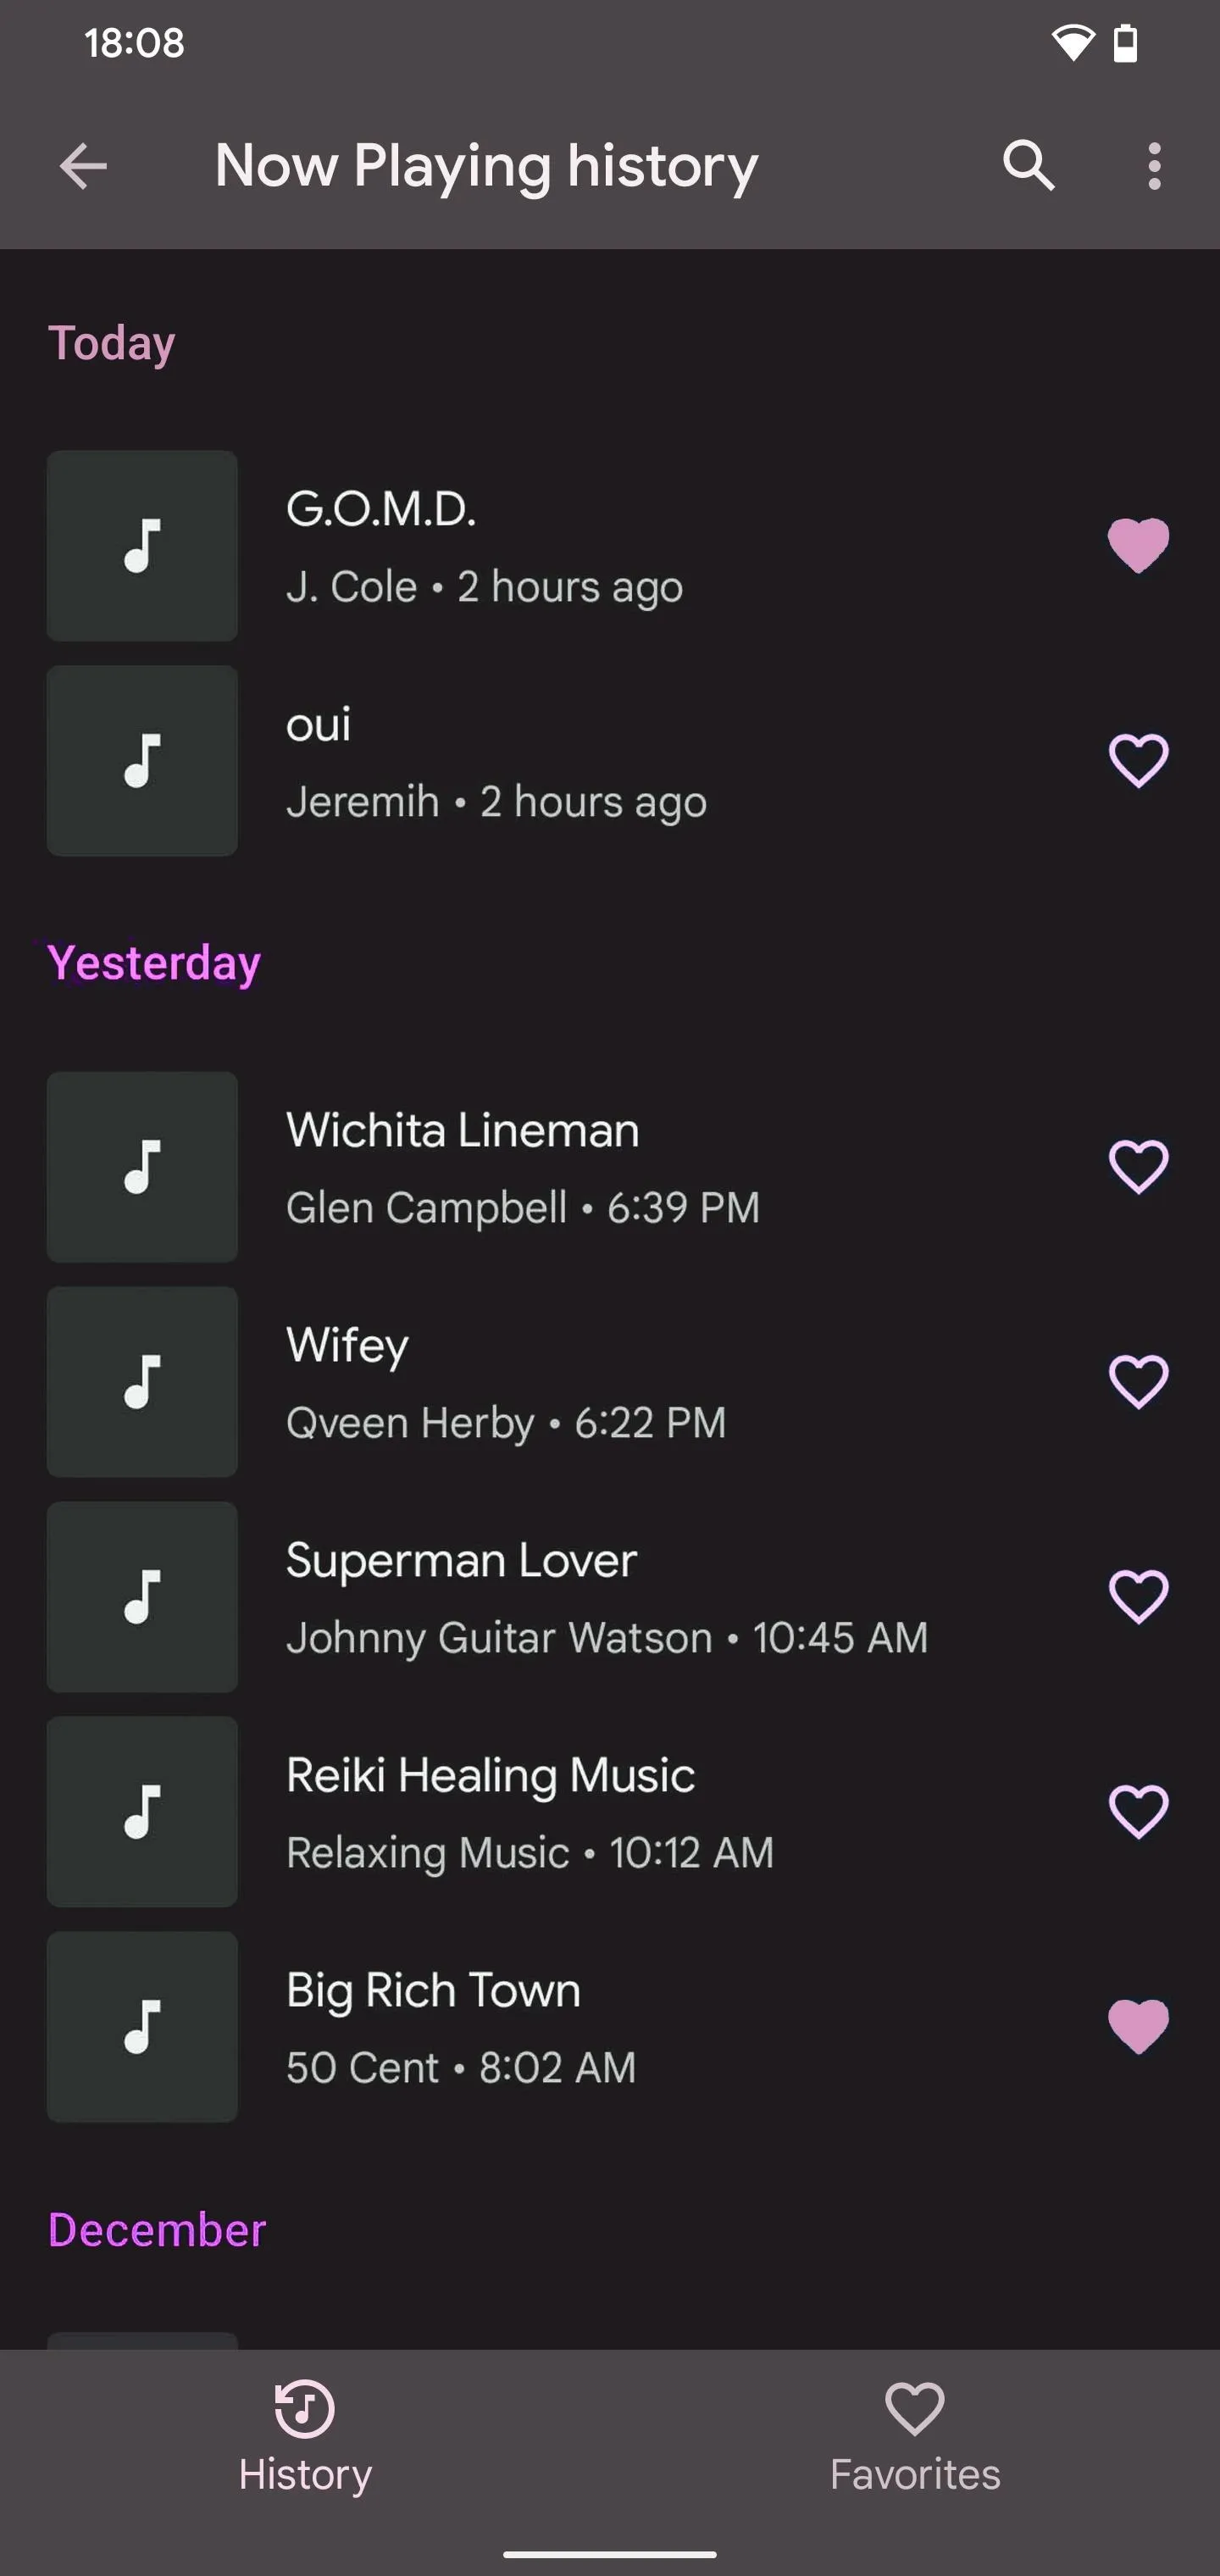


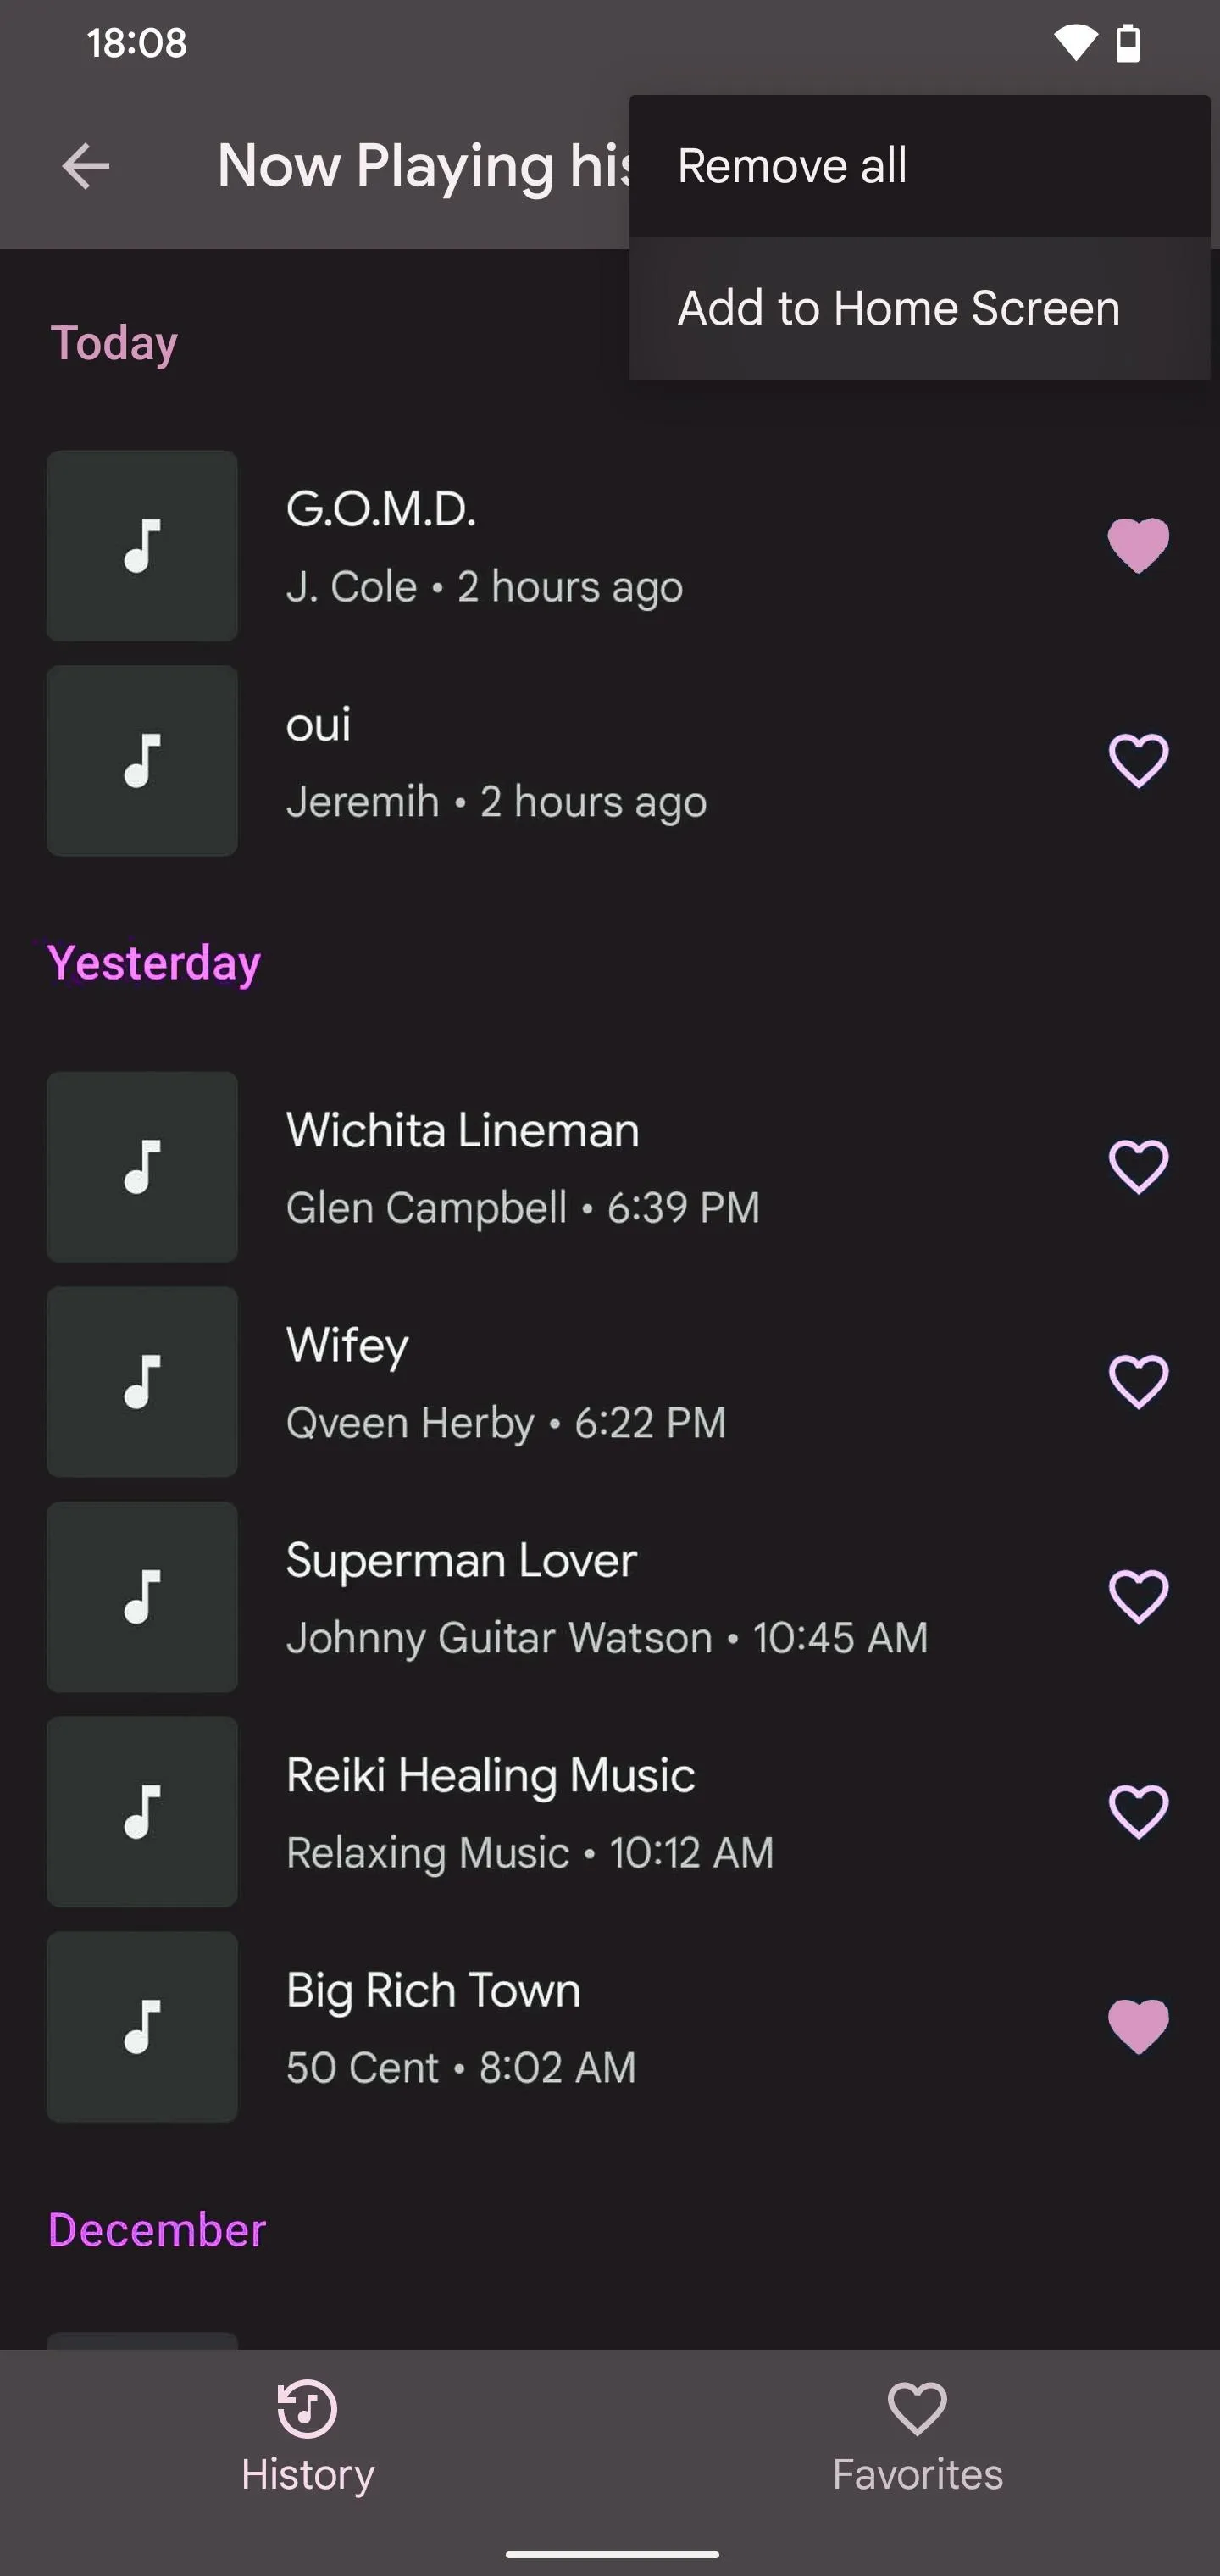
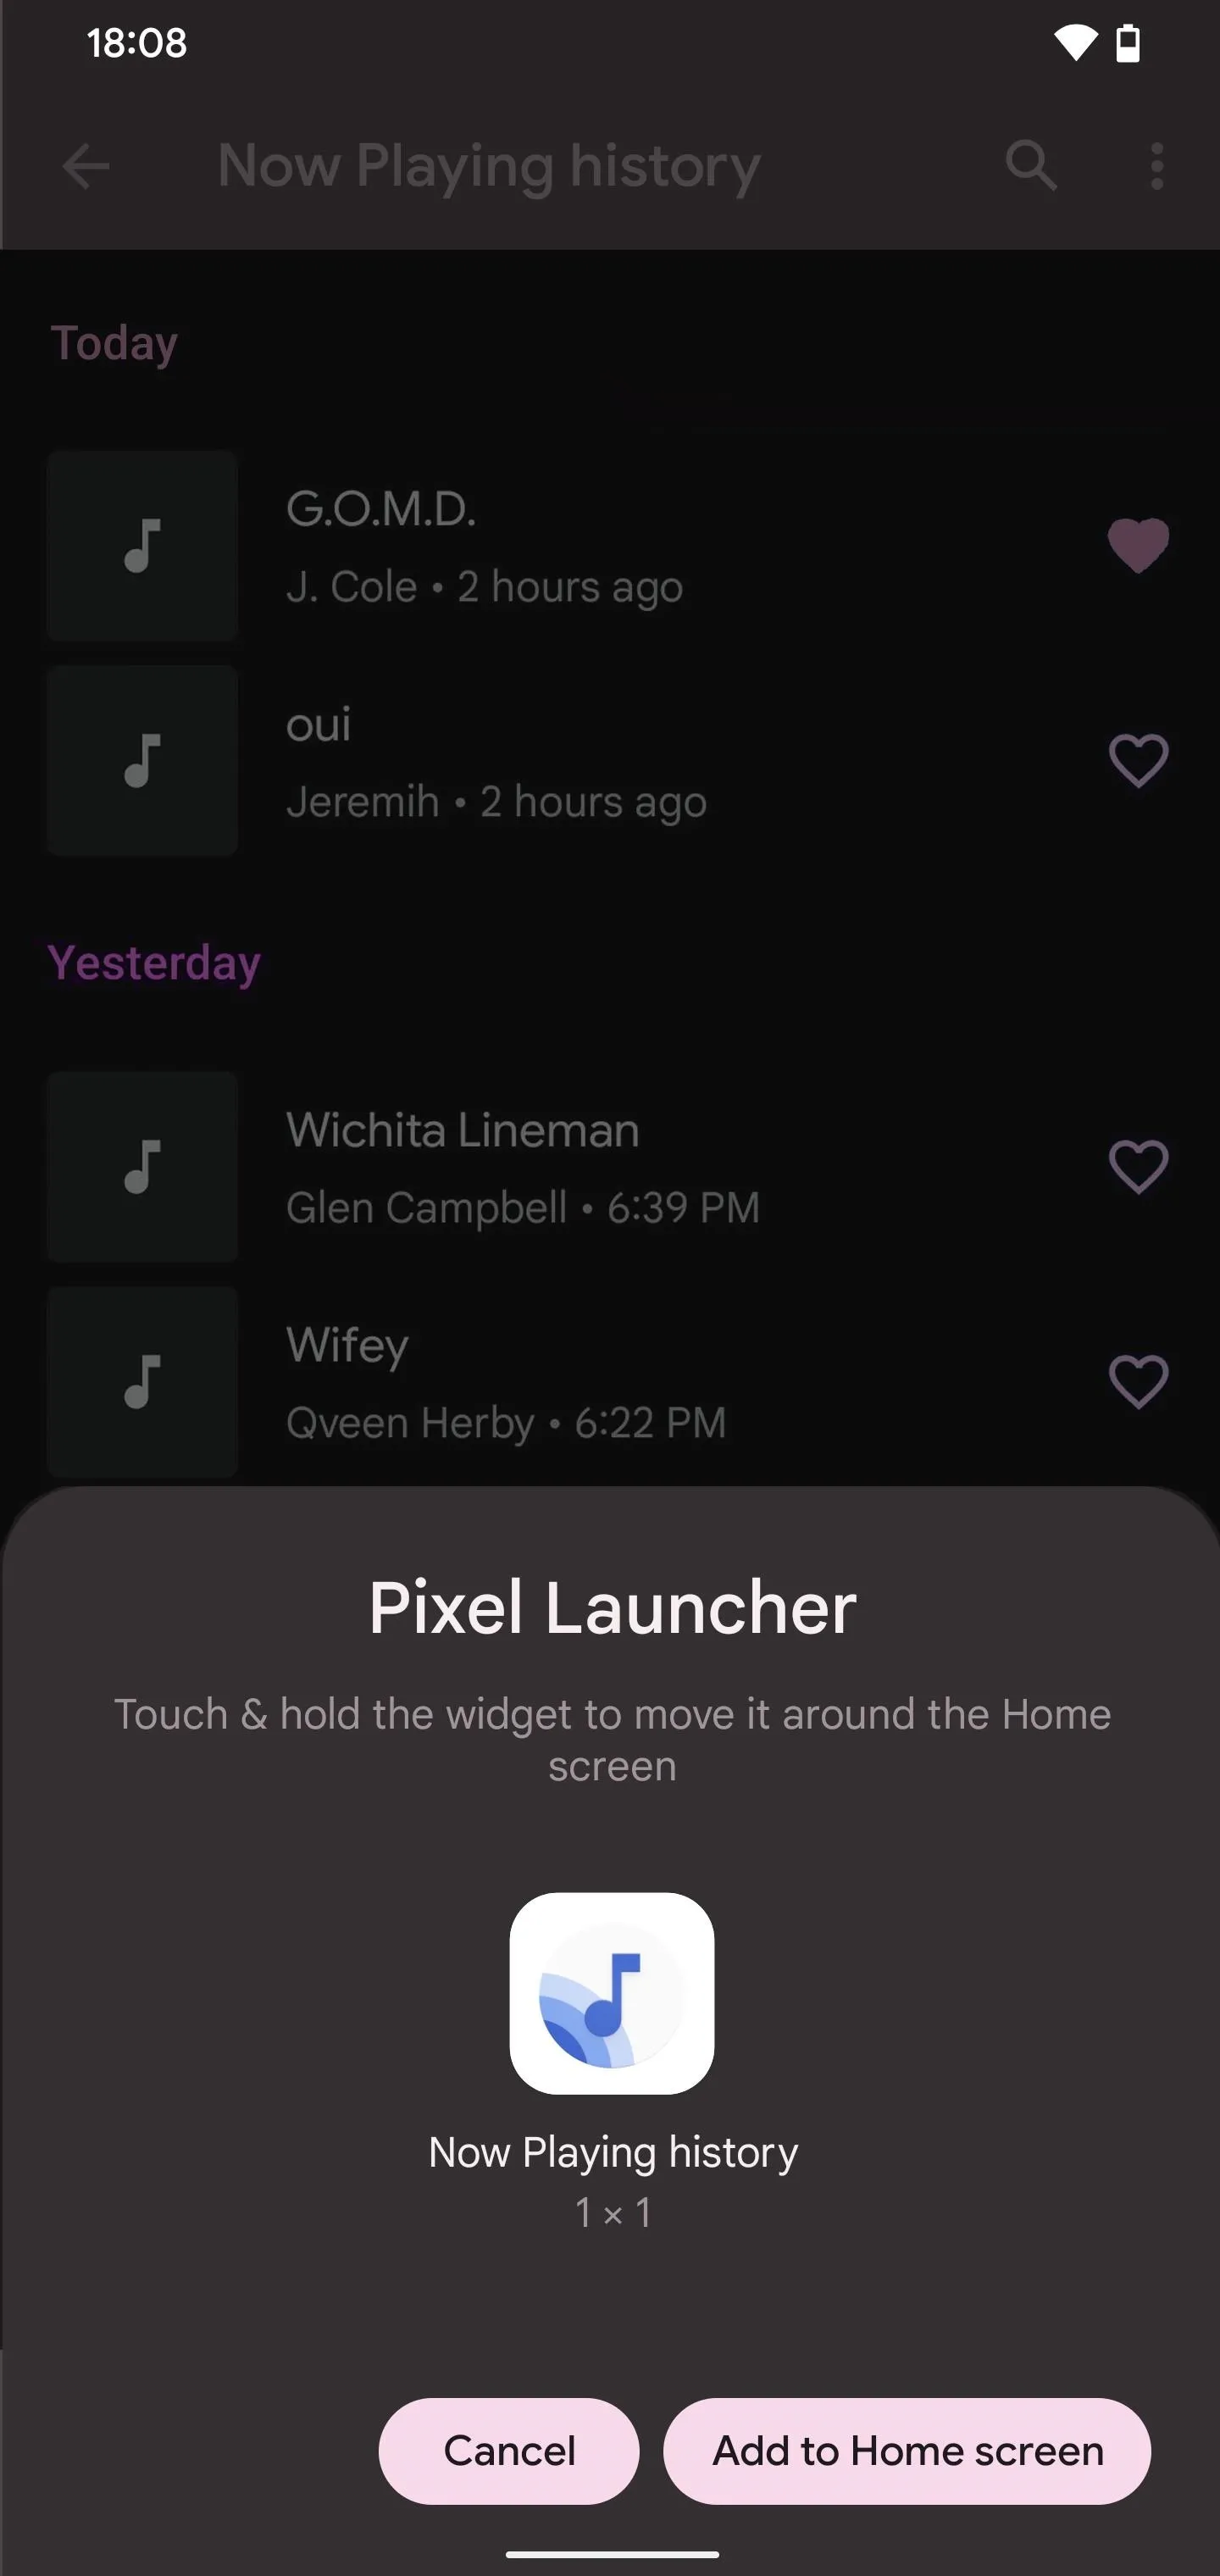
You can also add a shortcut to the history on your home screen. To do so, tap the vertical ellipsis at the top, then "Add to Home Screen," and place it where you want it. Another way to access your history is by tapping a recently identified song on your lock screen (you'll need to unlock your phone to continue).


From the Now Playing history screen, identified music will appear in reverse-chronological order, with the newer stuff at the top. Your phone can store thousands of songs here, and none of this information will impact your phone's internal storage limits.
I was able to go back to May 2021 (when I got my current phone) and see a breakdown of what songs my phone heard. You'll know the time of the day it was detected and the number of song detections in a given month if there were a lot. You can tap a group to expand its full list of songs.
Step 5: Bulk-Select Songs from Your History (Optional)
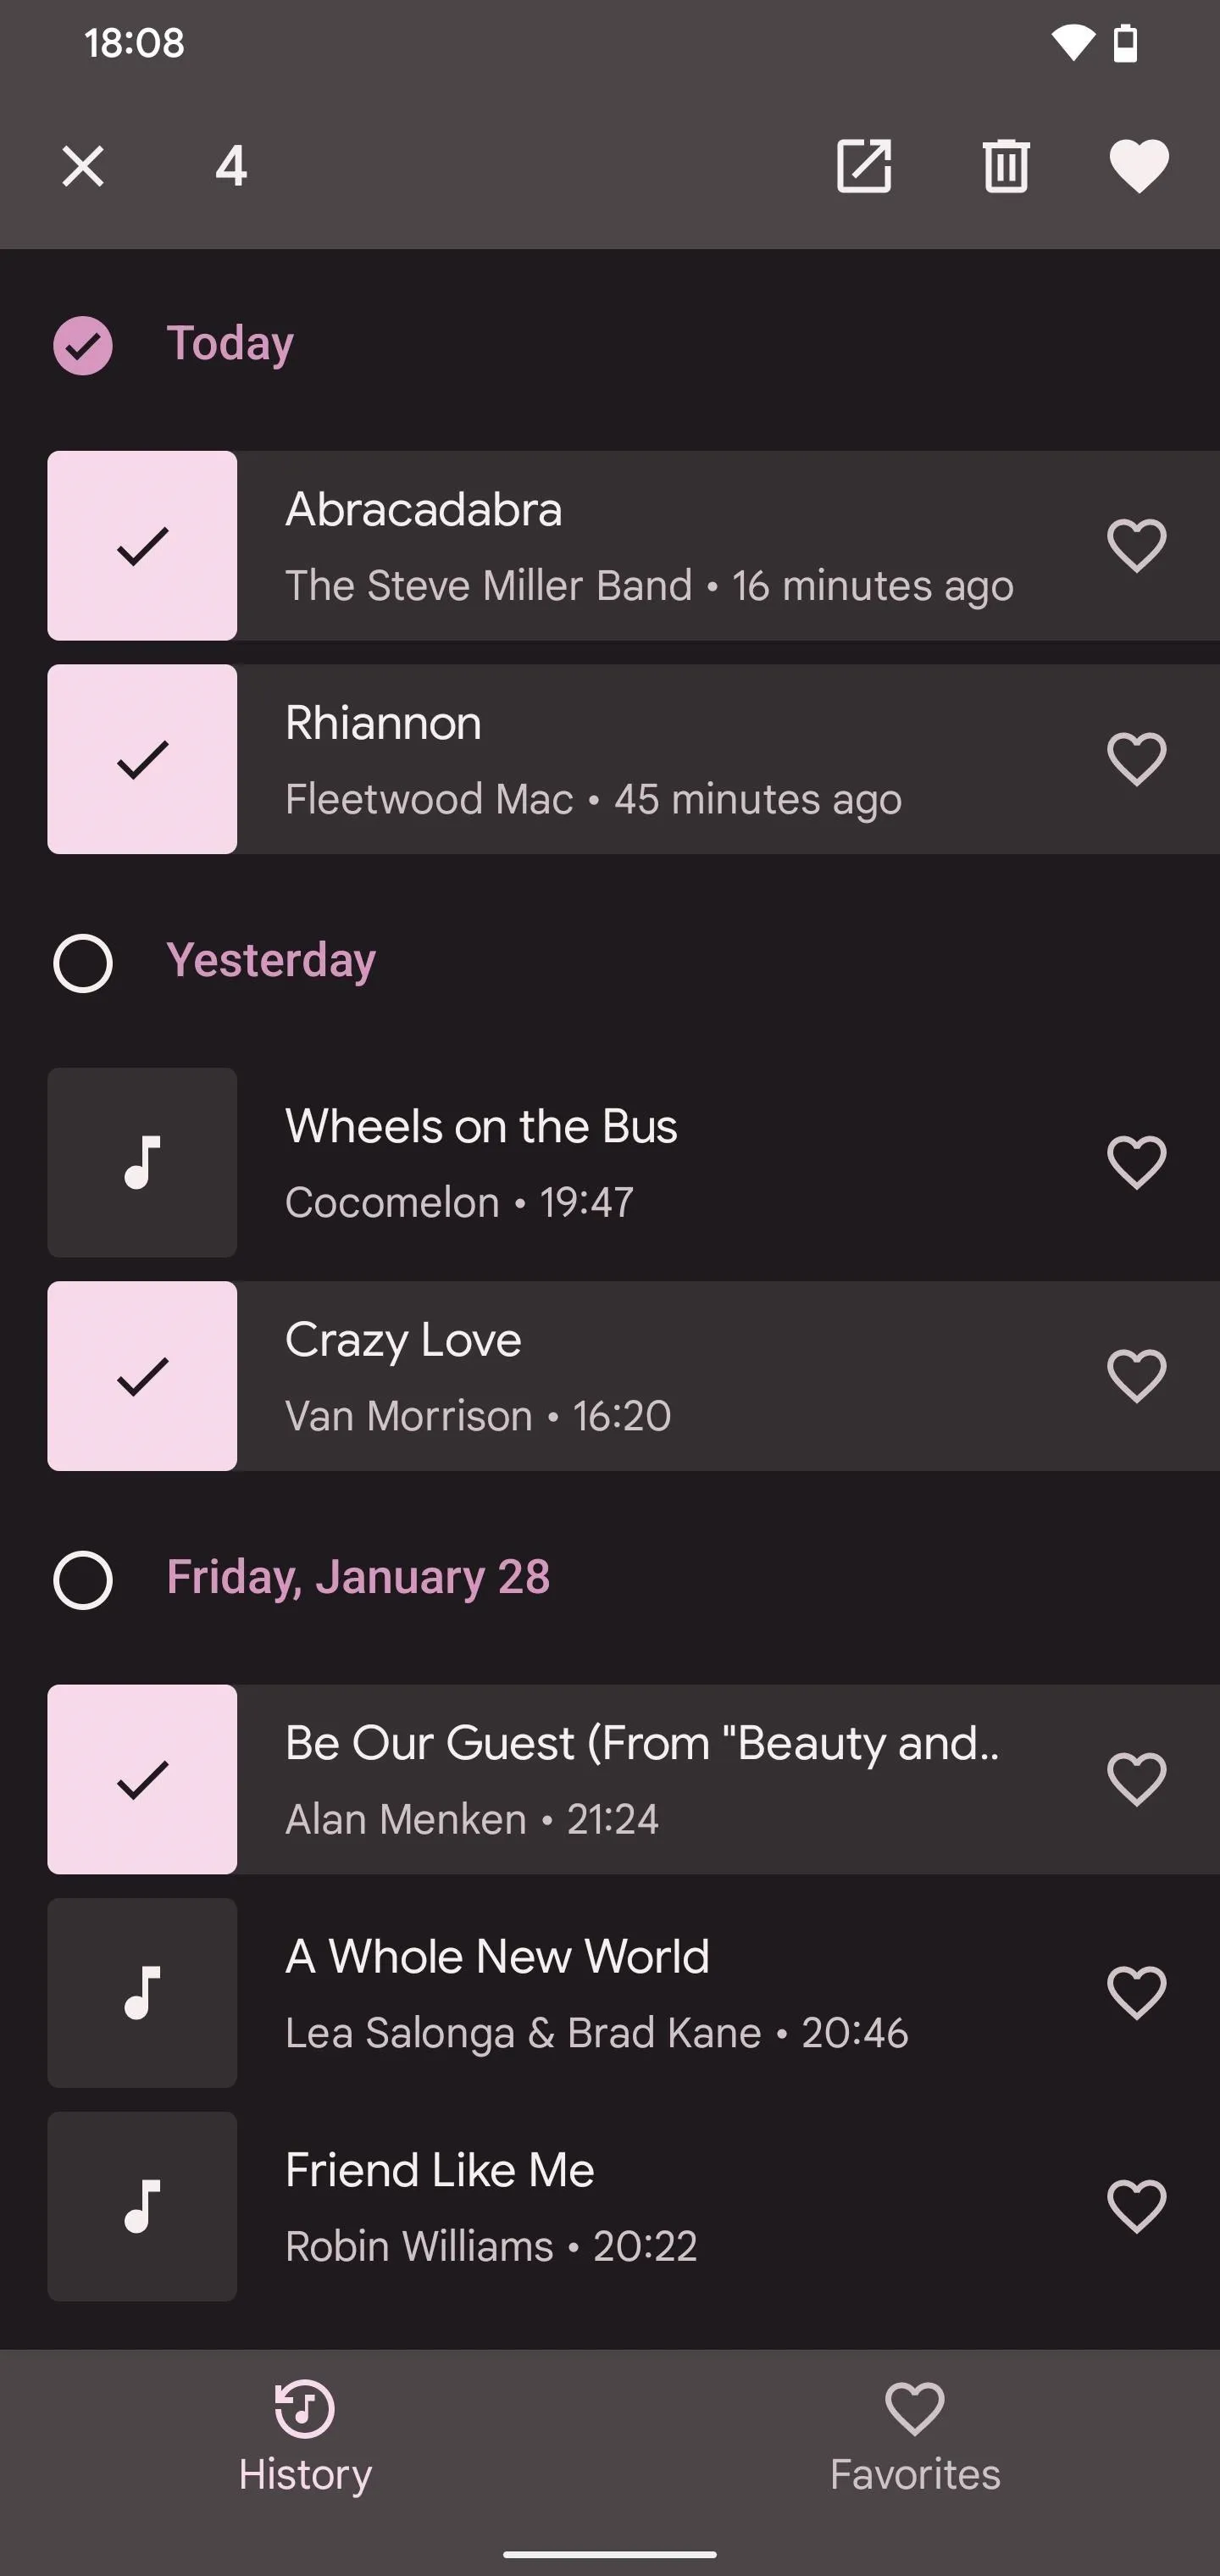
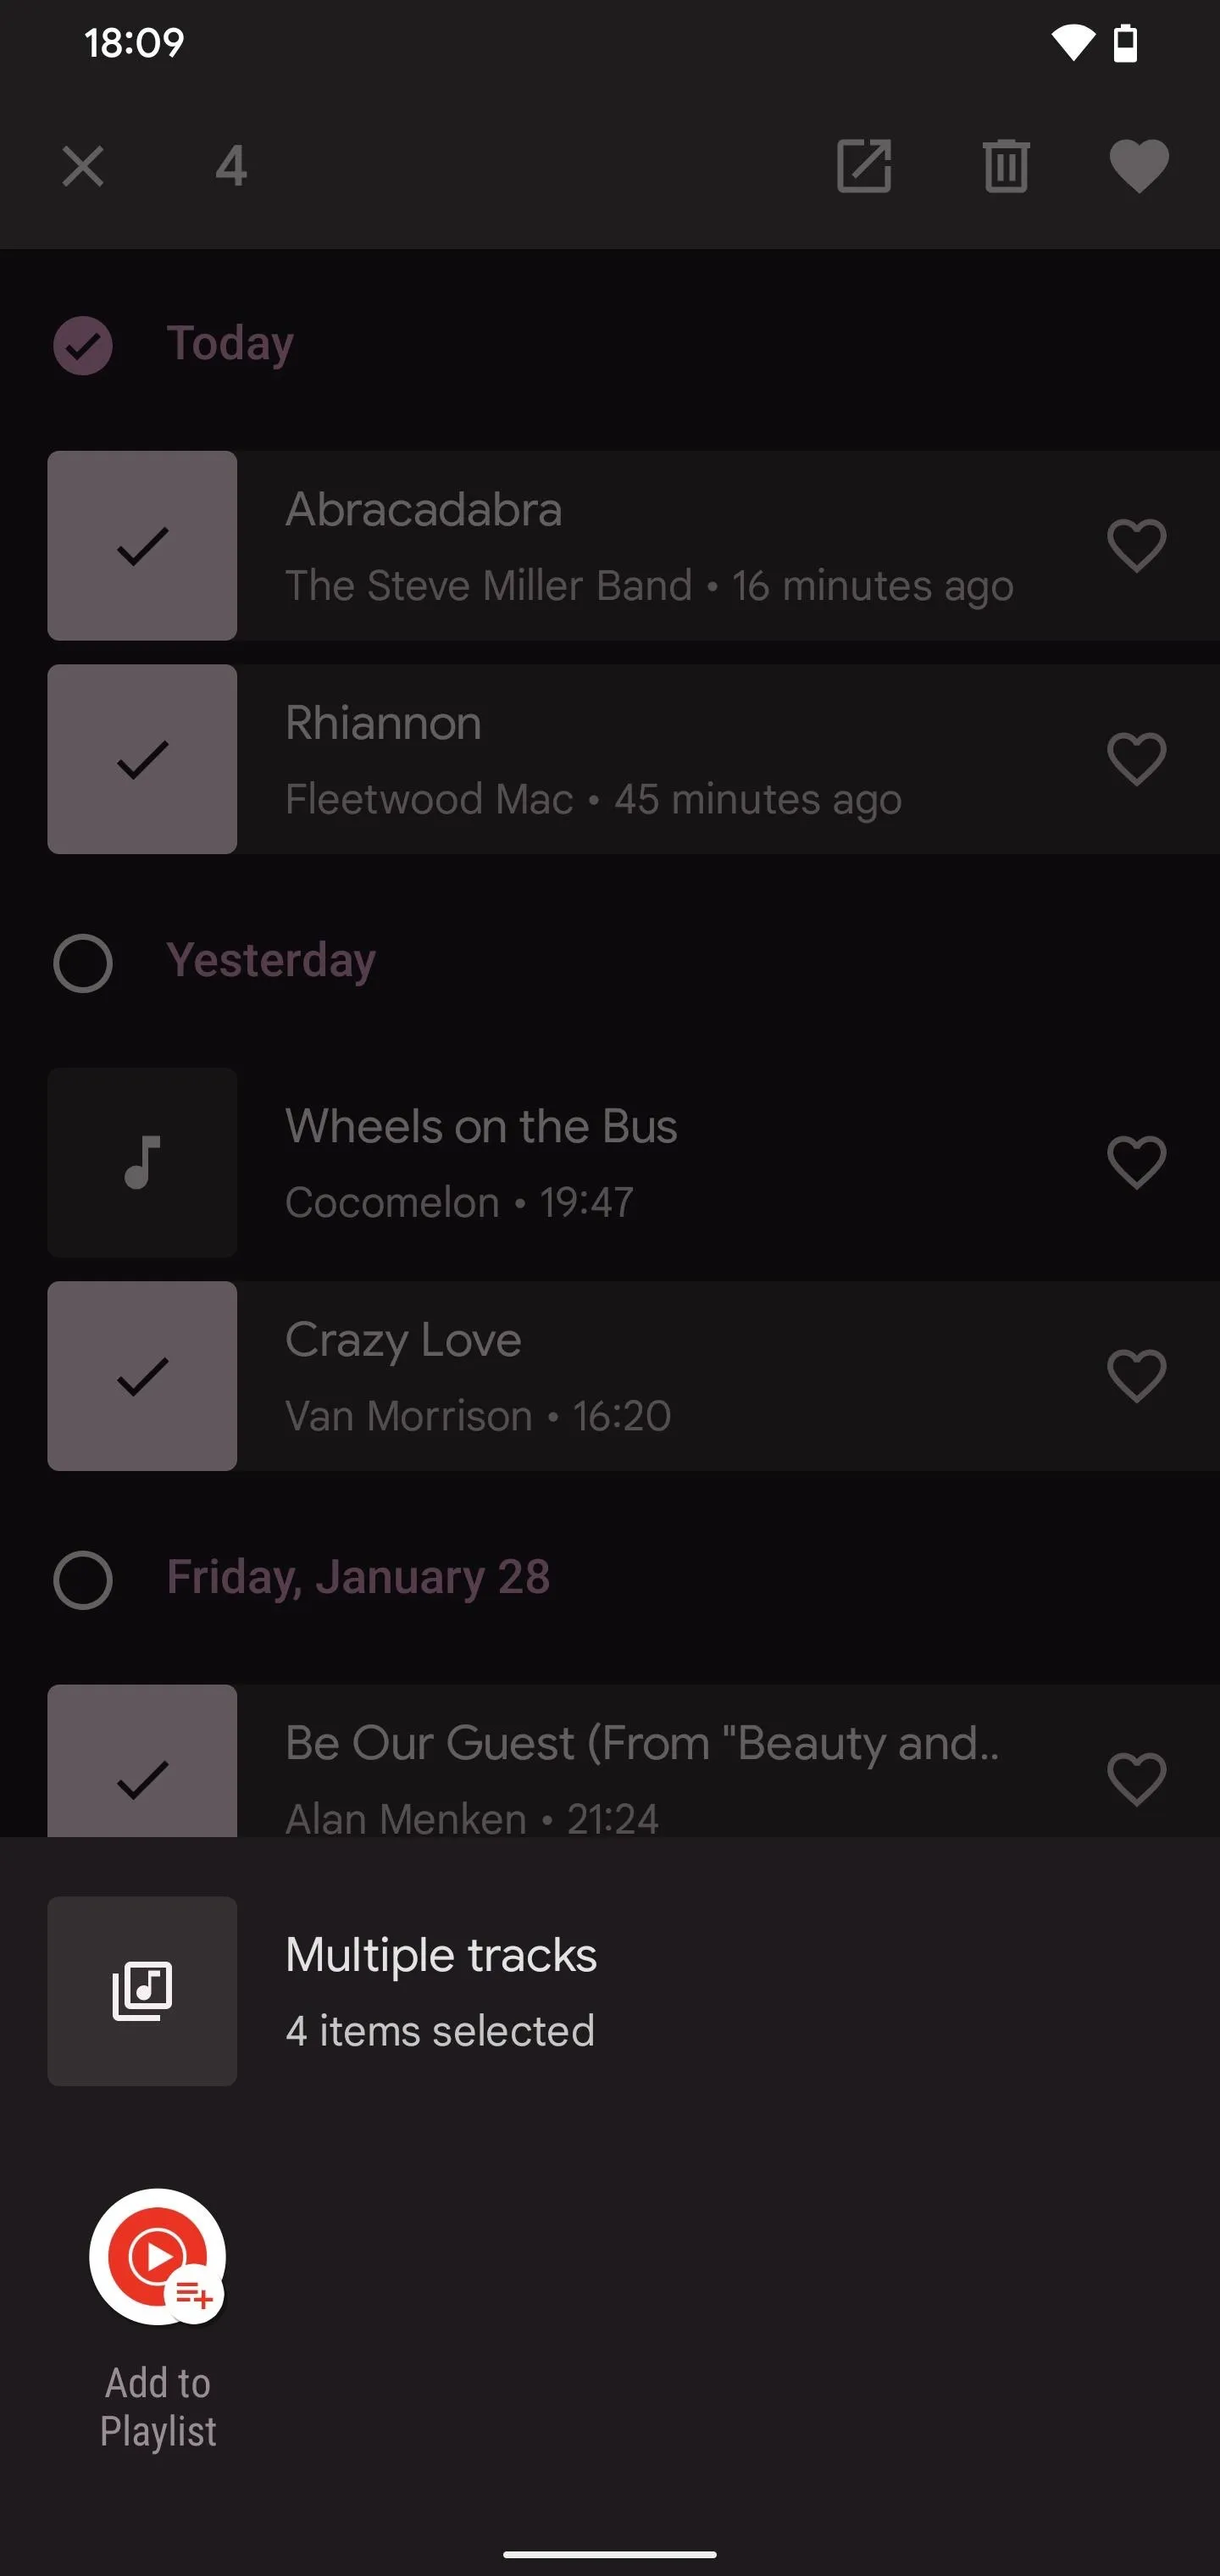
From the history, you can long-press a song name or tap the music note icon next to a song to select it, then choose any others in the list. You can bulk delete them with the trash can icon, favorite selected tracks, or share them to a playlist in the YouTube Music app. Bulk-editing is only available on the Pixel 3 and newer.


Step 6: Open or Share Songs from Your History (Optional)
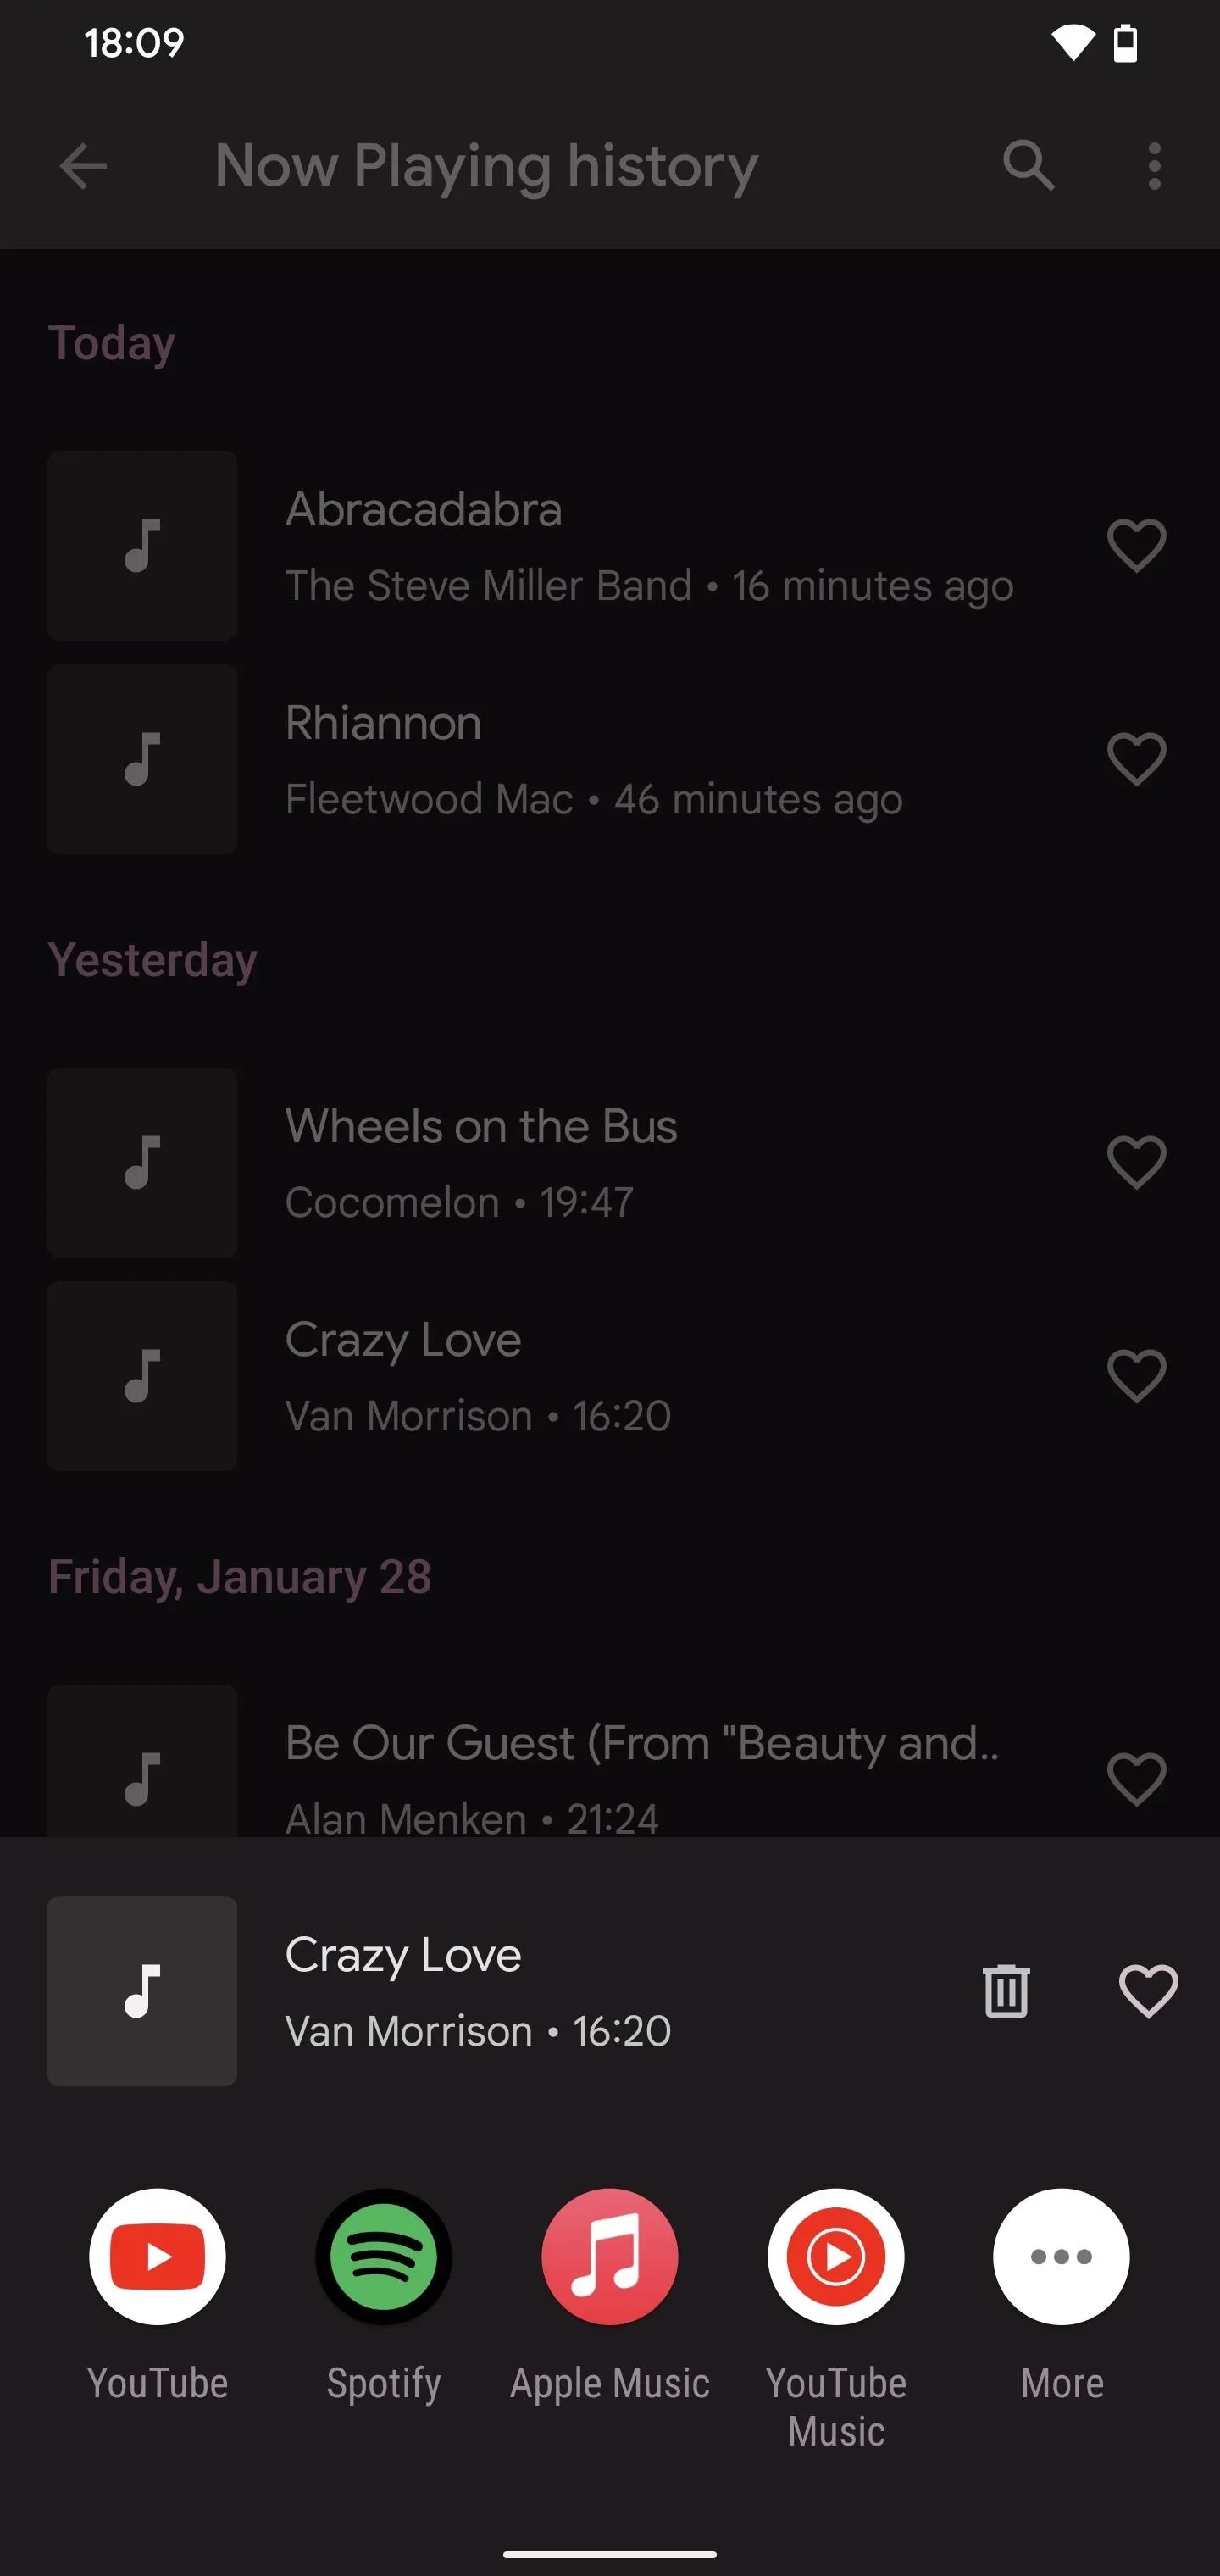
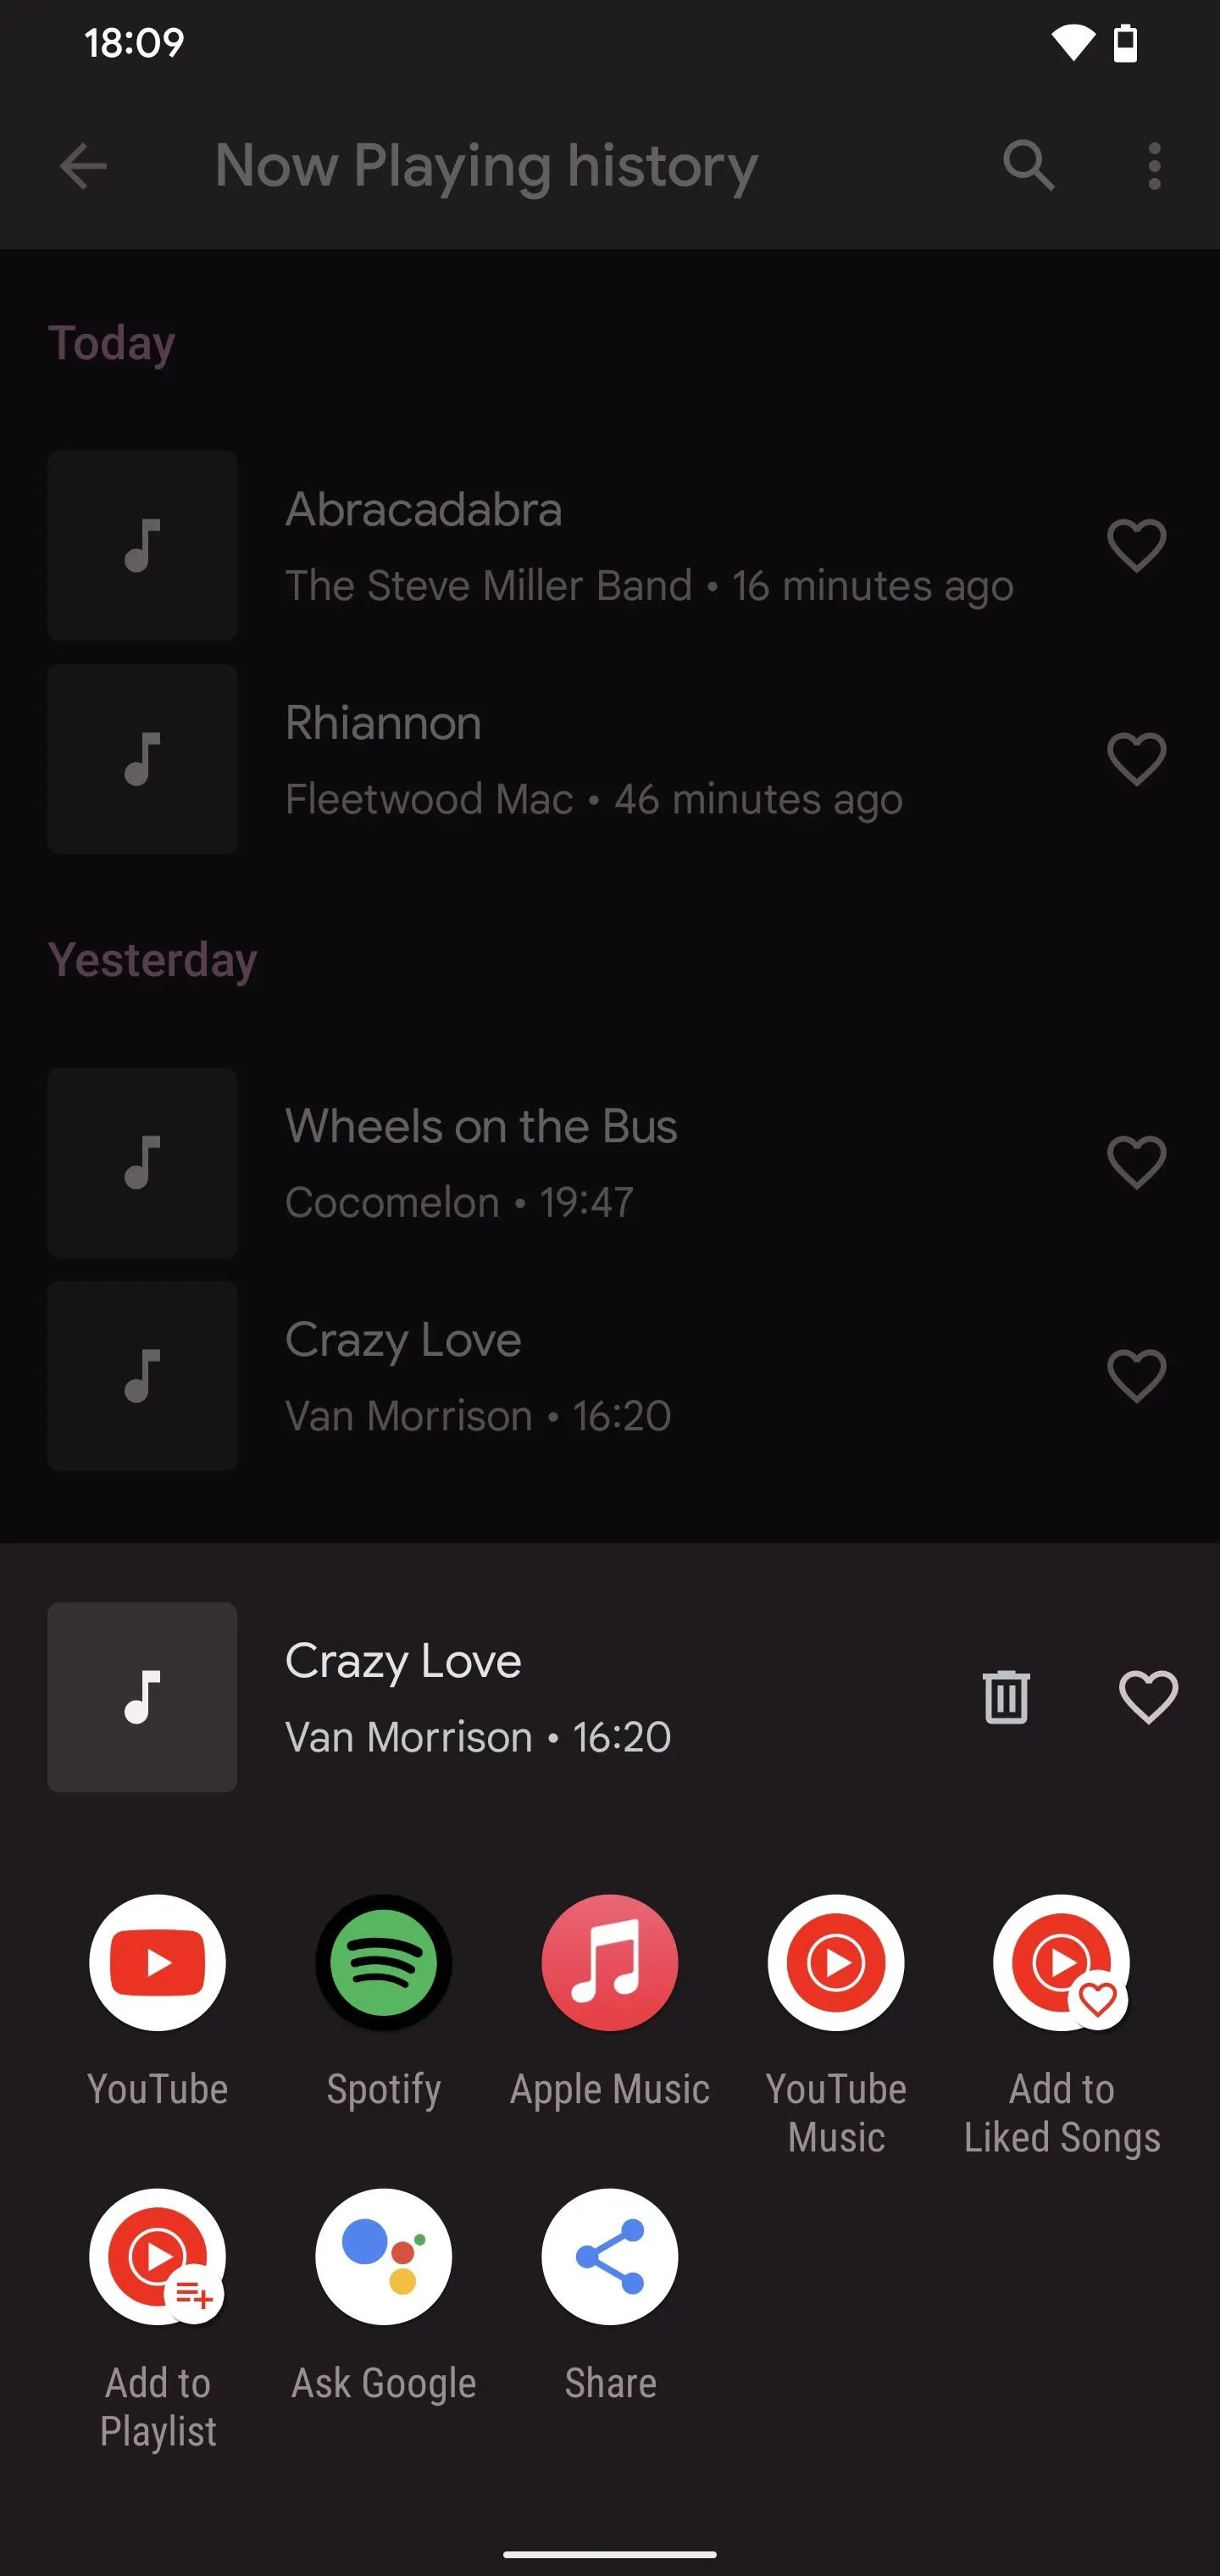
You can also tap a song from the history to see what apps you can open it in, such as Apple Music, Spotify, YouTube, YouTube Music, etc. Tap "More" to see additional options, including opening the regular share menu. You'll also see a trash can to remove the song from your history and a heart to favorite it (see the next section for more on favoriting).


Step 7: Favorite Songs in Your History (Optional)
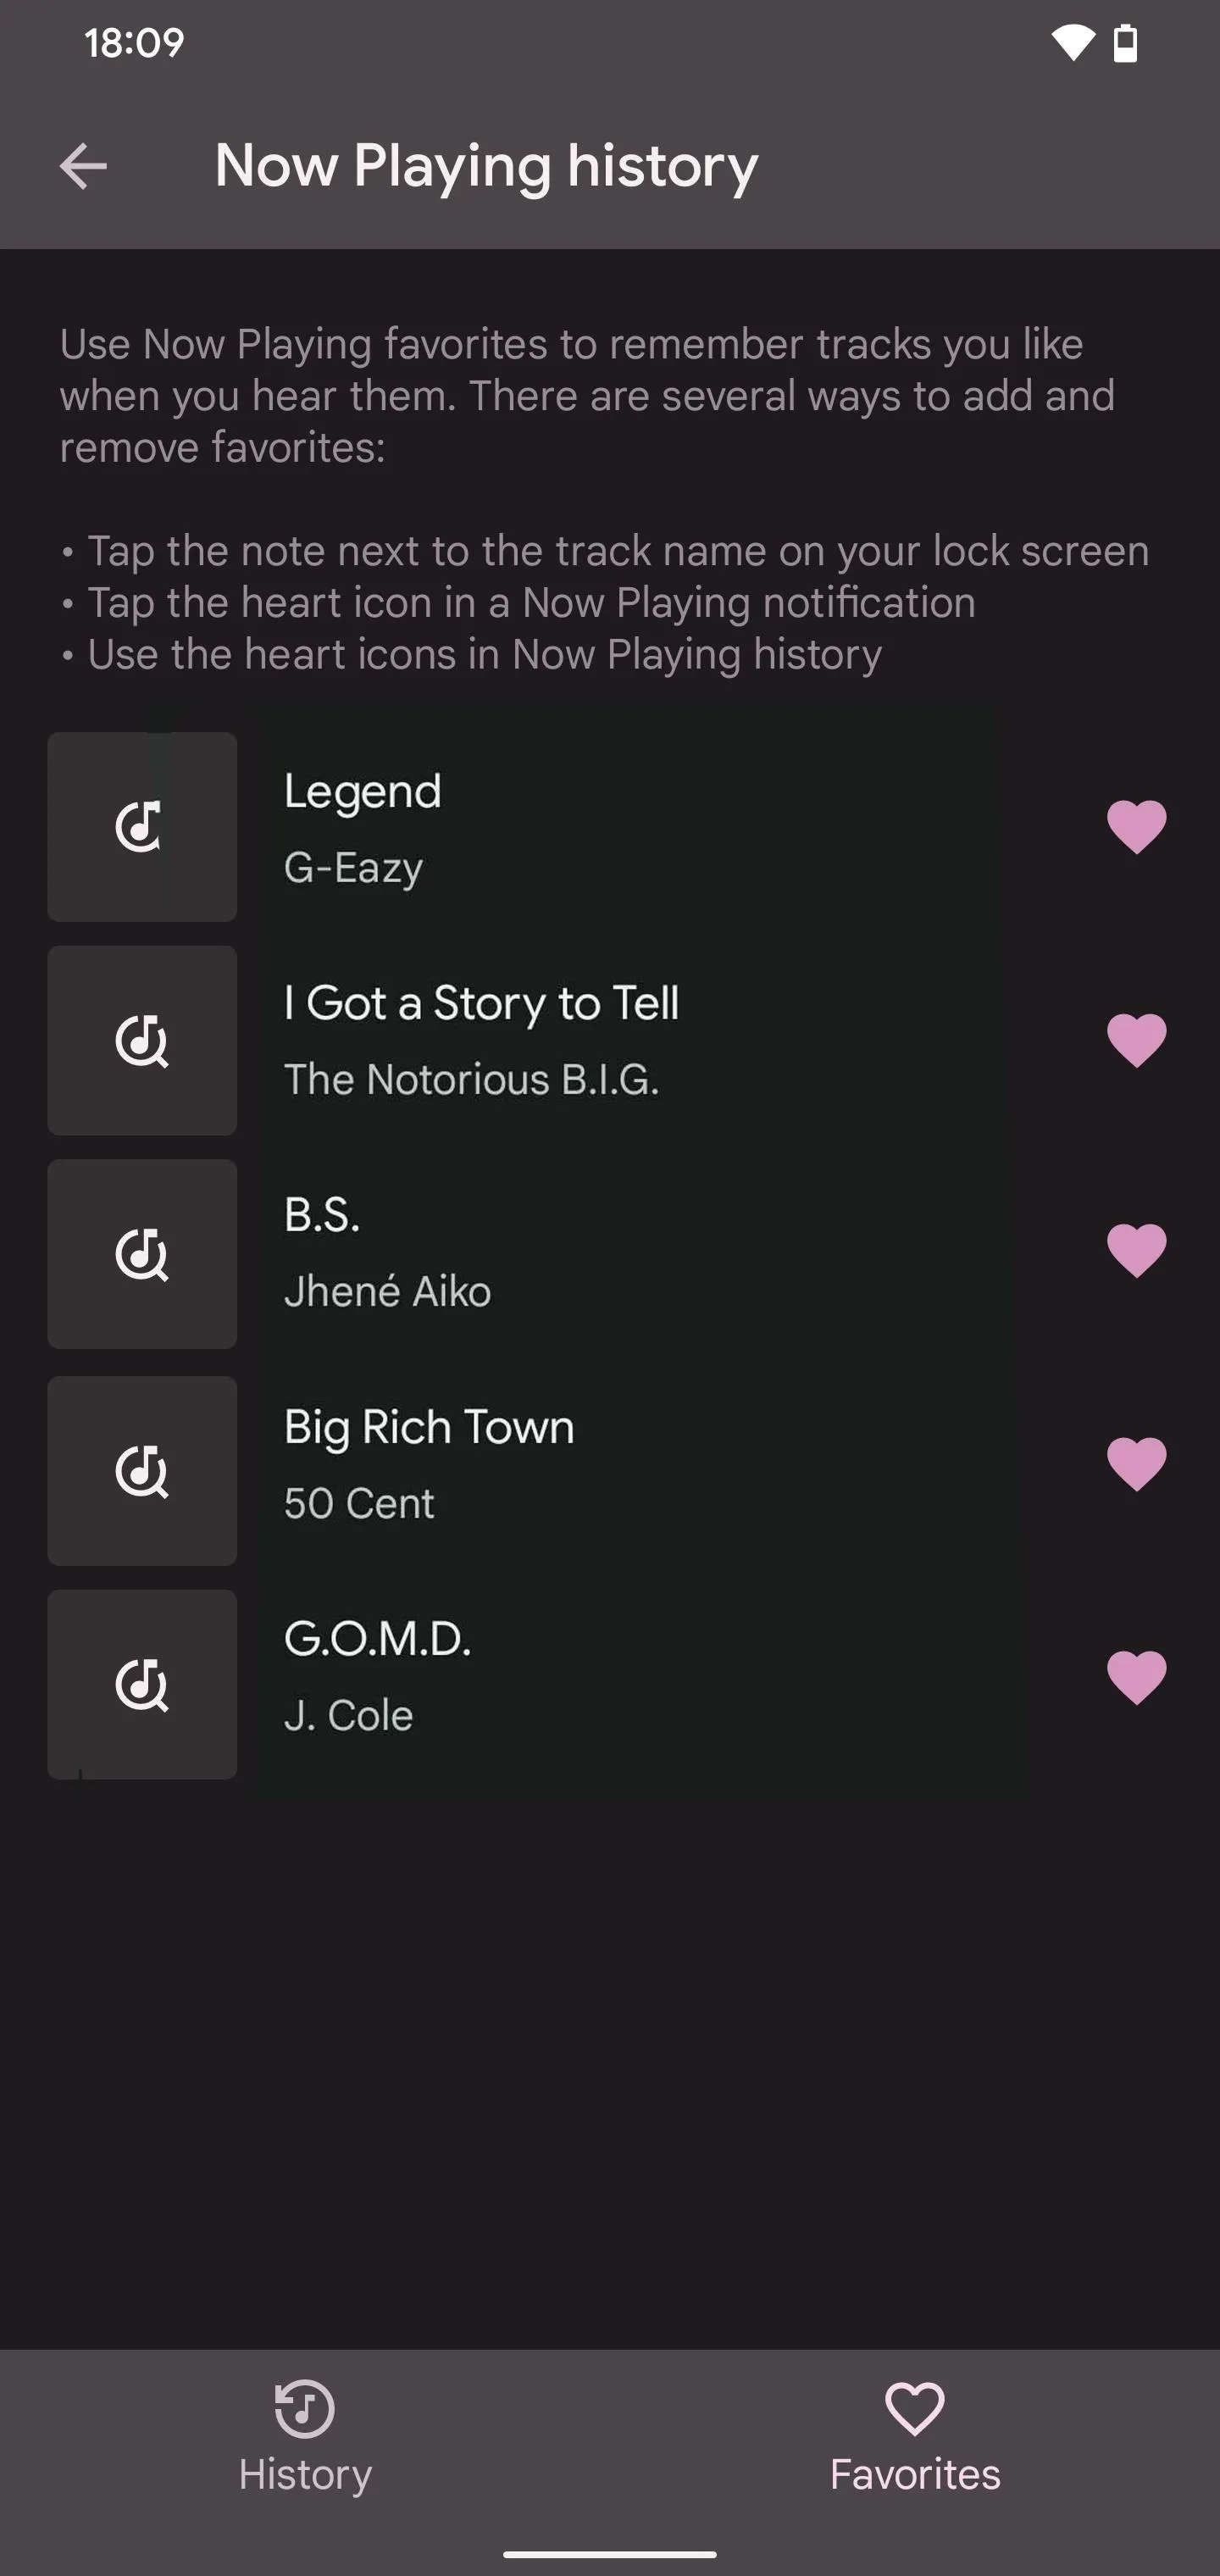
On the Pixel 3a and newer, there's a tab for "Favorites" in the Now Playing history. When you open that, you'll see any track you hearted from the history's list of tracks or the song's share menu, as seen above. Those aren't the only places you can favorite tracks, though.
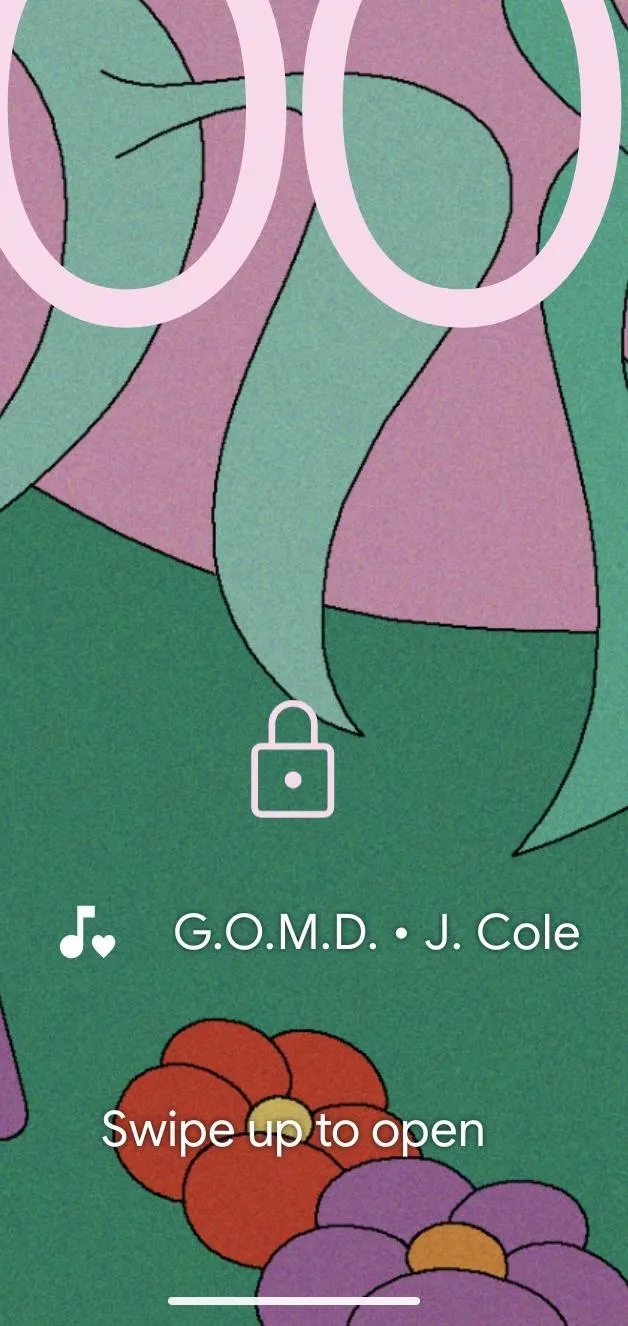
You can also favorite a song by tapping the note next to the song's name on your lock screen; a little heart icon should appear next to the note to indicate it worked.


You can also favorite a song from any Now Playing notifications your device sends.
Favorited songs will be organized in the "Favorites" tab in your Now Playing history, and all of the liked songs will retain their detection data in the regular list.
Step 8: Delete Songs in Your History (Optional)
If you don't like a song or group of songs, you can delete them from your history. As discussed above, you can bulk-select items (on Pixel 3 or newer) from the history or favorites lists, then tap the trash can icon to remove them. Additionally, you can tap a song and hit the trash can icon from the share menu.
When you want a clean slate, you can tap the vertical ellipsis from the history screen, then select "Remove all," which erases everything.
Tips for Using Now Playing
Although Now Playing is much more helpful in finding new songs, there are a couple of things to keep in mind when using it. If you work in or frequent places that have music playing constantly, your Now Playing list is going to fill up quickly. Left unchecked, you'll have to sift through dozens or even hundreds of songs individually to find it. To counteract this, consider doing the following:
- Favorite songs as they appear on your lock screen, so you don't lose them.
- Delete old or unwanted songs from your history.
- Go through the songs your phone detected at the end of each day.
- Use the Search button on the history screen to find a specific song.
Cover photo and screenshots by Desmond Brown/Gadget Hacks



Comments
No Comments Exist
Be the first, drop a comment!