TWRP is a name many are familiar with since it allows your Android device to install any custom file of your choosing. You can create a NANDroid backup to keep your data safe or even use Magisk to achieve full root access. In fact, TWRP is often seen as the gateway to modding your system for creating a unique user experience.
Having the power of TWRP over the stock recovery means you can have a lot more control over your phone's software. It's something all power users should be aware of when dealing with root-related system mods. Installing TWRP will override your stock recovery, but the benefits to using a custom recovery are so far beyond ordinary that it's well worth it in the long run.
- Guide Update (9/30/2019): Updated TWRP download files and added new instructions for permanently flashing TWRP to the system partition.
Requirements
- Windows, Mac, or Linux computer
- USB data cable
Step 1: Unlock Your Bootloader
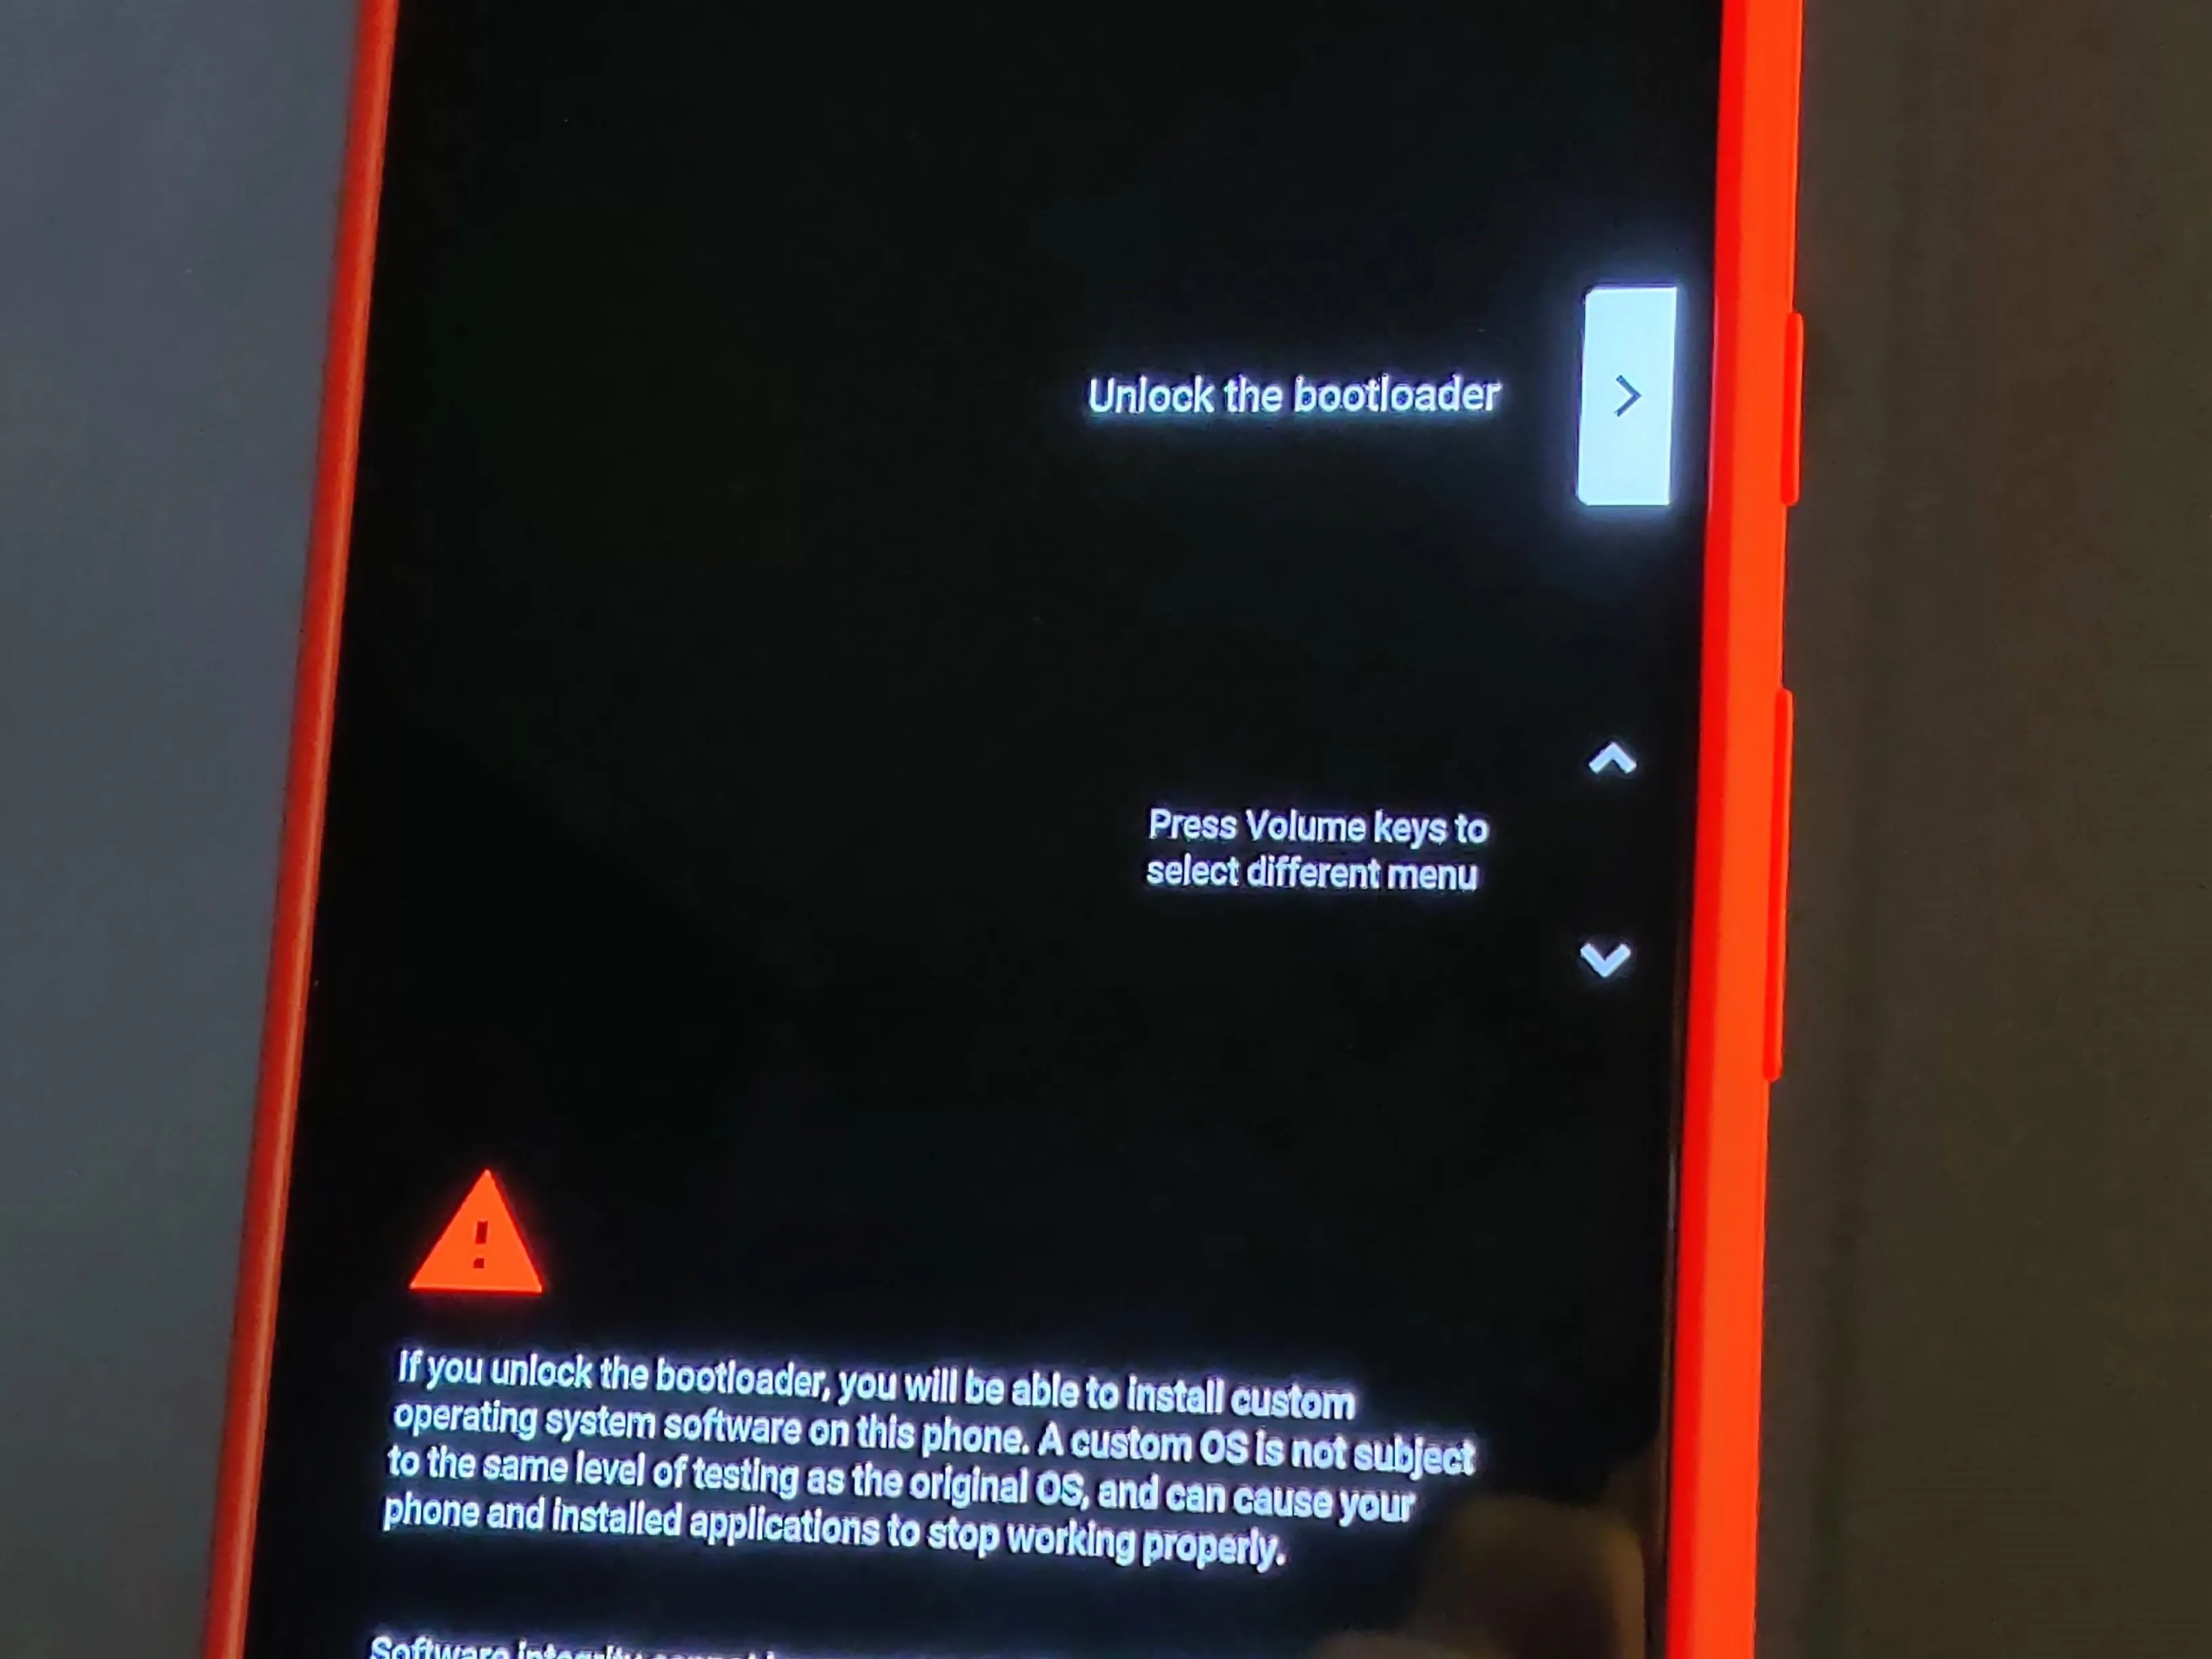
Before you can get started installing image files of any kind to your system, such as TWRP, your bootloader needs to be unlocked. You'll find that to be the case for all Android phones when you start diving into the rooting and modding scene for the first time. It's required to make any modifications to the system, so if you need to, hit up the link below to get that taken care of.
Step 2: Download the Official TWRP Files
Once the bootloader is unlocked, the next thing you need to do is the download both the TWRP image file and installer zip file for your specific Pixel 3a model. These files are from the official TWRP developers directly, which means you won't have to worry about things being unstable.
- Download TWRP 3.3.1-1 Image for Pixel 3a (.img) | Pixel 3a XL (.img)
For ease of use, rename the TWRP image file above to "twrp" (or "twrp.img" if your computer is set to show file extensions). This will help differentiate between the two files to make things easier during the install process. You will transfer this file to the platform-tools folder on your computer — more on that in Step 6 of this guide.
- Download TWRP 3.3.1-1 Installer for Pixel 3a (.zip) | Pixel 3a XL (.zip)
You should also rename the zip file above to something simple such as "twrp-installer" to keep things clean. You'll want to transfer this zip file to your phone's internal storage to an easy to find location, such as the "Download" folder.
Take note that TWRP support for Android 10 is not available right now, so if you plan on using TWRP on your Pixel 3a, you'll need to be running Android 9 Pie. We should expect official support for Android 10 at some point soon, so stay tuned for more updates.
Step 3: Boot into Fastboot Mode
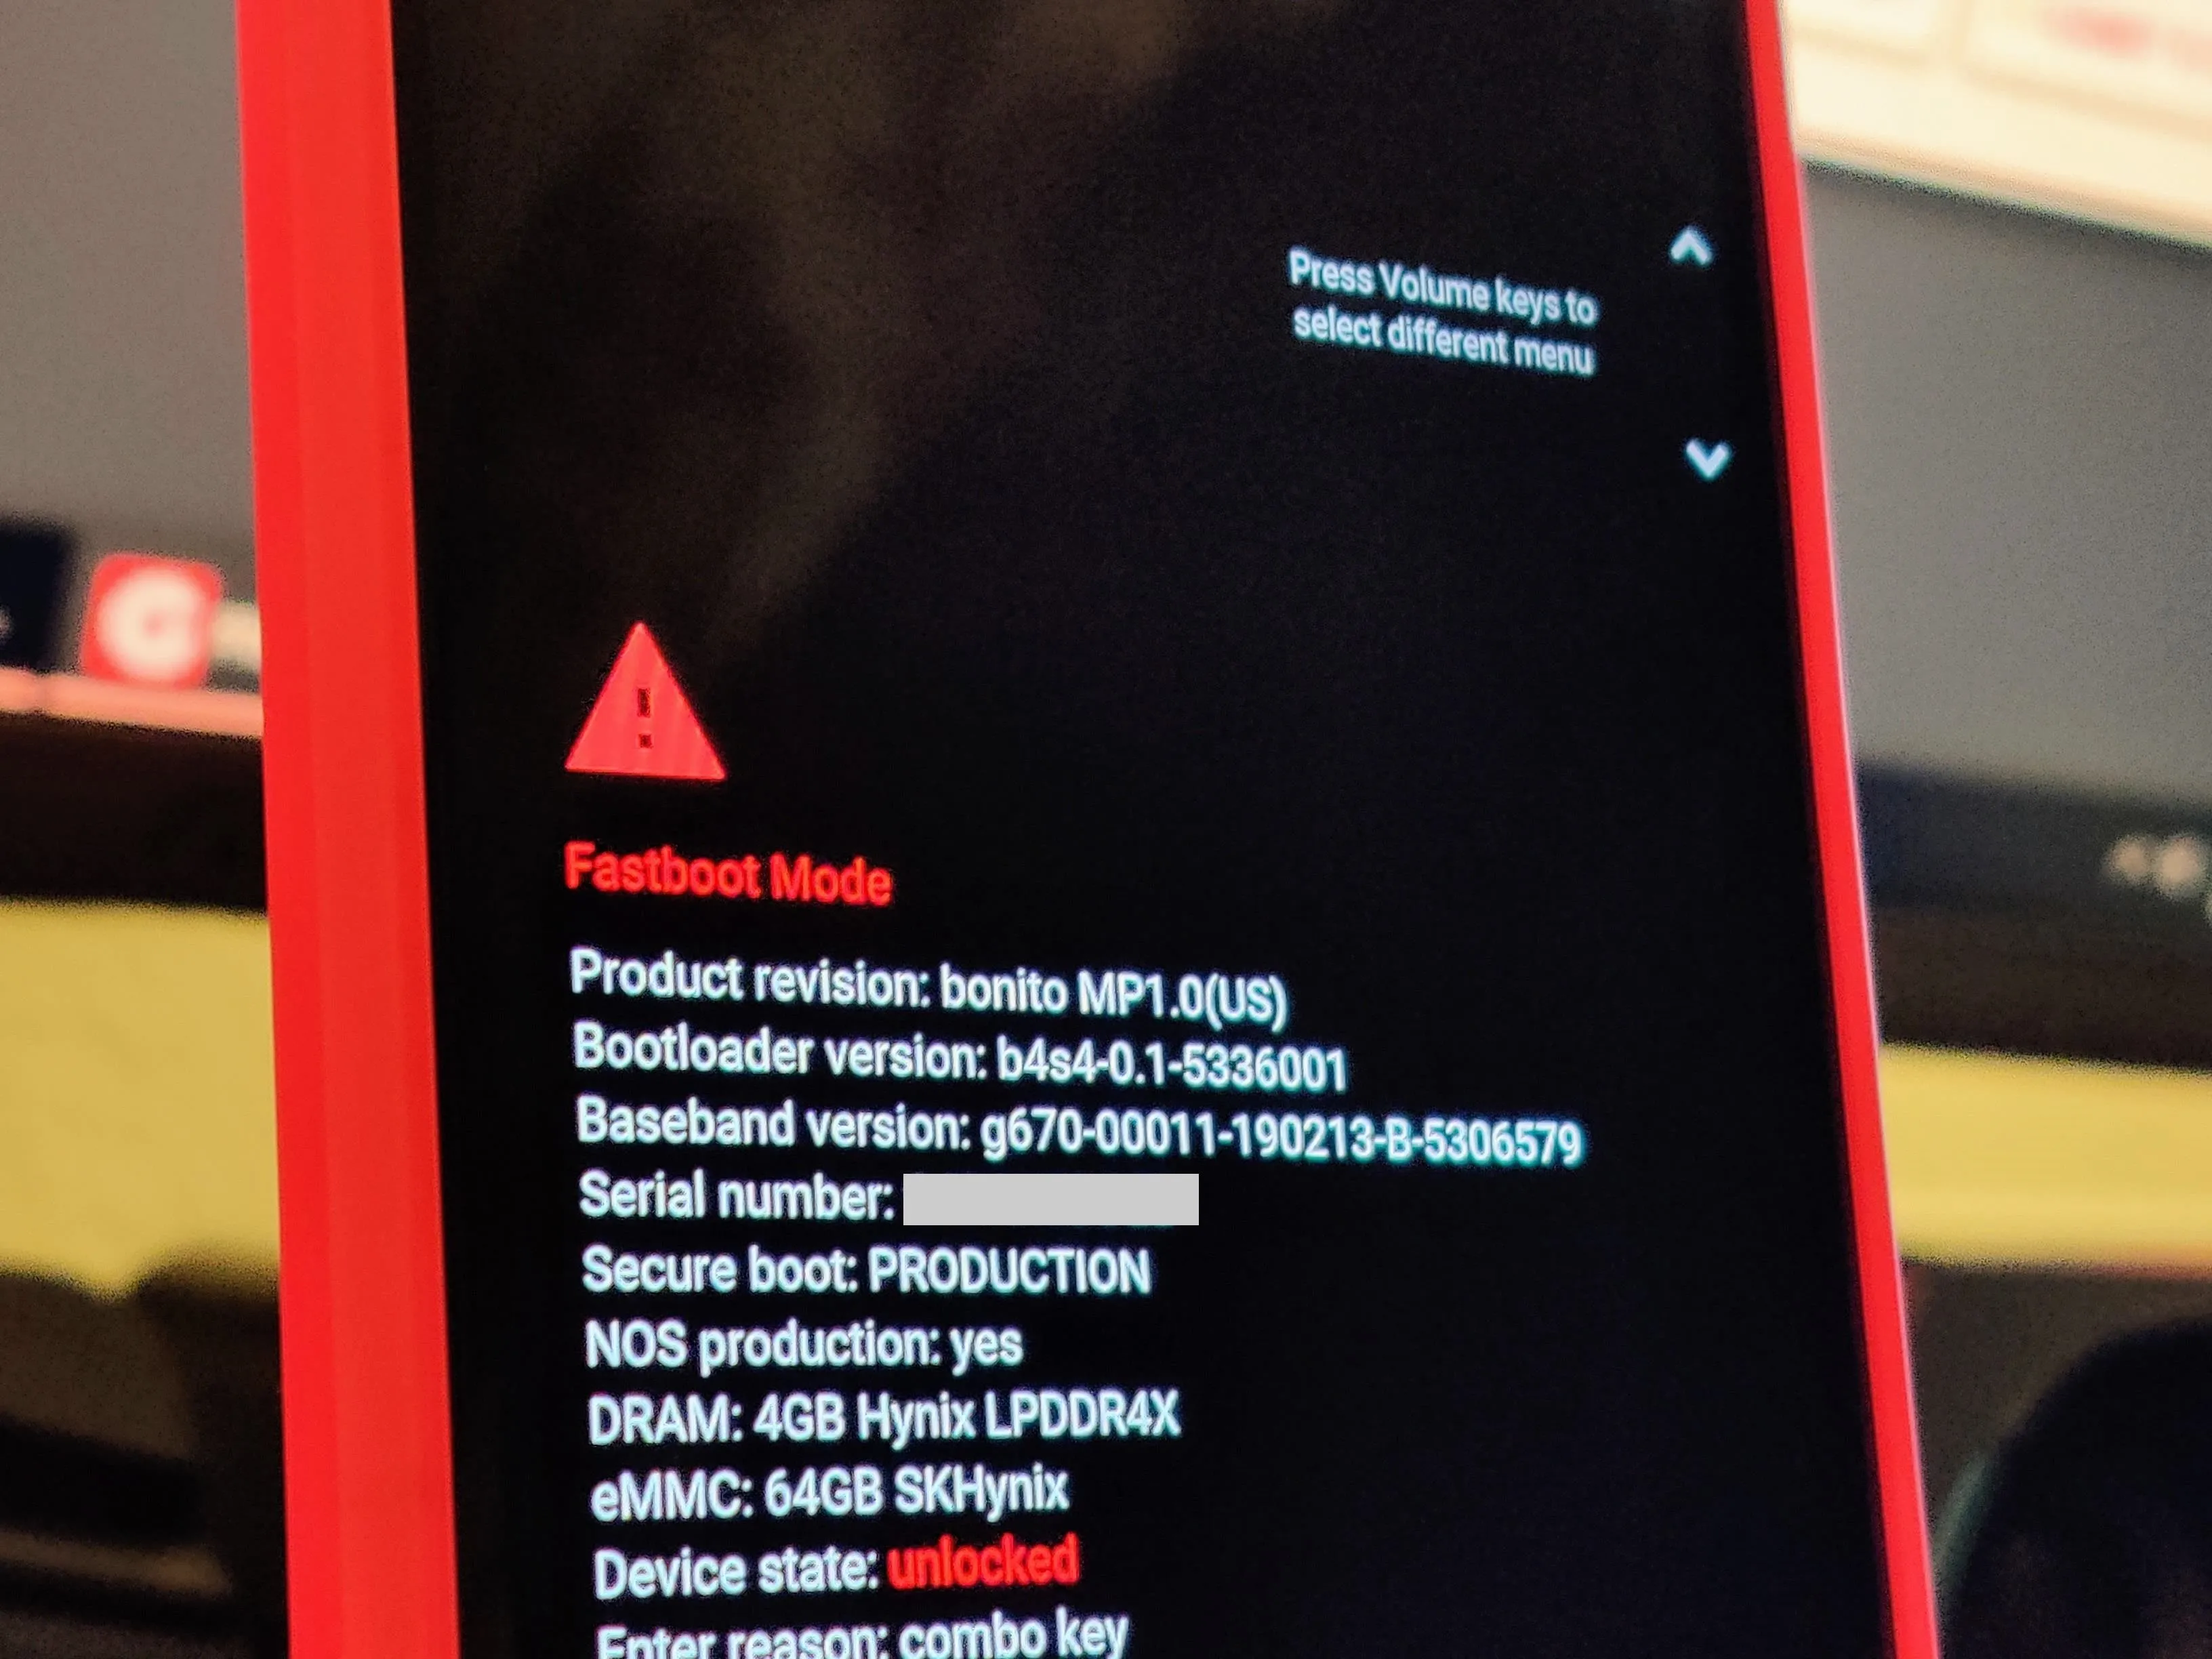
Now you've got the base image file required to boot your Pixel 3a into TWRP, but your phone isn't ready to accept the Fastboot command needed to get the ball rolling. Before you can get started with that, you'll need to put your phone into Fastboot Mode so that it can receive commands from your computer.
To do this, long-press the power button to bring up the power menu, then tap the "Power off" option to shut your phone completely off. Once it's powered down, hold the power button and the volume down button at the same time until the Fastboot Mode screen pops up. Now, connect your phone to your computer with a USB cable, then leave it just like this for the next steps.
Step 4: Install ADB & Fastboot on Your Computer
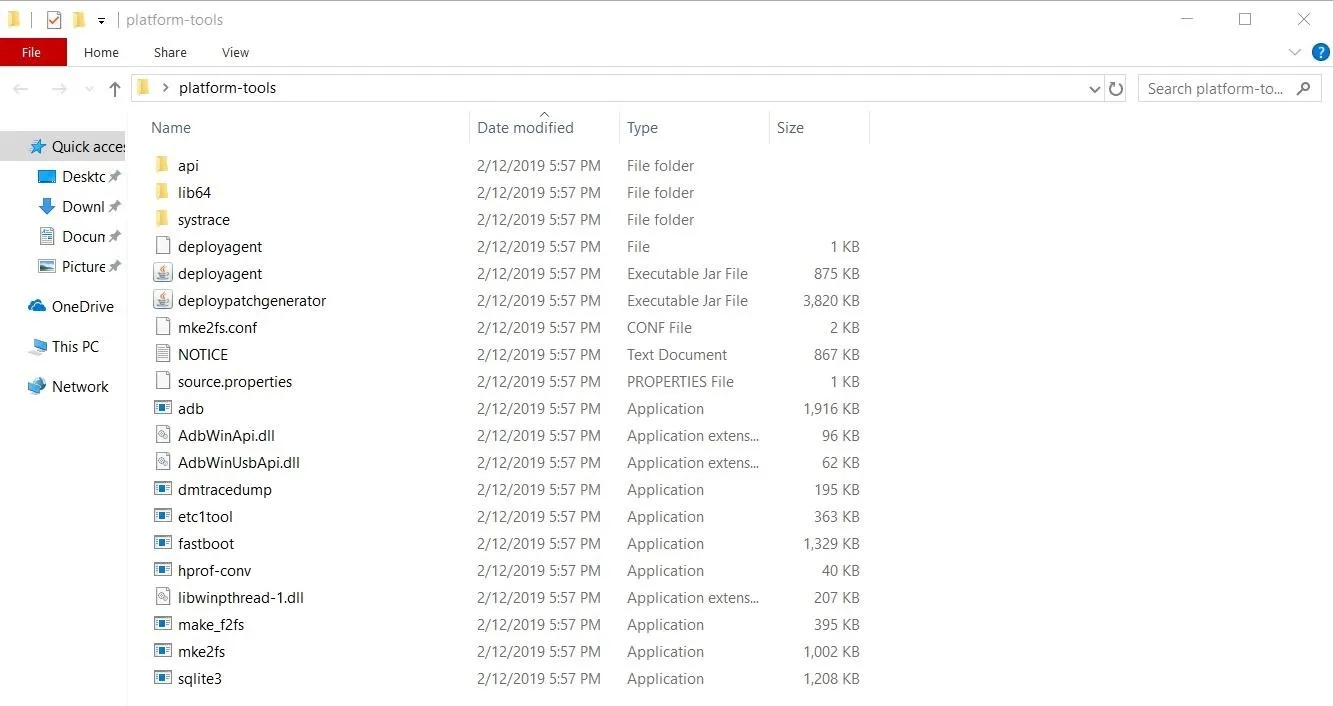
Now it's time to get the framework installed on your computer that allows you to push that TWRP image file to your phone. You'll need Google's SDK Platform-Tools standalone package, which gives you the required ADB and Fastboot commands. Everything is included in one neat and tidy folder, so that keeps things dead simple — no confusing drivers to install:
Step 5: Open a Command Window in Platform-Tools
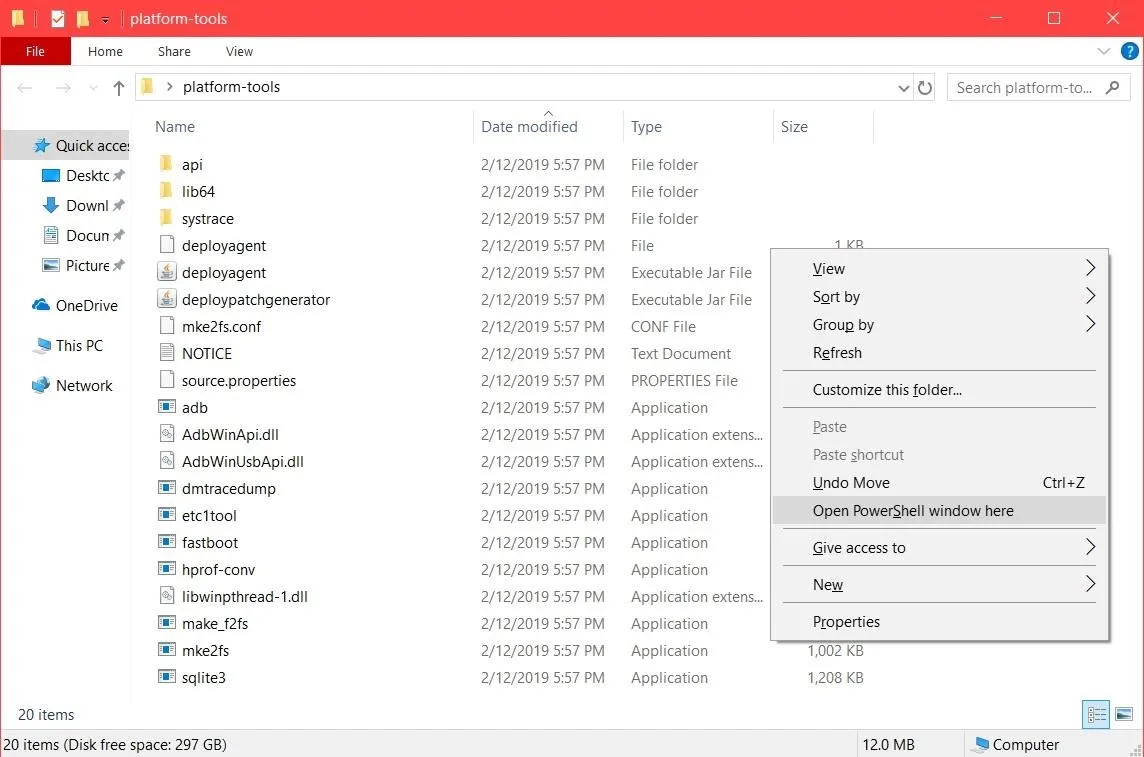
Now, your phone and computer are both ready to accept any Fastboot commands required for installing your own custom files, such as the TWRP image. Your phone should still be sitting on the Fastboot Menu main screen at this time, which means you'll now need to open a command window in the platform-tools folder on your computer. Hit up the link below to get that set up, then you're almost done here.
Step 6: Temporarily Boot into TWRP
Finally, it's time to take that TWRP image file (twrp.img) you downloaded earlier and transfer it over to the platform-tools folder on your computer. Once the file is in the correct location, you'll then get to execute a quick Fastboot command that allows you to temporarily boot into TWRP.
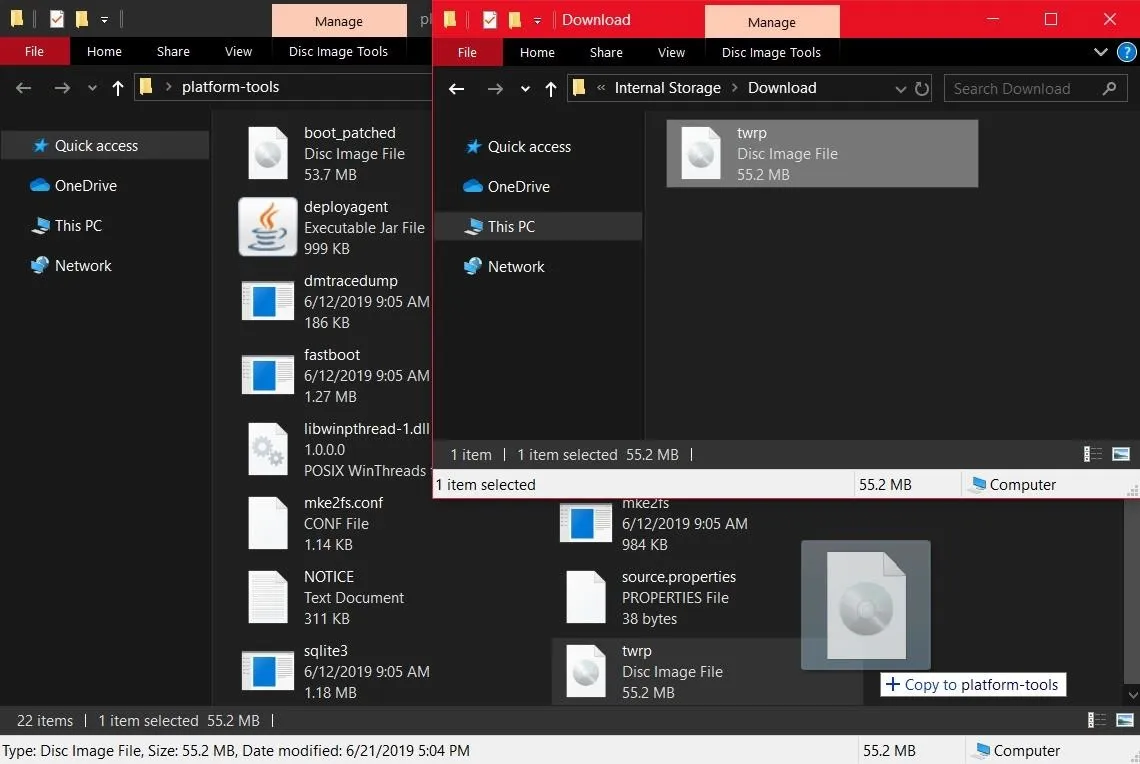
With a command window opened up within the platform-tools folder, type the following command, then press enter.
fastboot boot twrp.imgNote: Mac, Linux, and Windows PowerShell users will likely have to add a period and a slash before entering any ADB or Fastboot commands (e.g., ./fastboot boot twrp.img).
Once you hit the enter key, your phone will immediately respond by temporarily booting into TWRP. Swipe the slider on the first TWRP screen that says "Swipe to Allow Modifications" if needed. Once you do that, you should then be sitting on the main menu of TWRP.
Step 7: Permanently Flash TWRP
Since you're temporarily booting TWRP at this time from the image file itself, you'll need to flash the permanent version for it to stick to your system partition. From the TWRP main menu, tap "Install" then locate the TWRP Installer file (twrp-installer.zip) you downloaded from Step 2.
Tap the file once, then slide the "Swipe to Install" button at the bottom to begin installing the permanent version of TWRP onto your system partition. After it finishes installing, press the home button, go to "Reboot," then "Recovery." Now it'll reboot to the permanent version of TWRP rather than the temporary one.
From here, you can go about installing mods and other ZIP files for an even better experience, such as Magisk for root access. Enjoy!
Cover image and screenshots by Stephen Perkins/Gadget Hacks


Comments
No Comments Exist
Be the first, drop a comment!