The Pixel 5 is the first mainstream phone with perfectly symmetrical slim bezels. Most other "bezel-less" phones have had a disproportionately large bottom bezel, and while the iPhone's side and bottom bezels are symmetrical, there's a huge notch across most of its top bezel. The downside to the Pixel's approach is it has a pretty big display cutout for the front camera.
The cutout itself isn't bad, but the way Google has accommodated it in software UI elements is a bit of a problem. The top of the punch hole is about 2 mm below the top bezel of the phone. So for symmetry's sake, Google extended Android's status bar to about 2 mm below the bottom edge of the selfie camera. This made the status bar twice as tall as the Pixel 4's. Luckily, there's a Magisk module that can fix it.
Requirements
- Google Pixel 5 (not designed for other models)
- Root access with Magisk installed
Step 1: Get the Module
This mod was created by developer Tulsadiver, and there are two different versions of it (technically six, but I'll get to that later). One version makes the status bar 36 pixels tall, and the other makes it 24 pixels tall. Check them out in the GIF below, then tap one of the links to download the version you like.

Like I mentioned, there are actually four more versions of this mod, but they don't just shrink the status bar — they move the status bar clock, too. If you're interested in these, of if you're viewing this article in the future and the mods linked above no longer work, check out Tulsadiver's release thread on XDA.
Step 2: Flash the Module in Magisk Manager
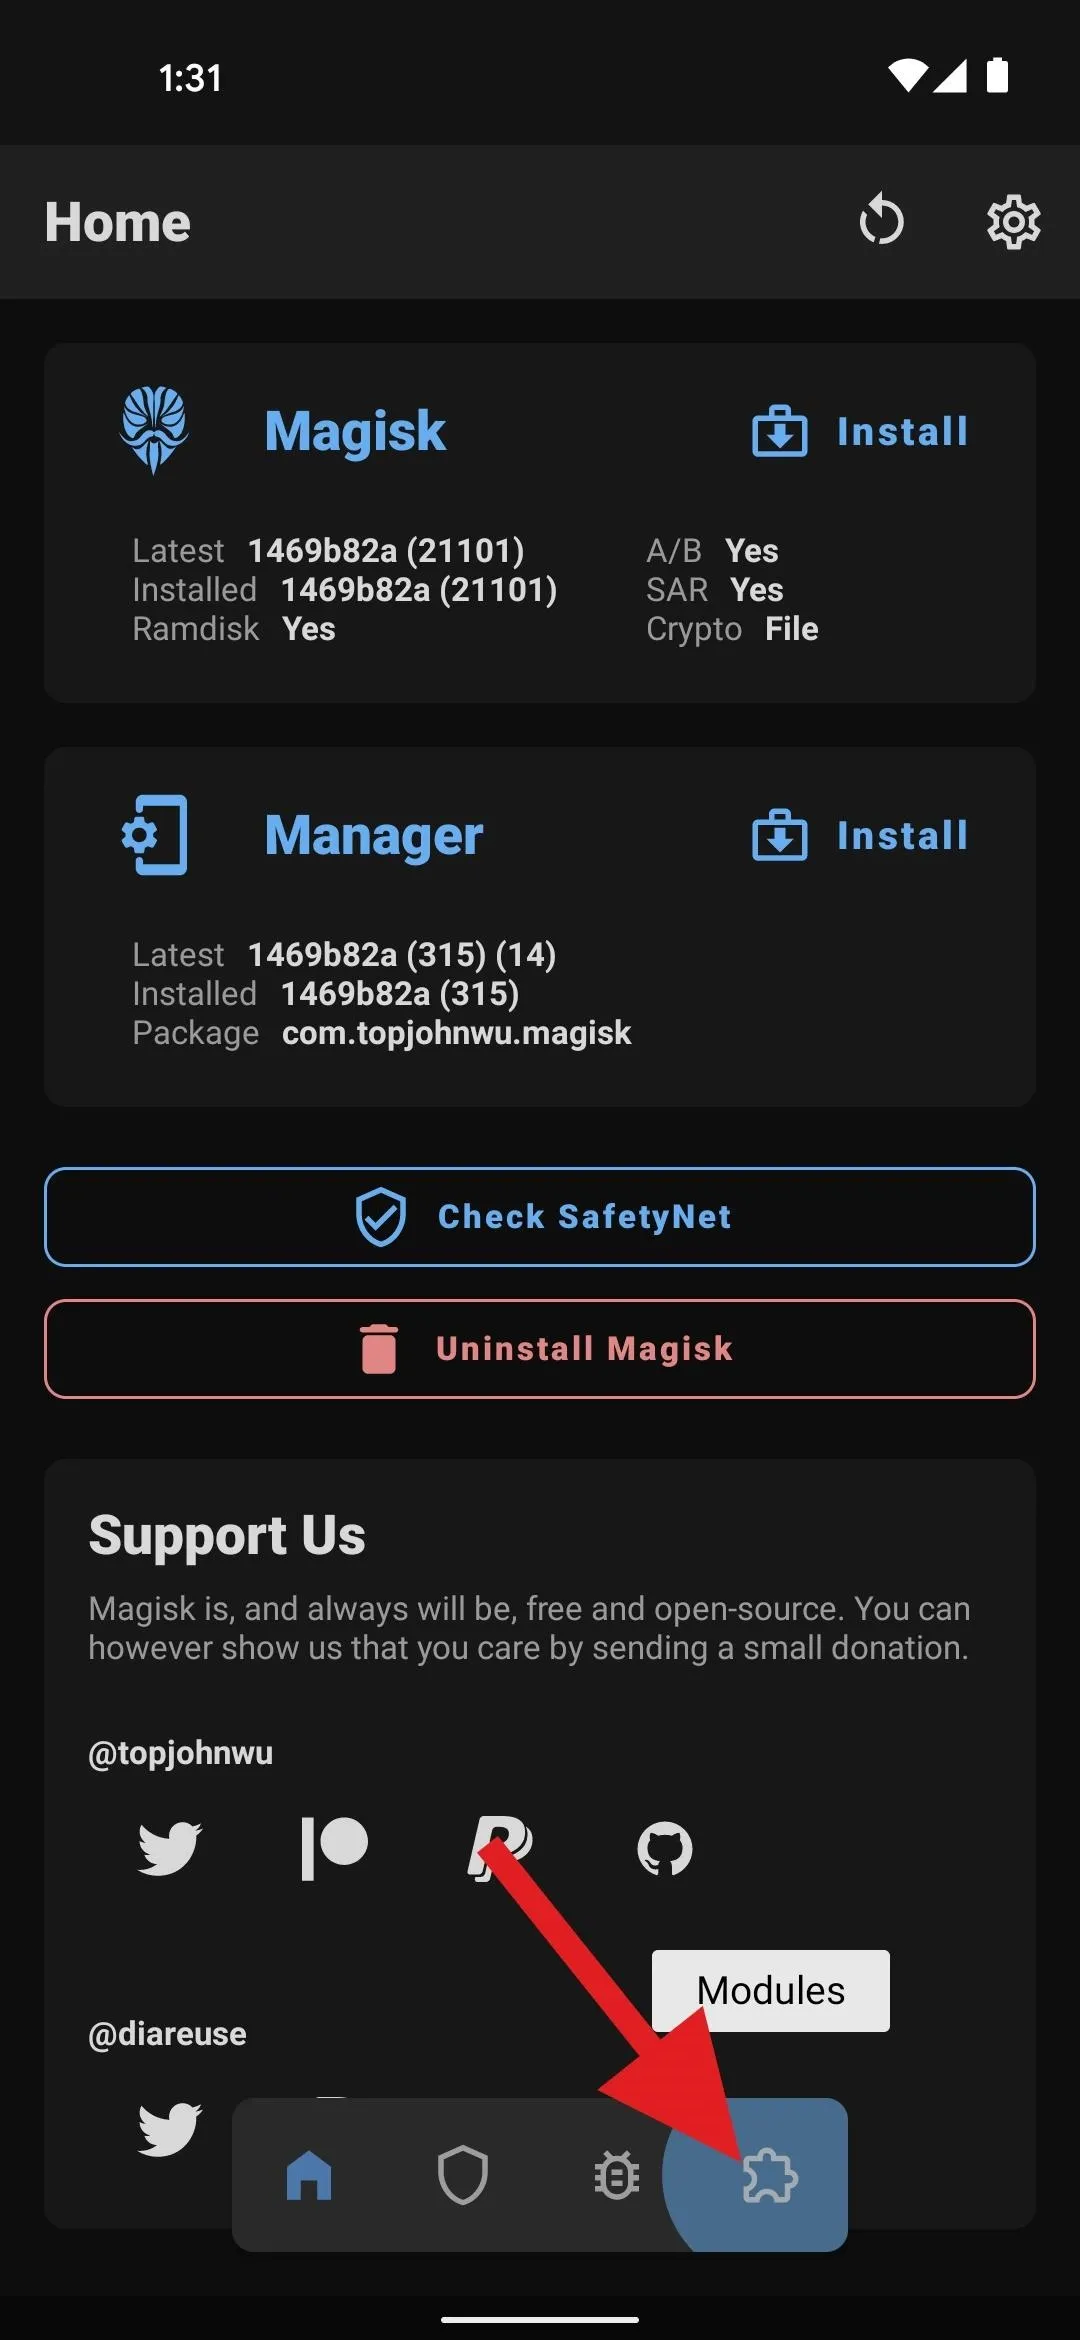
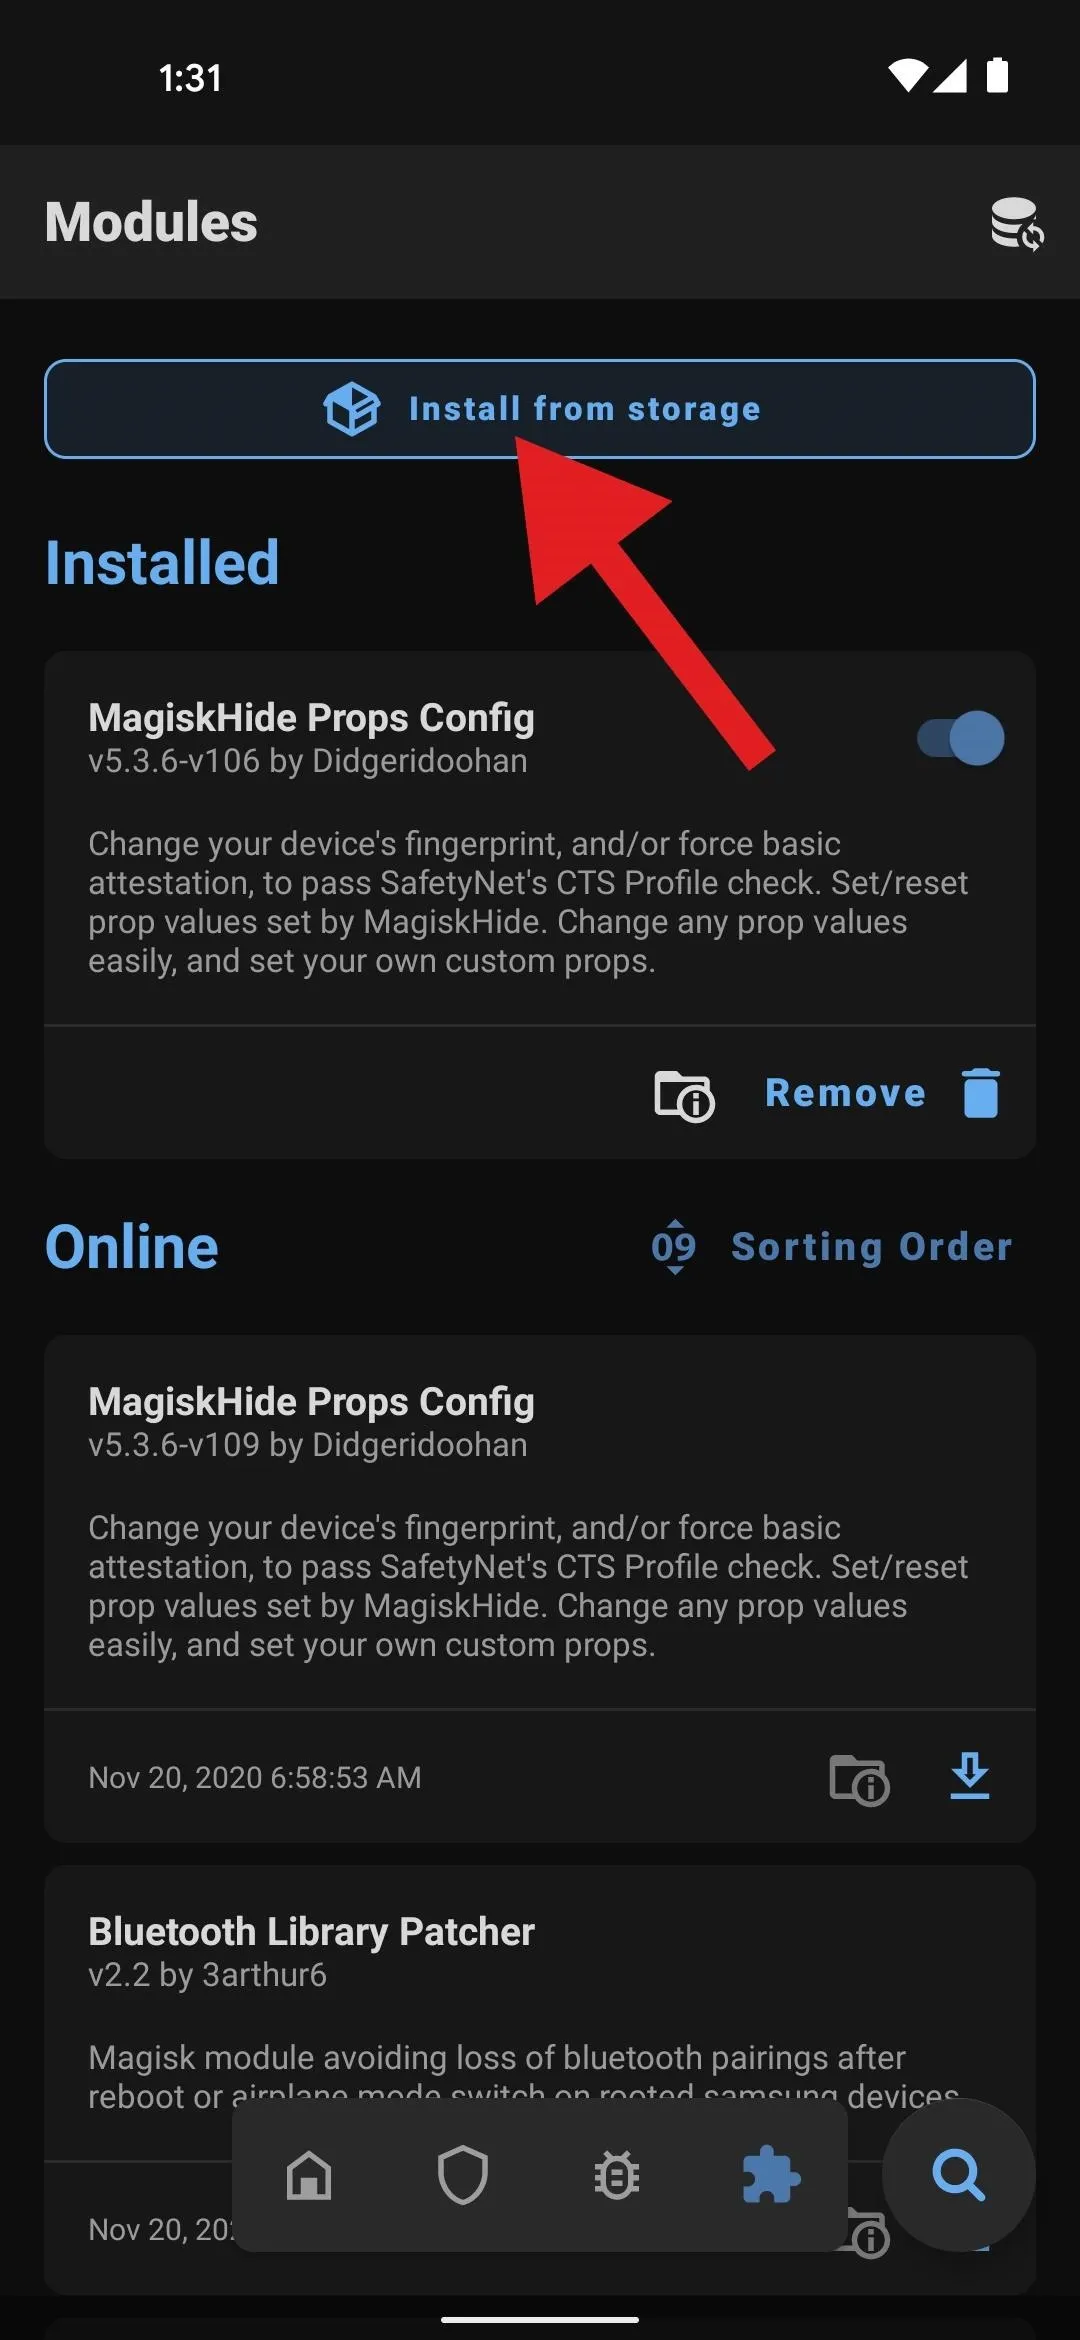
Once you've downloaded the mod, open your Magisk Manager app and tap the puzzle piece-shaped icon on the floating menu bar towards the bottom of the page. This will take you to the Modules tab, where you should tap "Install from storage." Next, select the mod file from your Downloads folder, then Magisk will begin installing it. When it's done, tap "Reboot."


Step 3: Simulate a Waterfall Display Cutout
For this part, you'll need to unlock Developer Options if you haven't done so already.
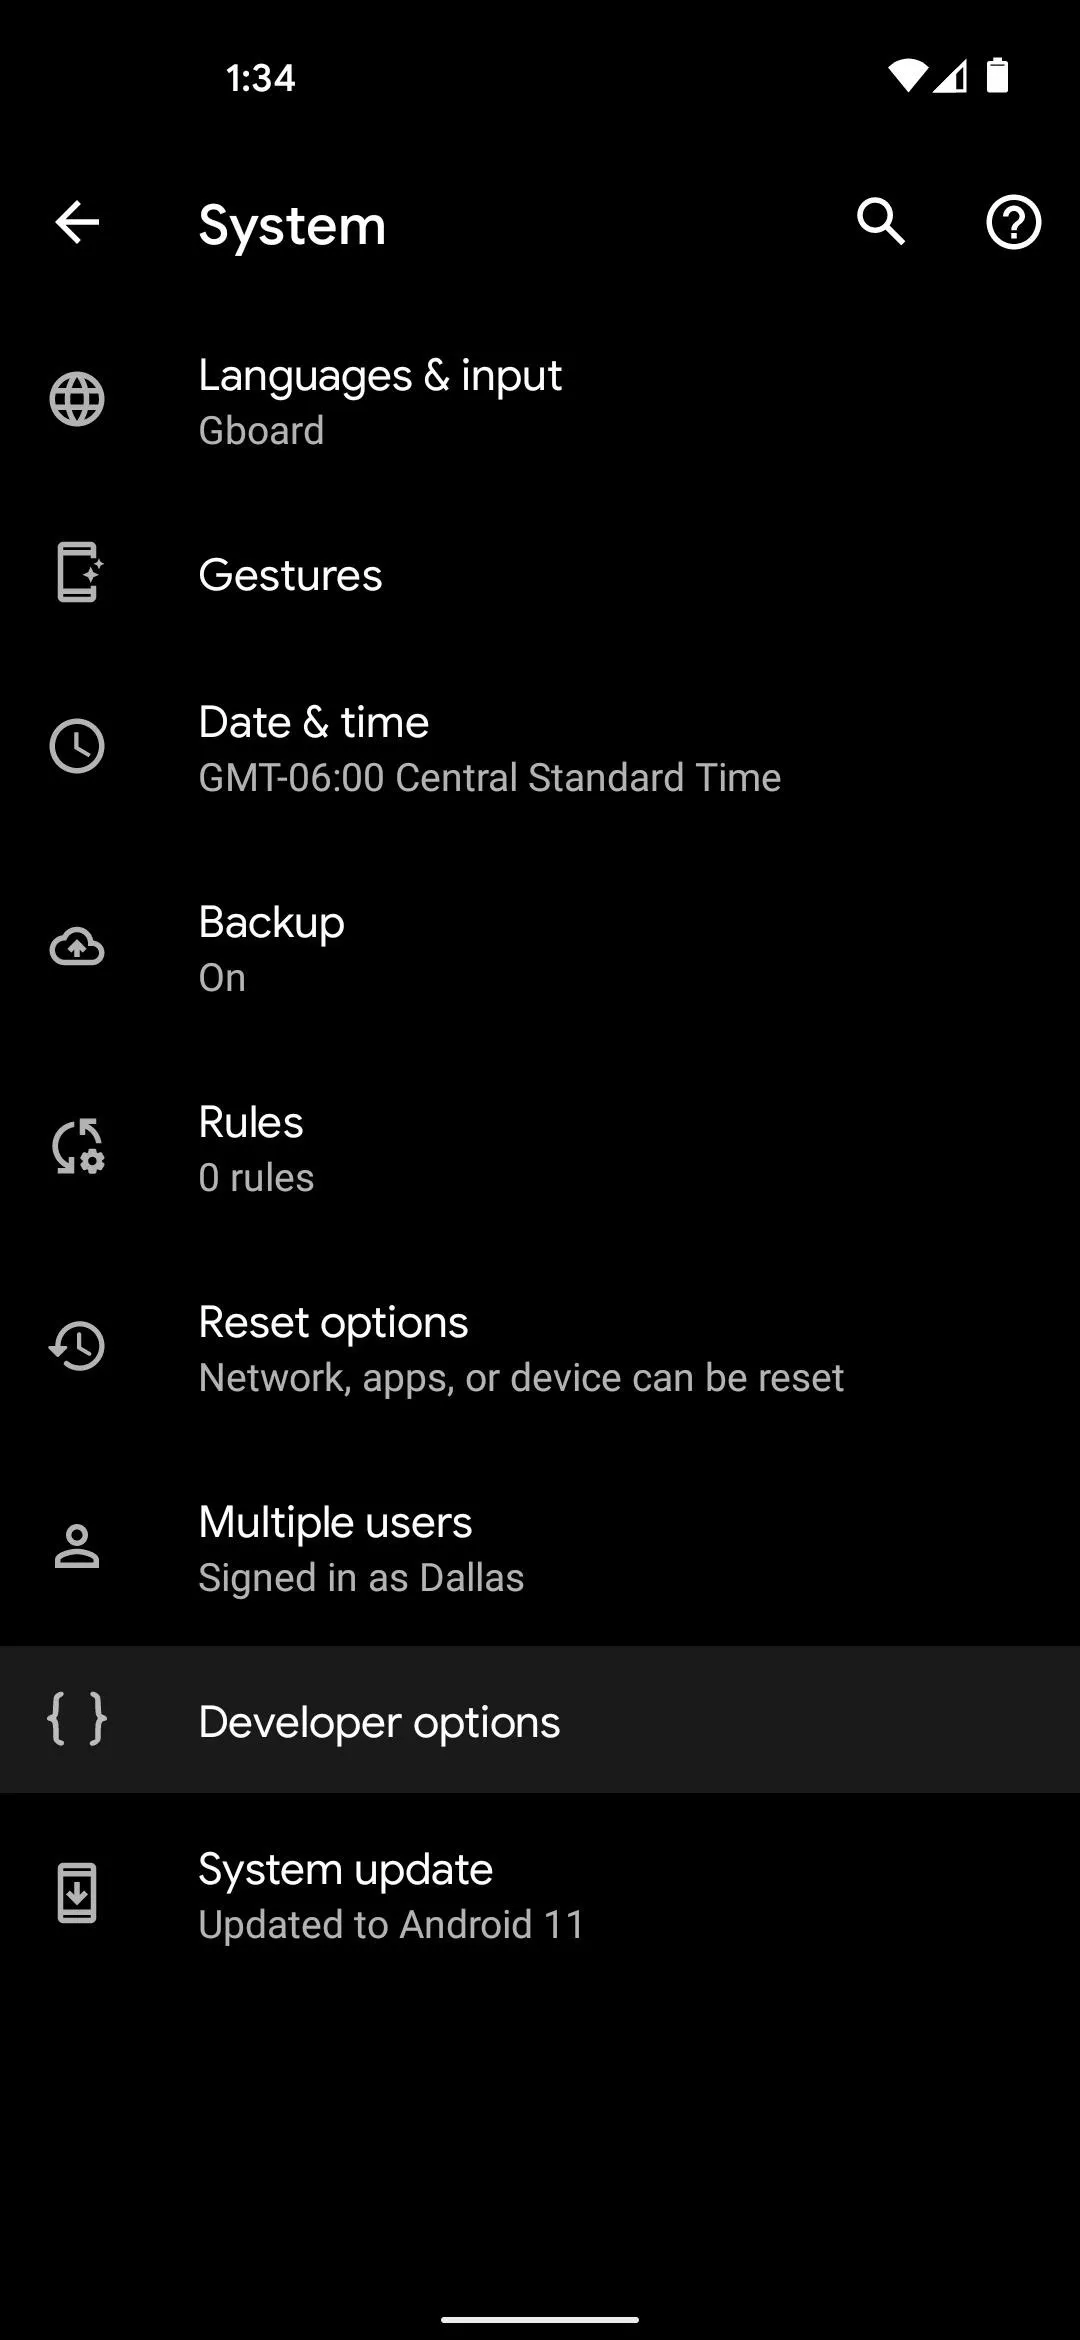
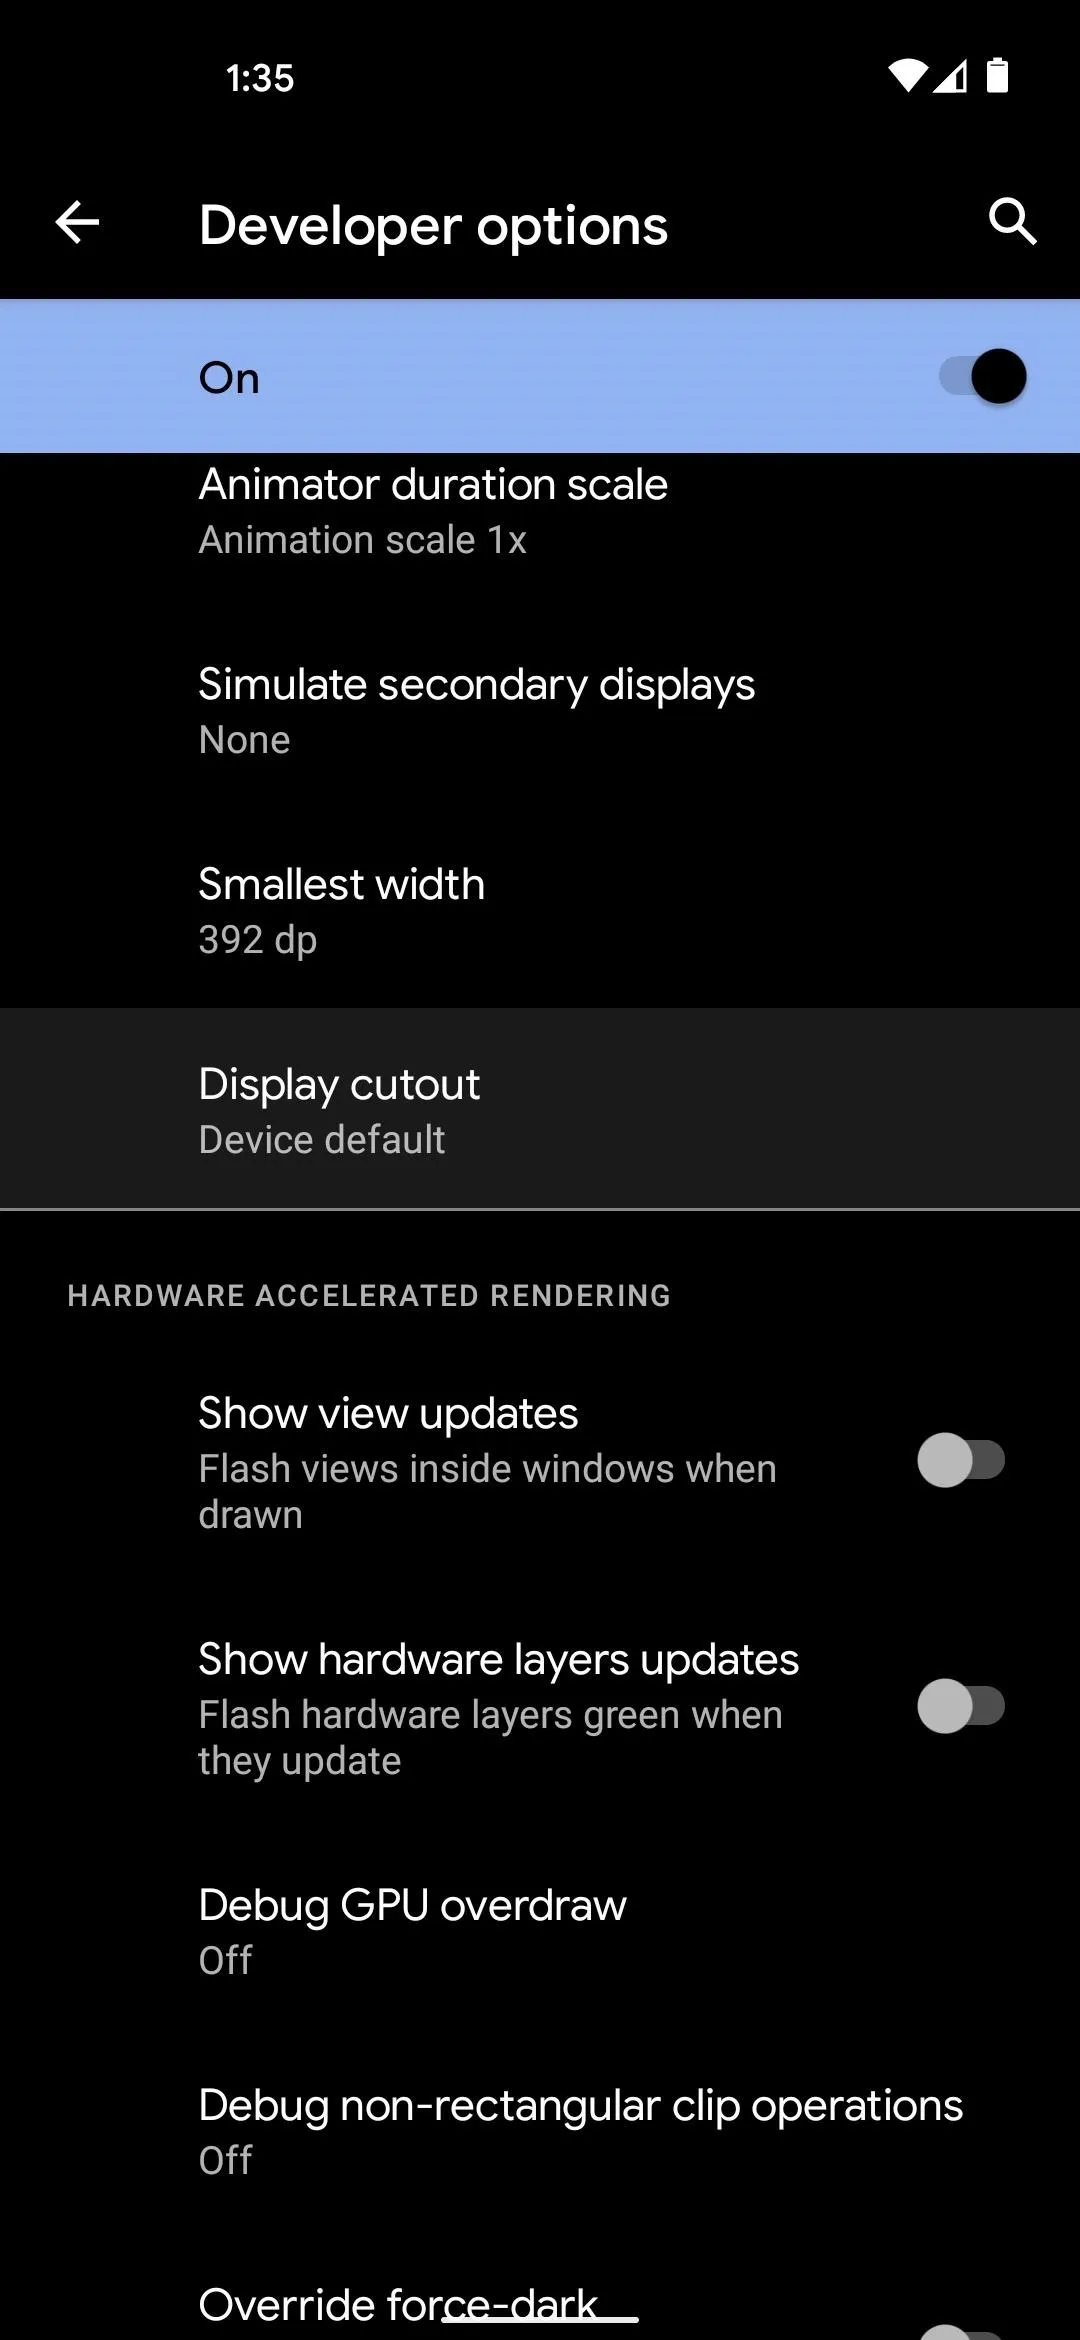
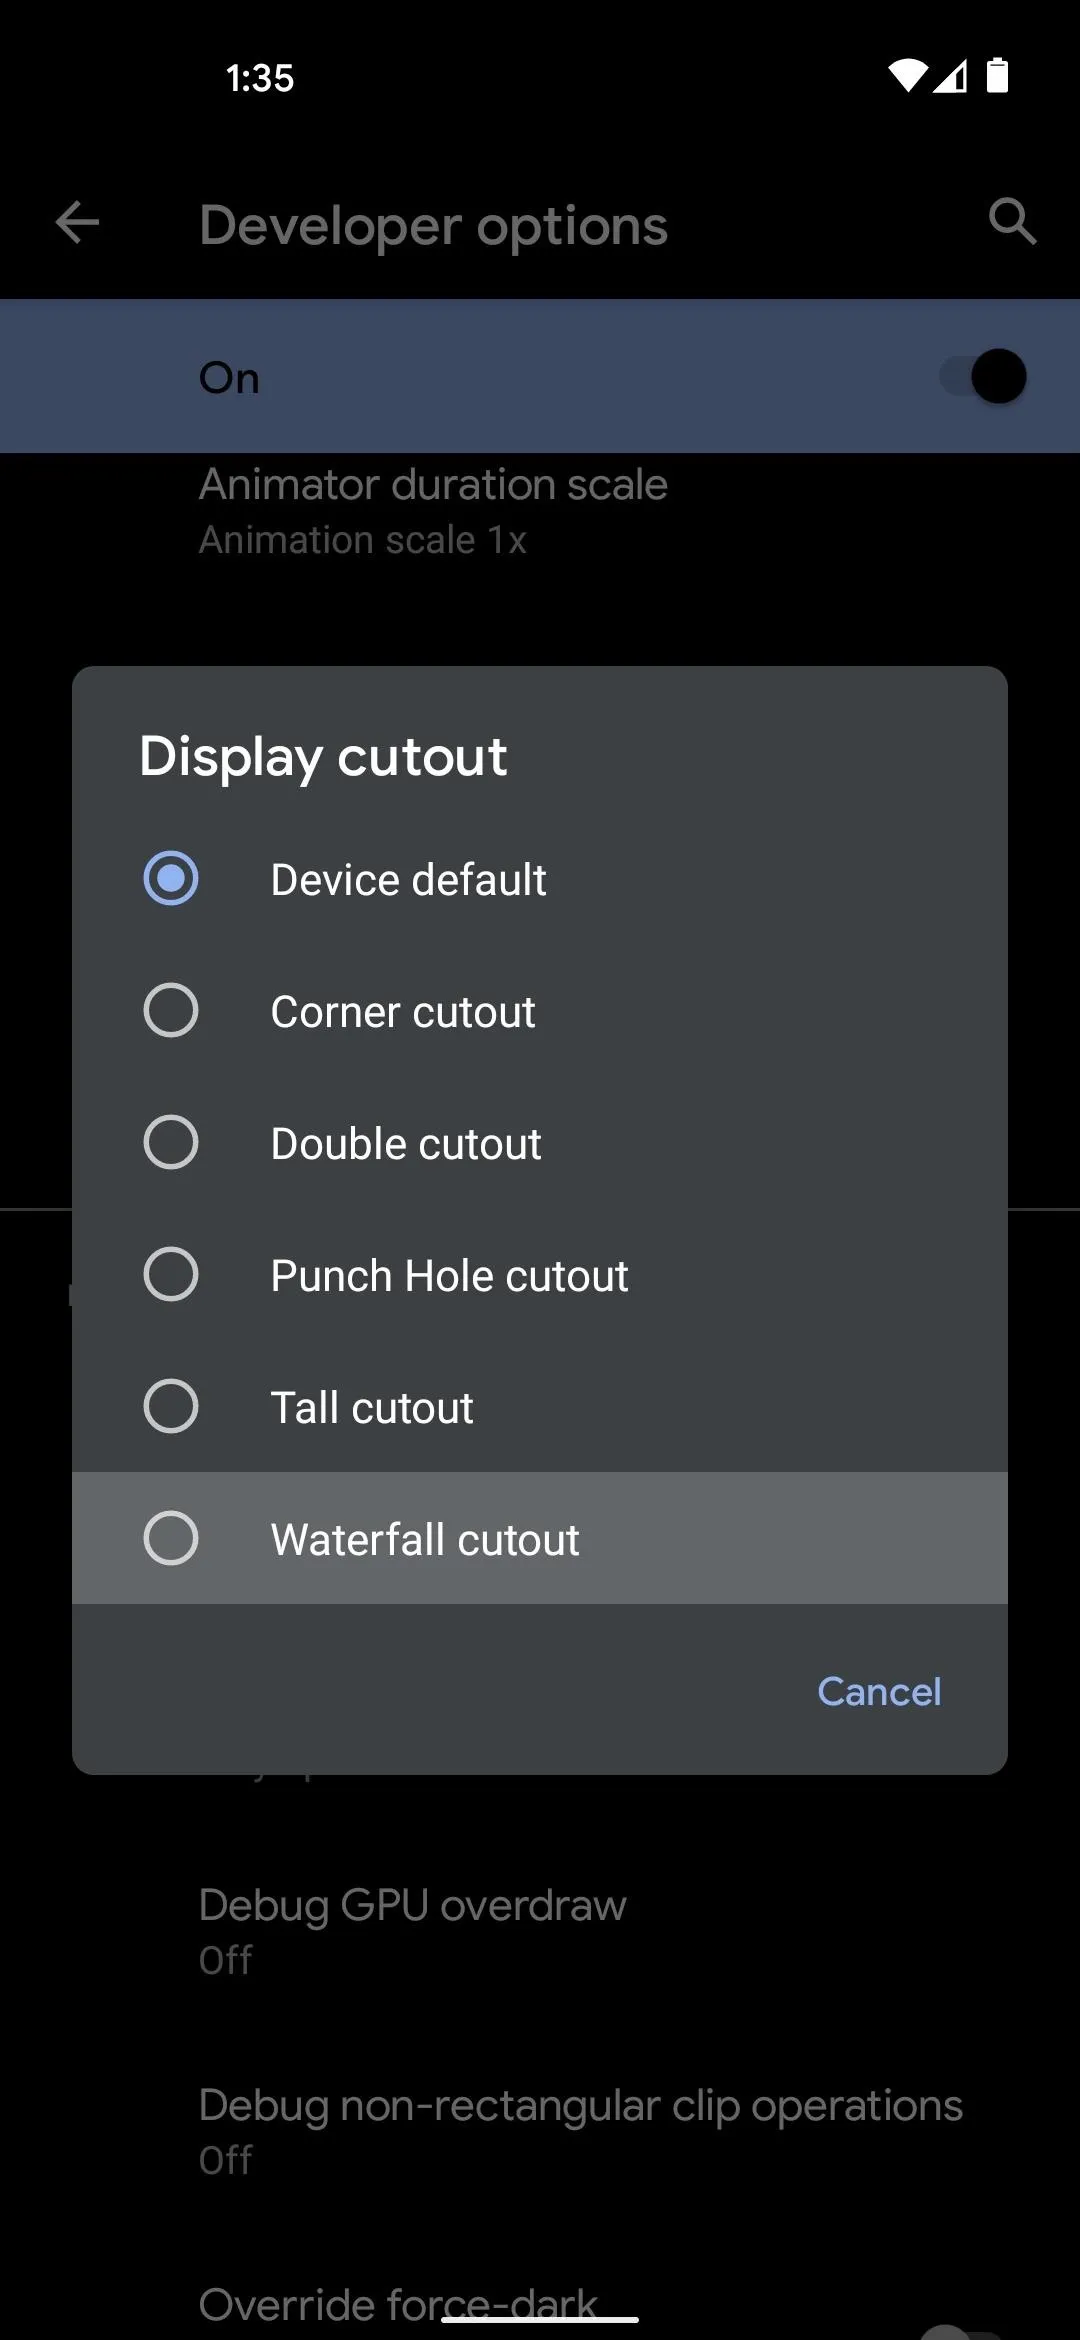
When you get back up, open Settings, then tap "System," and choose "Advanced." From there, select "Developer Options," then scroll about halfway down to the Drawing section. At the bottom of this section, tap "Display cutout," then choose "Waterfall cutout" from the popup.


Step 4: Enjoy a Smaller Status Bar
At this point, you're good to go. Depending on which mod you chose, your status bar should now be about half as tall as it was before. Yes, the virtual padding around the front camera isn't symmetrical anymore, but you'll actually be able to see more content on the screen in most apps.

Default

36 DP mod

24 DP mod

Default

36 DP mod

24 DP mod
If you ever want to undo this mod, go to the Modules section in your Magisk Manager app and disable the toggle switch next to it. Then, change "Display cutout" in Developer Options back to the "Default" setting and reboot your phone.
Cover image, screenshots, and GIF by Dallas Thomas/Gadget Hacks


Comments
No Comments Exist
Be the first, drop a comment!